# Create a new annotation
Source: https://docs.avidoai.com/api-reference/annotations/create-a-new-annotation
https://app.stainless.com/api/spec/documented/avido/openapi.documented.yml post /v0/annotations
Creates a new annotation.
# Delete an annotation
Source: https://docs.avidoai.com/api-reference/annotations/delete-an-annotation
https://app.stainless.com/api/spec/documented/avido/openapi.documented.yml delete /v0/annotations/{id}
Deletes an existing annotation.
# Get a single annotation by ID
Source: https://docs.avidoai.com/api-reference/annotations/get-a-single-annotation-by-id
https://app.stainless.com/api/spec/documented/avido/openapi.documented.yml get /v0/annotations/{id}
Retrieves detailed information about a specific annotation.
# List annotations
Source: https://docs.avidoai.com/api-reference/annotations/list-annotations
https://app.stainless.com/api/spec/documented/avido/openapi.documented.yml get /v0/annotations
Retrieves a paginated list of annotations with optional filtering.
# Update an annotation
Source: https://docs.avidoai.com/api-reference/annotations/update-an-annotation
https://app.stainless.com/api/spec/documented/avido/openapi.documented.yml put /v0/annotations/{id}
Updates an existing annotation.
# Get app config
Source: https://docs.avidoai.com/api-reference/app-config/get-app-config
https://app.stainless.com/api/spec/documented/avido/openapi.documented.yml get /v0/app-config
Returns public feature flags the dashboard needs to render correctly (e.g., whether the web scraper is enabled).
# Create a new application
Source: https://docs.avidoai.com/api-reference/applications/create-a-new-application
https://app.stainless.com/api/spec/documented/avido/openapi.documented.yml post /v0/applications
Creates a new application configuration.
# Create an API key for an application
Source: https://docs.avidoai.com/api-reference/applications/create-an-api-key-for-an-application
https://app.stainless.com/api/spec/documented/avido/openapi.documented.yml post /v0/applications/{id}/api-keys
Creates a new API key for the specified application. The plaintext key is returned only once and must be stored securely.
# Delete an API key
Source: https://docs.avidoai.com/api-reference/applications/delete-an-api-key
https://app.stainless.com/api/spec/documented/avido/openapi.documented.yml delete /v0/applications/{id}/api-keys/{keyId}
Deletes an API key for the specified application. Idempotent — returns 204 whether or not the key existed.
# Get a single application by ID
Source: https://docs.avidoai.com/api-reference/applications/get-a-single-application-by-id
https://app.stainless.com/api/spec/documented/avido/openapi.documented.yml get /v0/applications/{id}
Retrieves detailed information about a specific application.
# Get a single application by slug
Source: https://docs.avidoai.com/api-reference/applications/get-a-single-application-by-slug
https://app.stainless.com/api/spec/documented/avido/openapi.documented.yml get /v0/applications/by-slug/{slug}
Retrieves detailed information about a specific application by its slug.
# List API keys for an application
Source: https://docs.avidoai.com/api-reference/applications/list-api-keys-for-an-application
https://app.stainless.com/api/spec/documented/avido/openapi.documented.yml get /v0/applications/{id}/api-keys
Retrieves all API keys associated with a specific application.
# List applications
Source: https://docs.avidoai.com/api-reference/applications/list-applications
https://app.stainless.com/api/spec/documented/avido/openapi.documented.yml get /v0/applications
Retrieves a paginated list of applications with optional filtering.
# Bulk create assignments
Source: https://docs.avidoai.com/api-reference/assignments/bulk-create-assignments
https://app.stainless.com/api/spec/documented/avido/openapi.documented.yml post /v0/quickstarts/{id}/assignments/bulk
Creates multiple assignments in a single request.
# Bulk update assignments
Source: https://docs.avidoai.com/api-reference/assignments/bulk-update-assignments
https://app.stainless.com/api/spec/documented/avido/openapi.documented.yml put /v0/quickstarts/{id}/assignments/bulk
Updates multiple assignments in a single request.
# Create a new assignment
Source: https://docs.avidoai.com/api-reference/assignments/create-a-new-assignment
https://app.stainless.com/api/spec/documented/avido/openapi.documented.yml post /v0/quickstarts/{id}/assignments
Creates a new assignment linking a user to a topic.
# Delete an assignment
Source: https://docs.avidoai.com/api-reference/assignments/delete-an-assignment
https://app.stainless.com/api/spec/documented/avido/openapi.documented.yml delete /v0/quickstarts/{id}/assignments/{assignmentId}
Deletes an assignment.
# Get a single assignment by ID
Source: https://docs.avidoai.com/api-reference/assignments/get-a-single-assignment-by-id
https://app.stainless.com/api/spec/documented/avido/openapi.documented.yml get /v0/quickstarts/{id}/assignments/{assignmentId}
Retrieves detailed information about a specific assignment.
# List assignments for a quickstart
Source: https://docs.avidoai.com/api-reference/assignments/list-assignments-for-a-quickstart
https://app.stainless.com/api/spec/documented/avido/openapi.documented.yml get /v0/quickstarts/{id}/assignments
Retrieves a paginated list of assignments for a quickstart with optional filtering.
# Update an assignment
Source: https://docs.avidoai.com/api-reference/assignments/update-an-assignment
https://app.stainless.com/api/spec/documented/avido/openapi.documented.yml put /v0/quickstarts/{id}/assignments/{assignmentId}
Updates an existing assignment.
# Stream assistant response
Source: https://docs.avidoai.com/api-reference/assistant/stream-assistant-response
https://app.stainless.com/api/spec/documented/avido/openapi.documented.yml post /v0/assistant/chat
Streams assistant output and tool execution events as an SSE UI message stream.
# Get current session
Source: https://docs.avidoai.com/api-reference/authentication/get-current-session
https://app.stainless.com/api/spec/documented/avido/openapi.documented.yml get /v0/auth/session
Returns the currently authenticated session for cookie-based callers. Used by the apps/app frontend to centralise session validation through the API rather than calling Better Auth directly. Authenticated by Better Auth session cookie on the parent domain — NOT by API key / application id like the rest of the v0 API.
# List enabled auth providers
Source: https://docs.avidoai.com/api-reference/authentication/list-enabled-auth-providers
https://app.stainless.com/api/spec/documented/avido/openapi.documented.yml get /v0/auth/providers
Returns which auth providers are currently configured on the API server: the set of SSO social providers (derived from `GOOGLE_CLIENT_ID/SECRET`, `MICROSOFT_CLIENT_ID/SECRET`) and whether an email provider (Loops) is configured via `LOOPS_API_KEY`. This endpoint is unauthenticated so that the login UI can render the correct set of provider buttons before the user signs in.
# List organizations for current session
Source: https://docs.avidoai.com/api-reference/authentication/list-organizations-for-current-session
https://app.stainless.com/api/spec/documented/avido/openapi.documented.yml get /v0/auth/organizations
Returns the organisations the authenticated user belongs to. Called in-process via `auth.api.listOrganizations` so server-to-server requests are not subject to Better Auth's `Origin`-header CSRF check. Cookie-authenticated: NOT part of the public API key / application-id contract.
# Set active organization for current session
Source: https://docs.avidoai.com/api-reference/authentication/set-active-organization-for-current-session
https://app.stainless.com/api/spec/documented/avido/openapi.documented.yml post /v0/auth/organizations/set-active
Switches the active organisation on the authenticated session. Called in-process via `auth.api.setActiveOrganization` so server-to-server requests are not subject to Better Auth's `Origin`-header CSRF check. Better Auth rotates the active-org cookie; the rotated `Set-Cookie` headers are forwarded on the response so the browser's cookie jar is updated atomically with the 201 reply.
# Delete a contradiction
Source: https://docs.avidoai.com/api-reference/contradictions/delete-a-contradiction
https://app.stainless.com/api/spec/documented/avido/openapi.documented.yml delete /v0/quickstarts/{id}/contradictions/{contradictionId}
Deletes a contradiction.
# List contradictions for a quickstart
Source: https://docs.avidoai.com/api-reference/contradictions/list-contradictions-for-a-quickstart
https://app.stainless.com/api/spec/documented/avido/openapi.documented.yml get /v0/quickstarts/{id}/contradictions
Retrieves a paginated list of contradictions for the given quickstart with optional filtering.
# Update a contradiction
Source: https://docs.avidoai.com/api-reference/contradictions/update-a-contradiction
https://app.stainless.com/api/spec/documented/avido/openapi.documented.yml put /v0/quickstarts/{id}/contradictions/{contradictionId}
Updates an existing contradiction (e.g. assign a user or mark as resolved).
# Get a conversation
Source: https://docs.avidoai.com/api-reference/conversations/get-a-conversation
https://app.stainless.com/api/spec/documented/avido/openapi.documented.yml get /v0/conversations/{id}
Retrieves a single conversation by ID, including its messages.
# List conversations
Source: https://docs.avidoai.com/api-reference/conversations/list-conversations
https://app.stainless.com/api/spec/documented/avido/openapi.documented.yml get /v0/conversations
Retrieves a paginated list of conversations with optional filtering. When includeMessages=true is passed with a taskId, each conversation includes its messages.
# Upload conversations via CSV file
Source: https://docs.avidoai.com/api-reference/conversations/upload-conversations-via-csv-file
https://app.stainless.com/api/spec/documented/avido/openapi.documented.yml post /v0/conversations/upload
Uploads a CSV file containing conversations. The file will be validated and, unless processFile is false, processed asynchronously. Conversations are application-scoped and require an application context.
# List document chunks
Source: https://docs.avidoai.com/api-reference/document-chunks/list-document-chunks
https://app.stainless.com/api/spec/documented/avido/openapi.documented.yml get /v0/documents/chunked
Retrieves a paginated list of document chunks with optional filtering by document ID.
# Get tags for a document
Source: https://docs.avidoai.com/api-reference/document-tags/get-tags-for-a-document
https://app.stainless.com/api/spec/documented/avido/openapi.documented.yml get /v0/documents/{id}/tags
Retrieves all tags assigned to a specific document.
# Update document tags
Source: https://docs.avidoai.com/api-reference/document-tags/update-document-tags
https://app.stainless.com/api/spec/documented/avido/openapi.documented.yml put /v0/documents/{id}/tags
Updates the tags assigned to a specific document. This replaces all existing tags.
# Delete unmapped document
Source: https://docs.avidoai.com/api-reference/document-tests/delete-unmapped-document
https://app.stainless.com/api/spec/documented/avido/openapi.documented.yml delete /v0/documents/tests/{testId}/coverage/unmapped-documents/{documentId}
Deletes a document from the application and removes it from the unmapped documents list in a knowledge coverage test result
# List document tests
Source: https://docs.avidoai.com/api-reference/document-tests/list-document-tests
https://app.stainless.com/api/spec/documented/avido/openapi.documented.yml get /v0/documents/tests
Retrieves a paginated list of document tests with optional filtering by type and status
# Remove unmapped document from results
Source: https://docs.avidoai.com/api-reference/document-tests/remove-unmapped-document-from-results
https://app.stainless.com/api/spec/documented/avido/openapi.documented.yml put /v0/documents/tests/{testId}/coverage/unmapped-documents/{documentId}
Removes a document from the unmapped documents list in a knowledge coverage test result without deleting the document itself
# Trigger document test
Source: https://docs.avidoai.com/api-reference/document-tests/trigger-document-test
https://app.stainless.com/api/spec/documented/avido/openapi.documented.yml post /v0/documents/tests/trigger
Creates and triggers a document test execution. For KNOWLEDGE_COVERAGE and DOCS_TO_TASKS_MAPPING, applicationId is required.
# Activate a specific version of a document
Source: https://docs.avidoai.com/api-reference/document-versions/activate-a-specific-version-of-a-document
https://app.stainless.com/api/spec/documented/avido/openapi.documented.yml put /v0/documents/{id}/versions/{versionNumber}/activate
Makes a specific version the active version of a document. This is the version that will be returned by default when fetching the document.
# Create a new version of a document
Source: https://docs.avidoai.com/api-reference/document-versions/create-a-new-version-of-a-document
https://app.stainless.com/api/spec/documented/avido/openapi.documented.yml post /v0/documents/{id}/versions
Creates a new version of an existing document. The new version will have the next version number.
# Get a specific version of a document
Source: https://docs.avidoai.com/api-reference/document-versions/get-a-specific-version-of-a-document
https://app.stainless.com/api/spec/documented/avido/openapi.documented.yml get /v0/documents/{id}/versions/{versionNumber}
Retrieves a specific version of a document by version number.
# List all versions of a document
Source: https://docs.avidoai.com/api-reference/document-versions/list-all-versions-of-a-document
https://app.stainless.com/api/spec/documented/avido/openapi.documented.yml get /v0/documents/{id}/versions
Retrieves all versions of a specific document, ordered by version number descending.
# Add tags to multiple documents
Source: https://docs.avidoai.com/api-reference/documents/add-tags-to-multiple-documents
https://app.stainless.com/api/spec/documented/avido/openapi.documented.yml post /v0/documents/tags
Add one or more tags to multiple documents in a single request. All documents and tags must exist and belong to the same organization.
# Assign a document to a user
Source: https://docs.avidoai.com/api-reference/documents/assign-a-document-to-a-user
https://app.stainless.com/api/spec/documented/avido/openapi.documented.yml put /v0/documents/{id}/assign
Assigns a specific document to a user by their user ID.
# Bulk activate latest versions of multiple documents
Source: https://docs.avidoai.com/api-reference/documents/bulk-activate-latest-versions-of-multiple-documents
https://app.stainless.com/api/spec/documented/avido/openapi.documented.yml post /v0/documents/activate-latest
Activates the latest version (highest version number) for multiple documents. Returns information about which documents were successfully activated and which failed.
# Bulk export documents as CSV
Source: https://docs.avidoai.com/api-reference/documents/bulk-export-documents-as-csv
https://app.stainless.com/api/spec/documented/avido/openapi.documented.yml post /v0/documents/export/csv
Exports selected documents as a CSV file with title and content columns from active versions
# Bulk optimize multiple documents
Source: https://docs.avidoai.com/api-reference/documents/bulk-optimize-multiple-documents
https://app.stainless.com/api/spec/documented/avido/openapi.documented.yml post /v0/documents/optimize
Triggers background optimization jobs for multiple documents. Returns information about which documents were successfully queued and which failed.
# Bulk update status of multiple document versions
Source: https://docs.avidoai.com/api-reference/documents/bulk-update-status-of-multiple-document-versions
https://app.stainless.com/api/spec/documented/avido/openapi.documented.yml post /v0/documents/status
Updates the status of the active version for multiple documents.
# Create a new document
Source: https://docs.avidoai.com/api-reference/documents/create-a-new-document
https://app.stainless.com/api/spec/documented/avido/openapi.documented.yml post /v0/documents
Creates a new document with the provided information.
# Delete a document
Source: https://docs.avidoai.com/api-reference/documents/delete-a-document
https://app.stainless.com/api/spec/documented/avido/openapi.documented.yml delete /v0/documents/{id}
Deletes a document and its related document versions by the given document ID
# Delete multiple documents
Source: https://docs.avidoai.com/api-reference/documents/delete-multiple-documents
https://app.stainless.com/api/spec/documented/avido/openapi.documented.yml post /v0/documents/delete
Deletes multiple documents by ID. This will also delete their versions.
# Get a single document by ID
Source: https://docs.avidoai.com/api-reference/documents/get-a-single-document-by-id
https://app.stainless.com/api/spec/documented/avido/openapi.documented.yml get /v0/documents/{id}
Retrieves detailed information about a specific document, including its parent-child relationships and active version details.
# Get all document IDs
Source: https://docs.avidoai.com/api-reference/documents/get-all-document-ids
https://app.stainless.com/api/spec/documented/avido/openapi.documented.yml get /v0/documents/ids
Fetches all document IDs without pagination. Supports filtering by status and tags. Useful for bulk operations.
# Get document counts
Source: https://docs.avidoai.com/api-reference/documents/get-document-counts
https://app.stainless.com/api/spec/documented/avido/openapi.documented.yml get /v0/documents/count
Returns total document count and count of documents that have an active version.
# Get document counts by assignee
Source: https://docs.avidoai.com/api-reference/documents/get-document-counts-by-assignee
https://app.stainless.com/api/spec/documented/avido/openapi.documented.yml get /v0/documents/count-by-assignee
Retrieves document counts grouped by assignee for the authenticated organization.
# List documents
Source: https://docs.avidoai.com/api-reference/documents/list-documents
https://app.stainless.com/api/spec/documented/avido/openapi.documented.yml get /v0/documents
Retrieves a paginated list of documents with optional filtering by status, assignee, parent, and other criteria. Only returns documents with active approved versions unless otherwise specified.
# Optimize a document
Source: https://docs.avidoai.com/api-reference/documents/optimize-a-document
https://app.stainless.com/api/spec/documented/avido/openapi.documented.yml post /v0/documents/{id}/optimize
Triggers a background optimization job for the specified document. Returns 204 No Content on success.
# Update a document version
Source: https://docs.avidoai.com/api-reference/documents/update-a-document-version
https://app.stainless.com/api/spec/documented/avido/openapi.documented.yml put /v0/documents/{id}/versions/{versionNumber}
Updates the content, title, status, or other fields of a specific document version.
# Update a document's topic
Source: https://docs.avidoai.com/api-reference/documents/update-a-documents-topic
https://app.stainless.com/api/spec/documented/avido/openapi.documented.yml put /v0/documents/{id}
Updates the topic assignment for a specific document. Set topicId to null to remove the topic.
# Upload documents via CSV or PDF file
Source: https://docs.avidoai.com/api-reference/documents/upload-documents-via-csv-or-pdf-file
https://app.stainless.com/api/spec/documented/avido/openapi.documented.yml post /v0/documents/upload
Uploads a CSV or PDF file containing documents. CSV files will be validated and processed. PDF files will be processed via OCR. Unless processFile is set to false, processing happens asynchronously.
# Create an evaluation definition
Source: https://docs.avidoai.com/api-reference/eval-definitions/create-an-evaluation-definition
https://app.stainless.com/api/spec/documented/avido/openapi.documented.yml post /v0/definitions
Creates a new evaluation definition for an application.
# Delete an evaluation definition
Source: https://docs.avidoai.com/api-reference/eval-definitions/delete-an-evaluation-definition
https://app.stainless.com/api/spec/documented/avido/openapi.documented.yml delete /v0/definitions/{id}
Deletes an evaluation definition and all associated data (cascade delete of linked tasks and evaluations).
# Get application-level evaluation definitions
Source: https://docs.avidoai.com/api-reference/eval-definitions/get-application-level-evaluation-definitions
https://app.stainless.com/api/spec/documented/avido/openapi.documented.yml get /v0/definitions/application
Retrieves all evaluation definitions linked at the application level.
# Link an evaluation definition to a task
Source: https://docs.avidoai.com/api-reference/eval-definitions/link-an-evaluation-definition-to-a-task
https://app.stainless.com/api/spec/documented/avido/openapi.documented.yml post /v0/definitions/link
Associates an evaluation definition with a task for automatic evaluation.
# Link evaluation definitions to the application
Source: https://docs.avidoai.com/api-reference/eval-definitions/link-evaluation-definitions-to-the-application
https://app.stainless.com/api/spec/documented/avido/openapi.documented.yml post /v0/definitions/link-application
Associates evaluation definitions with the application for automatic evaluation of all tasks.
# Link evaluation definitions to topics
Source: https://docs.avidoai.com/api-reference/eval-definitions/link-evaluation-definitions-to-topics
https://app.stainless.com/api/spec/documented/avido/openapi.documented.yml post /v0/definitions/link-topics
Associates evaluation definitions with topics for automatic evaluation of all tasks in those topics.
# List evaluation definitions
Source: https://docs.avidoai.com/api-reference/eval-definitions/list-evaluation-definitions
https://app.stainless.com/api/spec/documented/avido/openapi.documented.yml get /v0/definitions
Retrieves a paginated list of evaluation definitions for an application.
# Unlink an evaluation definition from a task
Source: https://docs.avidoai.com/api-reference/eval-definitions/unlink-an-evaluation-definition-from-a-task
https://app.stainless.com/api/spec/documented/avido/openapi.documented.yml post /v0/definitions/unlink
Removes the association between an evaluation definition and a task.
# Unlink evaluation definitions from the application
Source: https://docs.avidoai.com/api-reference/eval-definitions/unlink-evaluation-definitions-from-the-application
https://app.stainless.com/api/spec/documented/avido/openapi.documented.yml post /v0/definitions/unlink-application
Removes the association between evaluation definitions and the application.
# Unlink evaluation definitions from topics
Source: https://docs.avidoai.com/api-reference/eval-definitions/unlink-evaluation-definitions-from-topics
https://app.stainless.com/api/spec/documented/avido/openapi.documented.yml post /v0/definitions/unlink-topics
Removes the association between evaluation definitions and topics.
# Update an evaluation definition
Source: https://docs.avidoai.com/api-reference/eval-definitions/update-an-evaluation-definition
https://app.stainless.com/api/spec/documented/avido/openapi.documented.yml put /v0/definitions/{id}
Updates an existing evaluation definition.
# Update task-specific config for an evaluation definition
Source: https://docs.avidoai.com/api-reference/eval-definitions/update-task-specific-config-for-an-evaluation-definition
https://app.stainless.com/api/spec/documented/avido/openapi.documented.yml put /v0/definitions/{id}/tasks/{taskId}
Updates the task-specific configuration (e.g., expected output) for an evaluation definition on a specific task.
# List tests
Source: https://docs.avidoai.com/api-reference/evals/list-tests
https://app.stainless.com/api/spec/documented/avido/openapi.documented.yml get /v0/tests
Retrieves a paginated list of tests with optional filtering.
# Create an experiment
Source: https://docs.avidoai.com/api-reference/experiments/create-an-experiment
https://app.stainless.com/api/spec/documented/avido/openapi.documented.yml post /v0/experiments
Creates a new experiment with the provided details.
# Create an experiment variant
Source: https://docs.avidoai.com/api-reference/experiments/create-an-experiment-variant
https://app.stainless.com/api/spec/documented/avido/openapi.documented.yml post /v0/experiments/{id}/variants
Creates a new variant for the specified experiment.
# Get an experiment
Source: https://docs.avidoai.com/api-reference/experiments/get-an-experiment
https://app.stainless.com/api/spec/documented/avido/openapi.documented.yml get /v0/experiments/{id}
Retrieves a single experiment by ID.
# List experiment variants
Source: https://docs.avidoai.com/api-reference/experiments/list-experiment-variants
https://app.stainless.com/api/spec/documented/avido/openapi.documented.yml get /v0/experiments/{id}/variants
Retrieves a paginated list of variants for the specified experiment.
# List experiments
Source: https://docs.avidoai.com/api-reference/experiments/list-experiments
https://app.stainless.com/api/spec/documented/avido/openapi.documented.yml get /v0/experiments
Retrieves a paginated list of experiments with optional filtering.
# Trigger experiment variant
Source: https://docs.avidoai.com/api-reference/experiments/trigger-experiment-variant
https://app.stainless.com/api/spec/documented/avido/openapi.documented.yml post /v0/experiments/{id}/variants/{variantId}/trigger
Triggers execution of all tasks associated with the experiment for the specified variant. Returns 204 No Content on success.
# Update an experiment
Source: https://docs.avidoai.com/api-reference/experiments/update-an-experiment
https://app.stainless.com/api/spec/documented/avido/openapi.documented.yml put /v0/experiments/{id}
Updates an existing experiment with the provided details.
# Update experiment variant
Source: https://docs.avidoai.com/api-reference/experiments/update-experiment-variant
https://app.stainless.com/api/spec/documented/avido/openapi.documented.yml put /v0/experiments/{id}/variants/{variantId}
Updates a specific experiment variant. Only title, description, and configPatch can be updated.
# Bulk create facts
Source: https://docs.avidoai.com/api-reference/facts/bulk-create-facts
https://app.stainless.com/api/spec/documented/avido/openapi.documented.yml post /v0/facts/bulk
Creates multiple facts in a single request.
# Create a new fact
Source: https://docs.avidoai.com/api-reference/facts/create-a-new-fact
https://app.stainless.com/api/spec/documented/avido/openapi.documented.yml post /v0/facts
Creates a new fact, optionally linked to topics.
# Delete a fact
Source: https://docs.avidoai.com/api-reference/facts/delete-a-fact
https://app.stainless.com/api/spec/documented/avido/openapi.documented.yml delete /v0/facts/{id}
Deletes a fact and its associated topic links.
# Get a single fact by ID
Source: https://docs.avidoai.com/api-reference/facts/get-a-single-fact-by-id
https://app.stainless.com/api/spec/documented/avido/openapi.documented.yml get /v0/facts/{id}
Retrieves detailed information about a specific fact.
# List facts
Source: https://docs.avidoai.com/api-reference/facts/list-facts
https://app.stainless.com/api/spec/documented/avido/openapi.documented.yml get /v0/facts
Retrieves a paginated list of facts with optional filtering.
# Update a fact
Source: https://docs.avidoai.com/api-reference/facts/update-a-fact
https://app.stainless.com/api/spec/documented/avido/openapi.documented.yml put /v0/facts/{id}
Updates the statement, scope, or status of an existing fact.
# Send product feedback
Source: https://docs.avidoai.com/api-reference/feedback/send-product-feedback
https://app.stainless.com/api/spec/documented/avido/openapi.documented.yml post /v0/feedback
Dispatches a feedback email to the Avido team via the Loops transactional email integration. The authenticated user's email is attached automatically.
# Delete a file processing
Source: https://docs.avidoai.com/api-reference/file-processings/delete-a-file-processing
https://app.stainless.com/api/spec/documented/avido/openapi.documented.yml delete /v0/file-processings/{id}
Deletes a file processing record by the given ID
# List file processings
Source: https://docs.avidoai.com/api-reference/fileprocessings/list-file-processings
https://app.stainless.com/api/spec/documented/avido/openapi.documented.yml get /v0/file-processings
Retrieves a paginated list of file processings with optional filtering.
# Create an inference step
Source: https://docs.avidoai.com/api-reference/inference-steps/create-an-inference-step
https://app.stainless.com/api/spec/documented/avido/openapi.documented.yml post /v0/inference-steps
# List inference steps
Source: https://docs.avidoai.com/api-reference/inference-steps/list-inference-steps
https://app.stainless.com/api/spec/documented/avido/openapi.documented.yml get /v0/inference-steps
# Ingest events
Source: https://docs.avidoai.com/api-reference/ingestion/ingest-events
https://app.stainless.com/api/spec/documented/avido/openapi.documented.yml post /v0/ingest
Ingest an array of events (traces or steps) to store and process.
# Ingest OTLP traces
Source: https://docs.avidoai.com/api-reference/ingestion/ingest-otlp-traces
https://app.stainless.com/api/spec/documented/avido/openapi.documented.yml post /v0/otel/traces
Ingest OpenTelemetry Protocol (OTLP) traces in JSON format. Converts OTLP spans to Avido events and processes them through the standard ingestion pipeline. Supports OpenInference semantic conventions for LLM, tool, retriever, and other span types.
# Bulk update issues
Source: https://docs.avidoai.com/api-reference/issues/bulk-update-issues
https://app.stainless.com/api/spec/documented/avido/openapi.documented.yml patch /v0/issues
Updates status, priority, or assignment for multiple issues. Returns updated issues with assigned user information. User must be a valid organization member and not banned when assigning.
# Create a new issue
Source: https://docs.avidoai.com/api-reference/issues/create-a-new-issue
https://app.stainless.com/api/spec/documented/avido/openapi.documented.yml post /v0/issues
Creates a new issue for tracking problems or improvements.
# Delete an issue
Source: https://docs.avidoai.com/api-reference/issues/delete-an-issue
https://app.stainless.com/api/spec/documented/avido/openapi.documented.yml delete /v0/issues/{id}
Deletes an existing issue permanently.
# Get a single issue by ID with duplicates
Source: https://docs.avidoai.com/api-reference/issues/get-a-single-issue-by-id-with-duplicates
https://app.stainless.com/api/spec/documented/avido/openapi.documented.yml get /v0/issues/{id}
Retrieves detailed information about a specific issue, including all duplicate/child issues in the duplicates array with minimal fields (id, title, createdAt).
# Get suggested task for an issue
Source: https://docs.avidoai.com/api-reference/issues/get-suggested-task-for-an-issue
https://app.stainless.com/api/spec/documented/avido/openapi.documented.yml get /v0/issues/{id}/suggested-task
Retrieves the DRAFT task associated with an issue of type SUGGESTED_TASK. This endpoint only works for issues that have a taskId and are of type SUGGESTED_TASK with a task in DRAFT status.
# List issues
Source: https://docs.avidoai.com/api-reference/issues/list-issues
https://app.stainless.com/api/spec/documented/avido/openapi.documented.yml get /v0/issues
Retrieves a paginated list of issues with optional filtering by date range, status, priority, assignee, and more.
# List minimal issues
Source: https://docs.avidoai.com/api-reference/issues/list-minimal-issues
https://app.stainless.com/api/spec/documented/avido/openapi.documented.yml get /v0/issues/minimal
Retrieves a paginated list of issues with only essential fields (id, title, status, source, priority, createdAt, assignedTo). Optimized for list views and performance. Supports sorting by createdAt and priority.
# Update an issue
Source: https://docs.avidoai.com/api-reference/issues/update-an-issue
https://app.stainless.com/api/spec/documented/avido/openapi.documented.yml put /v0/issues/{id}
Updates an existing issue. Can be used to reassign, change status, update priority, or modify any other issue fields.
# Update and activate suggested task
Source: https://docs.avidoai.com/api-reference/issues/update-and-activate-suggested-task
https://app.stainless.com/api/spec/documented/avido/openapi.documented.yml put /v0/issues/{id}/suggested-task
Updates the DRAFT task associated with an issue and activates it (changes status from DRAFT to ACTIVE). This endpoint only works for issues of type SUGGESTED_TASK with a task in DRAFT status. After activation, the task becomes a regular active task.
# Create model pricing
Source: https://docs.avidoai.com/api-reference/model-pricing/create-model-pricing
https://app.stainless.com/api/spec/documented/avido/openapi.documented.yml post /v0/model-pricing
Creates a new model pricing entry
# Delete model pricing
Source: https://docs.avidoai.com/api-reference/model-pricing/delete-model-pricing
https://app.stainless.com/api/spec/documented/avido/openapi.documented.yml delete /v0/model-pricing/{id}
Deletes a model pricing entry
# Get model pricing
Source: https://docs.avidoai.com/api-reference/model-pricing/get-model-pricing
https://app.stainless.com/api/spec/documented/avido/openapi.documented.yml get /v0/model-pricing/{id}
Retrieves a specific model pricing entry by ID
# List model pricing
Source: https://docs.avidoai.com/api-reference/model-pricing/list-model-pricing
https://app.stainless.com/api/spec/documented/avido/openapi.documented.yml get /v0/model-pricing
Retrieves a paginated list of model pricing entries with optional filtering
# Update model pricing
Source: https://docs.avidoai.com/api-reference/model-pricing/update-model-pricing
https://app.stainless.com/api/spec/documented/avido/openapi.documented.yml put /v0/model-pricing/{id}
Updates an existing model pricing entry
# Get organization config
Source: https://docs.avidoai.com/api-reference/organization-config/get-organization-config
https://app.stainless.com/api/spec/documented/avido/openapi.documented.yml get /v0/org-config
Retrieves the organization configuration settings. Returns default values if no config has been saved yet.
# Update organization config
Source: https://docs.avidoai.com/api-reference/organization-config/update-organization-config
https://app.stainless.com/api/spec/documented/avido/openapi.documented.yml put /v0/org-config
Updates the organization configuration settings. Creates a new config if one doesn't exist. Only updates fields that are provided in the request body.
# List organization members
Source: https://docs.avidoai.com/api-reference/organization-members/list-organization-members
https://app.stainless.com/api/spec/documented/avido/openapi.documented.yml get /v0/organization-members
Retrieves the list of users who belong to the authenticated organization. Banned members are filtered out of the response. The `email` field is only returned to callers with `owner` or `admin` role — lower-privileged members receive the same payload without `email` to prevent directory enumeration.
# Create a quickstart
Source: https://docs.avidoai.com/api-reference/quickstartsv2/create-a-quickstart
https://app.stainless.com/api/spec/documented/avido/openapi.documented.yml post /v0/quickstarts
Creates a new quickstart with the provided details.
# Get a quickstart
Source: https://docs.avidoai.com/api-reference/quickstartsv2/get-a-quickstart
https://app.stainless.com/api/spec/documented/avido/openapi.documented.yml get /v0/quickstarts/{id}
Retrieves a single quickstart by ID.
# Get KB material counts for a quickstart
Source: https://docs.avidoai.com/api-reference/quickstartsv2/get-kb-material-counts-for-a-quickstart
https://app.stainless.com/api/spec/documented/avido/openapi.documented.yml get /v0/quickstarts/{id}/kb-material-counts
Returns the number of knowledge base documents and scrape jobs associated with a quickstart.
# Get policy eval counts for a quickstart
Source: https://docs.avidoai.com/api-reference/quickstartsv2/get-policy-eval-counts-for-a-quickstart
https://app.stainless.com/api/spec/documented/avido/openapi.documented.yml get /v0/quickstarts/{id}/policy-counts
Returns the total topics count, application-wide eval count, and per-topic eval counts for a quickstart. Includes both DRAFT and ACTIVE evals. Only evals created by this quickstart are counted.
# List documents for a quickstart topic
Source: https://docs.avidoai.com/api-reference/quickstartsv2/list-documents-for-a-quickstart-topic
https://app.stainless.com/api/spec/documented/avido/openapi.documented.yml get /v0/quickstarts/{id}/topics/{topicId}/documents
Retrieves a paginated list of documents belonging to a specific topic within a quickstart.
# List quickstarts
Source: https://docs.avidoai.com/api-reference/quickstartsv2/list-quickstarts
https://app.stainless.com/api/spec/documented/avido/openapi.documented.yml get /v0/quickstarts
Retrieves a paginated list of quickstarts with optional filtering.
# List tasks for a quickstart topic
Source: https://docs.avidoai.com/api-reference/quickstartsv2/list-tasks-for-a-quickstart-topic
https://app.stainless.com/api/spec/documented/avido/openapi.documented.yml get /v0/quickstarts/{id}/topics/{topicId}/tasks
Retrieves a paginated list of tasks belonging to a specific topic within a quickstart.
# List topics for a quickstart
Source: https://docs.avidoai.com/api-reference/quickstartsv2/list-topics-for-a-quickstart
https://app.stainless.com/api/spec/documented/avido/openapi.documented.yml get /v0/quickstarts/{id}/topics
Retrieves a paginated list of topics belonging to a specific quickstart.
# List topics for a quickstart with document statistics
Source: https://docs.avidoai.com/api-reference/quickstartsv2/list-topics-for-a-quickstart-with-document-statistics
https://app.stainless.com/api/spec/documented/avido/openapi.documented.yml get /v0/quickstarts/{id}/document-topics
Retrieves a paginated list of topics belonging to a specific quickstart, enriched with document count and coverage statistics.
# Update a quickstart
Source: https://docs.avidoai.com/api-reference/quickstartsv2/update-a-quickstart
https://app.stainless.com/api/spec/documented/avido/openapi.documented.yml put /v0/quickstarts/{id}
Updates an existing quickstart with the provided details.
# Create a new report
Source: https://docs.avidoai.com/api-reference/reports/create-a-new-report
https://app.stainless.com/api/spec/documented/avido/openapi.documented.yml post /v0/reporting
Creates a new report.
# Delete a report
Source: https://docs.avidoai.com/api-reference/reports/delete-a-report
https://app.stainless.com/api/spec/documented/avido/openapi.documented.yml delete /v0/reporting/{id}
Deletes a specific report by its ID.
# Get a single report
Source: https://docs.avidoai.com/api-reference/reports/get-a-single-report
https://app.stainless.com/api/spec/documented/avido/openapi.documented.yml get /v0/reporting/{id}
Retrieves a specific report by its ID.
# Get columns for a datasource
Source: https://docs.avidoai.com/api-reference/reports/get-columns-for-a-datasource
https://app.stainless.com/api/spec/documented/avido/openapi.documented.yml get /v0/reporting/datasources/{id}/columns
Returns metadata about the whitelisted columns for a specific datasource that can be used for filtering in reporting queries.
# Get context-aware columns for a datasource
Source: https://docs.avidoai.com/api-reference/reports/get-context-aware-columns-for-a-datasource
https://app.stainless.com/api/spec/documented/avido/openapi.documented.yml post /v0/reporting/datasources/{id}/columns
Returns available columns for a datasource based on the intent and current query context. For filters/groupBy/measurements intents, returns all eligible columns. For orderBy intent, returns columns based on current groupBy and measurements context.
# Get distinct values for a column
Source: https://docs.avidoai.com/api-reference/reports/get-distinct-values-for-a-column
https://app.stainless.com/api/spec/documented/avido/openapi.documented.yml get /v0/reporting/datasources/{id}/columns/{columnId}/values
Returns a list of distinct values from a specific column in a datasource. For relation columns (e.g., topicId), returns the related records with their IDs and display names.
# Get eval stats aggregated by date
Source: https://docs.avidoai.com/api-reference/reports/get-eval-stats-aggregated-by-date
https://app.stainless.com/api/spec/documented/avido/openapi.documented.yml get /v0/reporting/eval-stats/by-date
Aggregates eval pass/total/avg-score counts bucketed by the requested time granularity.
# Get eval stats aggregated by date and eval definition
Source: https://docs.avidoai.com/api-reference/reports/get-eval-stats-aggregated-by-date-and-eval-definition
https://app.stainless.com/api/spec/documented/avido/openapi.documented.yml get /v0/reporting/eval-stats/by-date-and-definition
Aggregates eval pass/total/avg-score counts bucketed by time granularity and eval definition.
# Get eval stats aggregated by date and topic
Source: https://docs.avidoai.com/api-reference/reports/get-eval-stats-aggregated-by-date-and-topic
https://app.stainless.com/api/spec/documented/avido/openapi.documented.yml get /v0/reporting/eval-stats/by-date-and-topic
Aggregates eval pass/total/avg-score counts bucketed by time granularity and topic.
# Get eval stats aggregated by eval definition
Source: https://docs.avidoai.com/api-reference/reports/get-eval-stats-aggregated-by-eval-definition
https://app.stainless.com/api/spec/documented/avido/openapi.documented.yml get /v0/reporting/eval-stats/by-definition
Aggregates eval pass/total counts per eval definition across the time range. EXPERIMENT runs are excluded.
# List available datasources
Source: https://docs.avidoai.com/api-reference/reports/list-available-datasources
https://app.stainless.com/api/spec/documented/avido/openapi.documented.yml get /v0/reporting/datasources
Returns a list of all available reporting datasources with their IDs and human-readable names.
# List reports
Source: https://docs.avidoai.com/api-reference/reports/list-reports
https://app.stainless.com/api/spec/documented/avido/openapi.documented.yml get /v0/reporting
Retrieves a paginated list of reports with optional filtering by date range, assignee, and application.
# Query reporting data
Source: https://docs.avidoai.com/api-reference/reports/query-reporting-data
https://app.stainless.com/api/spec/documented/avido/openapi.documented.yml post /v0/reporting/query
Queries reporting data from specified datasources with optional filters and groupBy clauses. Supports aggregation and date truncation for time-based grouping.
# Update a report
Source: https://docs.avidoai.com/api-reference/reports/update-a-report
https://app.stainless.com/api/spec/documented/avido/openapi.documented.yml put /v0/reporting/{id}
Updates an existing report. Can be used to update title, description, or reassign/unassign the report.
# Get a single run by ID
Source: https://docs.avidoai.com/api-reference/runs/get-a-single-run-by-id
https://app.stainless.com/api/spec/documented/avido/openapi.documented.yml get /v0/runs/{id}
Retrieves detailed information about a specific run.
# List runs
Source: https://docs.avidoai.com/api-reference/runs/list-runs
https://app.stainless.com/api/spec/documented/avido/openapi.documented.yml get /v0/runs
Retrieves a paginated list of runs with optional filtering.
# Create a scrape job
Source: https://docs.avidoai.com/api-reference/scrape-jobs/create-a-scrape-job
https://app.stainless.com/api/spec/documented/avido/openapi.documented.yml post /v0/scrape-jobs
# Create multiple scrape jobs
Source: https://docs.avidoai.com/api-reference/scrape-jobs/create-multiple-scrape-jobs
https://app.stainless.com/api/spec/documented/avido/openapi.documented.yml post /v0/scrape-jobs/bulk
Create multiple scrape jobs at once from an array of URLs. Supports up to 2000 URLs per request. Each URL will be processed independently, with successful creations and failures reported separately.
# Delete a scrape job
Source: https://docs.avidoai.com/api-reference/scrape-jobs/delete-a-scrape-job
https://app.stainless.com/api/spec/documented/avido/openapi.documented.yml delete /v0/scrape-jobs/{id}
# Get a scrape job by ID
Source: https://docs.avidoai.com/api-reference/scrape-jobs/get-a-scrape-job-by-id
https://app.stainless.com/api/spec/documented/avido/openapi.documented.yml get /v0/scrape-jobs/{id}
# List all scrape jobs
Source: https://docs.avidoai.com/api-reference/scrape-jobs/list-all-scrape-jobs
https://app.stainless.com/api/spec/documented/avido/openapi.documented.yml get /v0/scrape-jobs
# Start scraping all pages of a scrape job
Source: https://docs.avidoai.com/api-reference/scrape-jobs/start-scraping-all-pages-of-a-scrape-job
https://app.stainless.com/api/spec/documented/avido/openapi.documented.yml post /v0/scrape-jobs/{id}/start
# Update a scrape job
Source: https://docs.avidoai.com/api-reference/scrape-jobs/update-a-scrape-job
https://app.stainless.com/api/spec/documented/avido/openapi.documented.yml put /v0/scrape-jobs/{id}
# Get install setup status
Source: https://docs.avidoai.com/api-reference/setup/get-install-setup-status
https://app.stainless.com/api/spec/documented/avido/openapi.documented.yml get /v0/setup/status
Returns whether the install needs onboarding. An install needs onboarding when no organizations exist in the database; the dashboard uses this to show a sign-up-first bootstrap flow on fresh deployments. This endpoint is unauthenticated so the login UI can call it before the user has a session.
# Create a new style guide
Source: https://docs.avidoai.com/api-reference/style-guides/create-a-new-style-guide
https://app.stainless.com/api/spec/documented/avido/openapi.documented.yml post /v0/style-guides
Creates a new style guide.
# Get a single style guide by ID
Source: https://docs.avidoai.com/api-reference/style-guides/get-a-single-style-guide-by-id
https://app.stainless.com/api/spec/documented/avido/openapi.documented.yml get /v0/style-guides/{id}
Retrieves detailed information about a specific style guide.
# List style guides
Source: https://docs.avidoai.com/api-reference/style-guides/list-style-guides
https://app.stainless.com/api/spec/documented/avido/openapi.documented.yml get /v0/style-guides
Retrieves a paginated list of style guides with optional filtering.
# Update a style guide
Source: https://docs.avidoai.com/api-reference/style-guides/update-a-style-guide
https://app.stainless.com/api/spec/documented/avido/openapi.documented.yml put /v0/style-guides/{id}
Updates the content of an existing style guide.
# Create a new tag
Source: https://docs.avidoai.com/api-reference/tags/create-a-new-tag
https://app.stainless.com/api/spec/documented/avido/openapi.documented.yml post /v0/tags
Creates a new tag with the provided information.
# Delete a tag
Source: https://docs.avidoai.com/api-reference/tags/delete-a-tag
https://app.stainless.com/api/spec/documented/avido/openapi.documented.yml delete /v0/tags/{id}
Deletes a tag by ID. This will also remove the tag from all documents.
# Get a single tag by ID
Source: https://docs.avidoai.com/api-reference/tags/get-a-single-tag-by-id
https://app.stainless.com/api/spec/documented/avido/openapi.documented.yml get /v0/tags/{id}
Retrieves detailed information about a specific tag.
# List tags
Source: https://docs.avidoai.com/api-reference/tags/list-tags
https://app.stainless.com/api/spec/documented/avido/openapi.documented.yml get /v0/tags
Retrieves a paginated list of tags with optional search filtering.
# Update an existing tag
Source: https://docs.avidoai.com/api-reference/tags/update-an-existing-tag
https://app.stainless.com/api/spec/documented/avido/openapi.documented.yml put /v0/tags/{id}
Updates an existing tag with the provided information.
# Create or update a task schedule
Source: https://docs.avidoai.com/api-reference/task-schedules/create-or-update-a-task-schedule
https://app.stainless.com/api/spec/documented/avido/openapi.documented.yml post /v0/tasks/schedule
# Delete task schedule
Source: https://docs.avidoai.com/api-reference/task-schedules/delete-task-schedule
https://app.stainless.com/api/spec/documented/avido/openapi.documented.yml delete /v0/tasks/{id}/schedule
# Get task schedule
Source: https://docs.avidoai.com/api-reference/task-schedules/get-task-schedule
https://app.stainless.com/api/spec/documented/avido/openapi.documented.yml get /v0/tasks/{id}/schedule
# Get tags for a task
Source: https://docs.avidoai.com/api-reference/task-tags/get-tags-for-a-task
https://app.stainless.com/api/spec/documented/avido/openapi.documented.yml get /v0/tasks/{id}/tags
Retrieves all tags assigned to a specific task.
# Update task tags
Source: https://docs.avidoai.com/api-reference/task-tags/update-task-tags
https://app.stainless.com/api/spec/documented/avido/openapi.documented.yml put /v0/tasks/{id}/tags
Updates the tags assigned to a specific task. This replaces all existing tags.
# Add tags to multiple tasks
Source: https://docs.avidoai.com/api-reference/tasks/add-tags-to-multiple-tasks
https://app.stainless.com/api/spec/documented/avido/openapi.documented.yml post /v0/tasks/tags
Add one or more tags to multiple tasks in a single request. All tasks and tags must exist and belong to the same organization.
# Bulk delete tasks
Source: https://docs.avidoai.com/api-reference/tasks/bulk-delete-tasks
https://app.stainless.com/api/spec/documented/avido/openapi.documented.yml post /v0/tasks/delete
Deletes multiple tasks by their IDs.
# Bulk update tasks
Source: https://docs.avidoai.com/api-reference/tasks/bulk-update-tasks
https://app.stainless.com/api/spec/documented/avido/openapi.documented.yml patch /v0/tasks
Updates multiple tasks at once. When isVerified is set, recalculates parent topic verification.
# Create a new task
Source: https://docs.avidoai.com/api-reference/tasks/create-a-new-task
https://app.stainless.com/api/spec/documented/avido/openapi.documented.yml post /v0/tasks
Creates a new task.
# Delete a task
Source: https://docs.avidoai.com/api-reference/tasks/delete-a-task
https://app.stainless.com/api/spec/documented/avido/openapi.documented.yml delete /v0/tasks/{id}
Deletes a single task by ID.
# Get a single task by ID
Source: https://docs.avidoai.com/api-reference/tasks/get-a-single-task-by-id
https://app.stainless.com/api/spec/documented/avido/openapi.documented.yml get /v0/tasks/{id}
Retrieves detailed information about a specific task.
# Get task coverage statistics
Source: https://docs.avidoai.com/api-reference/tasks/get-task-coverage-statistics
https://app.stainless.com/api/spec/documented/avido/openapi.documented.yml get /v0/tasks/task-coverage
Returns the percentage of active tasks that have at least one test run within the specified date range.
# Get task IDs
Source: https://docs.avidoai.com/api-reference/tasks/get-task-ids
https://app.stainless.com/api/spec/documented/avido/openapi.documented.yml get /v0/tasks/ids
Retrieves a list of task IDs with optional filtering.
# Install a task template
Source: https://docs.avidoai.com/api-reference/tasks/install-a-task-template
https://app.stainless.com/api/spec/documented/avido/openapi.documented.yml post /v0/tasks/template
Installs a predefined task template, creating tasks, topics, and eval definitions.
# List tasks
Source: https://docs.avidoai.com/api-reference/tasks/list-tasks
https://app.stainless.com/api/spec/documented/avido/openapi.documented.yml get /v0/tasks
Retrieves a paginated list of tasks with optional filtering.
# Run a task
Source: https://docs.avidoai.com/api-reference/tasks/run-a-task
https://app.stainless.com/api/spec/documented/avido/openapi.documented.yml post /v0/tasks/trigger
Triggers the execution of a task.
# Update an existing task
Source: https://docs.avidoai.com/api-reference/tasks/update-an-existing-task
https://app.stainless.com/api/spec/documented/avido/openapi.documented.yml put /v0/tasks/{id}
Updates an existing task with the provided information.
# Upload tasks via CSV file
Source: https://docs.avidoai.com/api-reference/tasks/upload-tasks-via-csv-file
https://app.stainless.com/api/spec/documented/avido/openapi.documented.yml post /v0/tasks/upload-csv
Uploads a CSV file containing tasks. The file will be validated and processed asynchronously.
# Get a single test by ID
Source: https://docs.avidoai.com/api-reference/tests/get-a-single-test-by-id
https://app.stainless.com/api/spec/documented/avido/openapi.documented.yml get /v0/tests/{id}
Retrieves detailed information about a specific test.
# Bulk update topics
Source: https://docs.avidoai.com/api-reference/topics/bulk-update-topics
https://app.stainless.com/api/spec/documented/avido/openapi.documented.yml patch /v0/topics
Updates multiple topics at once. When isTasksVerified is set, cascades to all tasks in the topics.
# Create a new topic
Source: https://docs.avidoai.com/api-reference/topics/create-a-new-topic
https://app.stainless.com/api/spec/documented/avido/openapi.documented.yml post /v0/topics
Creates a new topic.
# Delete a topic
Source: https://docs.avidoai.com/api-reference/topics/delete-a-topic
https://app.stainless.com/api/spec/documented/avido/openapi.documented.yml delete /v0/topics/{id}
Deletes a topic. By default, tasks associated with the topic will have their topicId set to null. Use cascade=true to explicitly delete all associated tasks.
# Get a single topic by ID
Source: https://docs.avidoai.com/api-reference/topics/get-a-single-topic-by-id
https://app.stainless.com/api/spec/documented/avido/openapi.documented.yml get /v0/topics/{id}
Retrieves detailed information about a specific topic.
# List topics
Source: https://docs.avidoai.com/api-reference/topics/list-topics
https://app.stainless.com/api/spec/documented/avido/openapi.documented.yml get /v0/topics
Retrieves a paginated list of topics with optional filtering.
# Update a topic
Source: https://docs.avidoai.com/api-reference/topics/update-a-topic
https://app.stainless.com/api/spec/documented/avido/openapi.documented.yml put /v0/topics/{id}
Updates a topic, including assigning or unassigning a user.
# Get a single trace by ID
Source: https://docs.avidoai.com/api-reference/traces/get-a-single-trace-by-id
https://app.stainless.com/api/spec/documented/avido/openapi.documented.yml get /v0/traces/{id}
Retrieves detailed information about a specific trace.
# Get a single trace by Test ID
Source: https://docs.avidoai.com/api-reference/traces/get-a-single-trace-by-test-id
https://app.stainless.com/api/spec/documented/avido/openapi.documented.yml get /v0/traces/by-test/{id}
Retrieves detailed information about a specific trace.
# List Trace Sessions
Source: https://docs.avidoai.com/api-reference/traces/list-trace-sessions
https://app.stainless.com/api/spec/documented/avido/openapi.documented.yml get /v0/traces/sessions
Retrieve traces grouped by referenceId with aggregated metrics.
# List Traces
Source: https://docs.avidoai.com/api-reference/traces/list-traces
https://app.stainless.com/api/spec/documented/avido/openapi.documented.yml get /v0/traces
Retrieve traces with associated steps, filtered by application ID and optional date parameters.
# Create or update webhook configuration for an application
Source: https://docs.avidoai.com/api-reference/webhook/create-or-update-webhook-configuration-for-an-application
https://app.stainless.com/api/spec/documented/avido/openapi.documented.yml post /v0/applications/{id}/webhook
Creates a webhook for an application if one does not exist, otherwise updates the existing webhook URL and/or headers.
# Delete webhook configuration for an application
Source: https://docs.avidoai.com/api-reference/webhook/delete-webhook-configuration-for-an-application
https://app.stainless.com/api/spec/documented/avido/openapi.documented.yml delete /v0/applications/{id}/webhook
Deletes the webhook configuration for a specific application.
# Get webhook configuration for an application
Source: https://docs.avidoai.com/api-reference/webhook/get-webhook-configuration-for-an-application
https://app.stainless.com/api/spec/documented/avido/openapi.documented.yml get /v0/applications/{id}/webhook
Retrieves the webhook configuration for a specific application. Returns null if no webhook is configured.
# Test webhook configuration for an application
Source: https://docs.avidoai.com/api-reference/webhook/test-webhook-configuration-for-an-application
https://app.stainless.com/api/spec/documented/avido/openapi.documented.yml post /v0/webhook/test
Sends a test webhook request to the configured webhook URL with a sample payload. Returns success status and any error details.
# Validate an incoming webhook request
Source: https://docs.avidoai.com/api-reference/webhook/validate-an-incoming-webhook-request
https://app.stainless.com/api/spec/documented/avido/openapi.documented.yml post /v0/validate-webhook
Checks the body (including timestamp and signature) against the configured webhook secret. Returns `{ valid: true }` if the signature is valid.
# Changelog
Source: https://docs.avidoai.com/changelog
Track product releases and improvements across Avido versions.
Avido v0.9.1 is a focused quality update, fixing layout issues on the dashboard and improving the interface across traces and data imports.
## Dashboard Layout Fix
The dashboard no longer shows a duplicate header when your application has no data yet. The layout now renders cleanly from the start, so new users get a polished first impression.
## Updated Traces View
The test page now uses the latest traces view, giving you a more consistent experience when reviewing trace data across different parts of the product.
## Scrollable Import Table
The URL table on the web scraper import page is now fully scrollable, making it easy to work with longer lists of URLs without the page cutting off content.
Along with security patches, container updates, certificate fixes, and infrastructure improvements.
Avido v0.9.0 brings a faster path from task analysis to experimentation, puts traces front and center in the navigation, and delivers a wave of quality improvements across the dashboard, evaluations, and webhook delivery.
## Create Experiments from Selected Tasks
You can now select tasks directly on the Tasks page and launch a new experiment with those tasks pre-filled. No more switching between pages or re-entering task details. Select, configure, and run.
## Traces in Navigation
Traces now have a dedicated page in the main navigation menu. System prompts are automatically extracted and displayed inside trace details, giving you full visibility into every LLM step without digging through raw spans.
## Dashboard & Analytics
* The date range filter on the dashboard now works correctly for 7-day, 14-day, and custom ranges.
* The At Glance page now supports series breakdown and fullscreen mode, consistent with the Insights page.
* Improved filtering on the Tests page removes the previous 100-task limit and adds tag filtering.
## Experiments Polish
* The max tokens slider is now easier to control precisely.
* Accidentally closing the baseline configuration drawer no longer resets your settings.
* Experiment variants no longer extend off-screen on the Experiments page.
* New documentation for the Experiments feature is now available.
## Traces & Evaluations
* The trace detail drawer is now resizable on the Timeline tab.
* You can select and copy text inside the trace drawer.
* Custom evaluation definitions can now be updated reliably.
## Topics & Tasks
* Topics can now be renamed directly.
* Updating a task's topic now refreshes the task list immediately.
* Improved button alignment when creating new tasks.
* Added Ctrl+A and Shift+click range selection for table items.
## Webhook Reliability
* Webhook delivery now supports per-organization throttling, preventing overload for high-volume integrations.
* Fixed applicationId handling in SDK webhook validation.
Along with security patches, container updates, certificate fixes, and infrastructure improvements.
Avido v0.8.0 ships a completely redesigned Inbox, better trace capture for agentic workflows, webhook authentication, and a batch of quality-of-life improvements.
## Inbox v2: Your AI Quality Command Center
The Inbox is where AI quality issues surface. Version 1 was a list. Version 2 is a command center.
We rebuilt the Inbox from scratch because the original didn't scale. When you're running dozens of evaluations across multiple AI applications, a simple scrolling list of issues stops working. You can't find what matters. You can't act on what you find. And you definitely can't triage 200 issues efficiently.
Inbox v2 fixes all of that.
### See Everything at Once
A new split-panel layout gives you a compact issue list on the left and full details on the right. Click any issue and you immediately see the business summary, technical summary, severity, source, and suggested actions. No more clicking into a page, reading it, clicking back, clicking the next one.
Every issue shows its severity, age, type, and cluster size at a glance. You can scan 50 issues in the time it used to take to review 5.
### Find What Matters
Filter by status (open, resolved, dismissed), severity (critical to low), type (bug, human annotation, suggested task), or source (test failure, system alert, API, human annotation). Sort by newest, oldest, or severity. Every filter combination is shareable via URL, so you can bookmark "critical open bugs" or share a filtered view with a colleague.
The default view shows open issues, newest first. For most teams, that's exactly right. Customize when you need to.
### Act Without Leaving
This is the big one. When Avido surfaces a suggested task from a pattern of issues, you can now create that task directly from the Inbox. One click. The task is created in Avido with the suggested title and description, and the issue is marked resolved. No context-switching, no copy-pasting, no "I'll get to that later."
Dismiss issues you've reviewed and don't need to act on. Resolve the ones you've addressed. The issue lifecycle is simple: Open → Resolved or Dismissed.
### Work in Bulk
Select multiple issues and resolve, dismiss, or change severity on all of them at once. Shift-click for range select, Cmd/Ctrl-click to toggle individual issues. When you have 30 low-severity duplicates cluttering the view, clear them in two clicks.
A bulk action bar appears at the bottom whenever you have a selection active.
### Keyboard-First Navigation
For teams triaging daily, speed matters. Navigate with `j`/`k` or arrow keys. Open details with `Enter`. Go back with `Esc`. Toggle selection with `x`. Resolve with `r`, dismiss with `d`. Press `?` to see all shortcuts.
You can process an entire Inbox session without touching the mouse.
### Smarter Clustering
Issues that are duplicates or near-duplicates now cluster together automatically. The parent issue shows a count badge so you know there are related issues underneath. When you resolve or dismiss a parent, all issues in the cluster follow.
This means fewer duplicate issues cluttering your view, and when you take action on one, you're taking action on all of them.
### Built for Volume
Infinite scroll loads issues continuously as you move through the list. No pagination, no "load more" buttons. Whether you have 50 issues or 5,000, the experience stays fast.
## Enhanced Agentic Trace Capture
Trace ingestion now handles complex agentic workflows more accurately.
* **Multiple Traces per Request:** Sending multiple unrelated trace spans in a single request now correctly maps each to its own trace
* **Smarter Message Extraction:** User and assistant messages are extracted more accurately from agent steps
* **Full OpenInference Support:** All OpenInference span kinds are now captured and displayed
* **Validated for Production:** Trace mapping verified against real-world agentic architectures
## Webhook Authentication
* **Custom Auth Headers:** Configure authentication headers on your webhook integration. They're sent with every webhook request
* **Enable/Disable Toggle:** Turn webhooks on or off directly from organization settings
## Tests & Experiments
* **Select All Tasks:** Select all tasks at once when adding them to an experiment
* **Filter by Tag:** Filter tests by the associated task's tags on the Tests page
* **Test Type in Sidebar:** The test sidebar now shows whether a test is synthetic or monitoring
## Evaluation Improvements
* **Recall Eval Handles Empty Context:** When no context is retrieved (e.g. a correctly moderated question), recall evaluation now skips gracefully instead of failing
## Trace & UI Polish
* **Traces Sorted Newest First:** The trace list now defaults to most recent traces on top
* **Accurate Trace Duration:** Total duration calculations are now correct for multi-step traces
* **Task Creation Fixes:** Newly created tasks appear immediately. New topics are auto-selected. Creating a task without a topic no longer errors
* **Webhook Test Results:** Failed webhook tests now display correctly in the UI
* **Settings Tab Persistence:** The active tab in Settings/Integrations stays in the URL
* **Task Filter at Scale:** The task dropdown in test filters now loads beyond 100 items
Along with security patches, dependency upgrades, and infrastructure improvements.
Avido v0.7.1 polishes the trace experience introduced in v0.7.0, and ships updated SDKs with better developer experience and new APIs.
## Trace Explorer Polish
* **Redesigned Trace List:** The trace list page now uses the same table layout as tasks and tests, with right-aligned colored badges for latency, cost, and status. Consistent and scannable
* **Timeline Duration and Hierarchy:** The timeline view now shows step durations and groups related steps hierarchically. LLM calls, tool executions, and logs appear under their parent group instead of a flat list
* **Cleaner UI:** Trace views are more focused with less visual clutter
## Updated SDKs
* **New TypeScript SDK:** A new native TypeScript SDK with improved developer experience, better type safety, and full coverage of recent API additions
* **Python SDK Update:** The Python SDK ships with the latest API changes and improved ergonomics
Along with security patches, monitoring improvements, and infrastructure hardening under the hood.
Avido v0.7.0 adds full support for agentic AI workflows. You can now capture multi-step agent traces with cost and error tracking, explore them with advanced filtering and search, and debug them with a timeline view, annotations, and shareable links.
## Agentic Trace Capture
* **Agent and Chain Grouping:** Traces from agentic frameworks now preserve their full hierarchy. Agent loops, chain orchestrations, and tool calls display as nested groups instead of flat logs
* **Error and Status Tracking:** Every trace step now carries a status (success, error, timeout) with error messages visible inline. No more guessing which step failed
* **Cost Tracking:** LLM steps now track cost per call. Set up model pricing once, and costs are auto-computed from token counts on every ingest. Total cost rolls up to the trace level
* **Tool Call Correlation:** Parallel tool calls (common in Claude and OpenAI agents) now carry correlation IDs, so you can match each tool execution to the LLM request that triggered it
* **Session Grouping:** Multi-turn conversations are linked by session ID. See all traces from a single conversation thread in one view
* **OpenTelemetry GenAI Support:** The OTel ingestion pipeline now extracts GenAI semantic convention attributes: agent names, finish reasons, tool call IDs, conversation IDs, and error status
* **Faster Ingest:** Trace ingestion is significantly faster, especially for complex agent traces with many steps
## Trace Explorer
* **Advanced Filters:** Filter traces by session, cost range, duration range, error status, metadata key/value pairs, and evaluation score range
* **Full-Text Search:** Search across all trace step content: inputs, outputs, tool calls, errors, and metadata
* **Enriched Table:** The trace list now shows duration, token count, cost, status, session ID, and step count at a glance. Toggle columns to fit your workflow
* **Session View:** A dedicated sessions tab groups traces by conversation, showing trace count, time range, total cost, and error indicators per session
* **Eval Scores in Traces:** Traces linked to evaluations now display scores as color-coded badges in the drawer and as an average score column in the list
## Trace Debugging
* **Timeline Visualization:** A new waterfall view shows the temporal relationship between trace steps. Color-coded by type (LLM, tool, retriever, group), with hover details for duration, tokens, cost, and errors. Useful for spotting bottlenecks and parallel execution
* **Step Annotations:** Leave notes on individual trace steps for debugging or review. Annotation badges show which steps have notes
* **Deep Link Sharing:** Copy a link to a specific trace and step. Opening it auto-scrolls to the right place with a highlight animation
* **Export:** Download any trace as JSON (full data) or Markdown (formatted narrative with summary table) for offline analysis or bug reports
## Improvements
* **New SDKs:** A new TypeScript SDK and a new version of the Python SDK, both fully up to date with the latest API
Along with security patches, dependency updates, infrastructure hardening, and reliability improvements under the hood.
Avido v0.6.1 is a focused round of fixes and improvements across the platform — better experiment workflows, faster page loads, and a more polished experience throughout.
## Trace Accuracy
* **Correct Trace Hierarchy:** Fixed an issue where parent span IDs weren't properly respected, which could cause duplicate steps in your trace view. Traces now display the correct call hierarchy
## Experiments
* **Accurate Variant Comparison:** Variant comparisons now correctly show differences in percentage points instead of raw percentages
* **Locked Completed Experiments:** You can no longer accidentally create new variants on completed or archived experiments
* **Improved Navigation:** Removed a confusing trace link that sent users to a different page with no easy way back. Added a close button to the test modal for smoother workflows
## UI & Usability
* **Monitoring Badge:** Tasks with active monitoring now show a badge in the task table for quick visibility
* **Active Filter Indicator:** An icon now signals when you have filters applied, so you always know what's shaping your view
* **Settings Navigation:** Added a back-to-app button in User Settings
* **Create Documents Button:** Fixed a layout issue that hid the create button on the documents page
* **Copy Application ID:** You can now copy your application ID from the integration page as expected
* **Side Sheet Fixes:** Rounded borders render correctly. Task side sheets no longer reset your scroll position when opened
* **Task Failure Evaluation:** Triggered tasks now correctly evaluate failure conditions on run completion
Along with security patches, performance improvements, and reliability work under the hood.
Avido v0.6.0 brings native OpenTelemetry trace ingestion (beta), stronger authentication with 2FA and SSO support, and a broad sweep of reporting and UI improvements across the platform.
## OpenTelemetry Trace Ingestion (Beta)
Avido now natively ingests OpenTelemetry traces, making it dramatically easier to connect your existing AI systems. If you're already using frameworks like Vercel AI SDK, LangChain, or LlamaIndex, you can start sending traces to Avido without writing custom integration code.
### Key Capabilities
* **OTLP HTTP Endpoint:** New `POST /v0/otel/traces` endpoint accepts standard OTLP JSON payloads. Plug in your existing OpenTelemetry setup and start sending traces immediately
* **Automatic Span Classification:** LLM, tool, retriever, and chain spans are automatically mapped to Avido's trace model with full attribute extraction
* **Latency Analysis:** New duration and timing fields on trace steps for precise performance tracking across your AI pipeline
This is a beta release and we'd love your feedback as you integrate. Reach out if you need help connecting your stack.
## Authentication & Security
* **Two-Factor Authentication:** TOTP-based 2FA is now available for all users, with backup recovery codes
* **SSO Support:** Single sign-on support for enterprise deployments
## Reporting & Insights
* **Flexible Filtering & Grouping:** Eval results can now be filtered and grouped by any combination of eval, task, topic, or tag
* **Improved Report Creation:** Clear feedback when creating reports-easily distinguish between missing configuration and empty results
* **Editable Descriptions:** Add or edit descriptions on existing Insights reports at any time
* **Empty Series Toggle:** Hide or show time points with no data in chart breakdowns for cleaner visualizations
* **Last 12 Months Preset:** New date filter preset for rolling 12-month reporting windows
## UI Polish
* **Scroll & Layout Fixes:** Restored proper scrolling across experiment detail pages, style guide editor, and topic selection
* **Sidebar Navigation:** Accurate active states, properly fitted workspace names, and visible application selector
* **Experiment Lifecycle:** Enhanced archive/restore flow with confirmation dialogs and status tracking
* **Copy to Clipboard:** Consistent copy behavior across the platform
* **Pagination:** Changing filters now correctly resets to page 1
Along with security, performance, and reliability improvements to make Avido faster and more stable for you.
Avido v0.5.0 introduces Emerging Use Case Tracking: The first feature in Avido's Monitoring module that automatically discovers how users actually use your AI in production. This release empowers teams to identify gaps between their test coverage and real-world usage before those gaps become incidents.
## Emerging Use Case Tracking
Emerging Use Case Tracking examines sampled production traffic, clusters repeated patterns, and surfaces suggestions for user behaviors that aren't covered by your existing tasks. Privacy-first, human-in-the-loop, built for regulated industries.
### Key Capabilities
* Automatic Pattern Discovery: Sample production sessions, extract user intent, and cluster similar requests together—one-off queries filtered automatically
* Human-in-the-Loop: Suggestions appear in your Inbox with recommended evaluations. Nothing ships without explicit approval
* Full Audit Trail: Every suggestion includes provenance metadata (model version, prompt, thresholds, reviewer decisions) for compliance requirements
### Why We Built This
AI systems get used in ways that diverge from intended tests. Teams discover gaps only after incidents, audits, or customer complaints. Manual review of production traffic doesn't scale.
For QA Engineers: Discover what users actually ask that you're not testing for. Review suggestions with examples, create tasks with linked evaluations, and close coverage gaps systematically.
For Engineering Teams: Stop learning about production issues from incident reports. Get proactive visibility into emerging usage patterns with configurable sampling and thresholds.
For Compliance Teams: Maintain complete audit trails of how production patterns were discovered, reviewed, and addressed. Every suggestion documents the algorithmic rationale and human decision.
Avido v0.4.0 introduces Experiments: A structured framework for testing prompt, model, and parameter changes against your evaluation tasks before deploying to production. This release empowers teams to iterate confidently on AI configurations with clear comparison metrics and zero risk of silent regressions.
## Experiments
Experiments enable systematic testing of configuration changes across your evaluation tasks. Create controlled tests for prompts, models, and parameters, compare results against baselines, and make data-driven decisions about what to deploy.
### Key Capabilities
* **Baseline-First Workflow**: Establish performance benchmarks before testing any changes, ensuring valid comparisons
* **Single-Variable Testing**: Each variant changes exactly one parameter (prompt, temperature, model, etc.) for clear cause-and-effect analysis
* **Automatic Isolation**: Experiment data is completely separated from production metrics and reporting
* **In-App Execution**: All tests run inside your application using the same webhook as regular evaluations—no separate infrastructure needed
* **Full Audit Trail**: Track every configuration change, test run, and decision with complete version history
### Why We Built This
Configuration changes to AI systems carry hidden risks. A temperature adjustment, prompt refinement, or model upgrade can improve some outputs while breaking others. Without structured testing, teams either move too slowly (afraid of regressions) or too quickly (missing quality issues until production).
**For Engineering Teams**: Test changes systematically before deploying. Run variants on the same task set as your baseline, get clear delta metrics, and avoid shipping regressions.
**For Product Teams**: Make evidence-based decisions about AI quality improvements. See exactly how prompt changes affect task performance across your evaluation suite.
**For Compliance Teams**: Maintain a complete audit trail of what was tested, why, and what changed. Every experiment documents the hypothesis, configuration changes, and results—meeting regulatory requirements for AI system changes.
Avido v0.3.0 delivers a streamlined set of improvements focused on helping teams organize work more efficiently and maintain consistent AI behavior across applications. This release strengthens how tasks and documents are structured, how teams perform bulk operations, and how style guides flow through both the Avido UI and your own applications.
## New in This Release
* **Unified Tagging System**: Add tags to tasks and documents, filter by tag, and apply tags in bulk.
* **Bulk Actions**: Perform shared bulk operations across tasks and documents, including bulk delete.
* **Document CSV Export**: Export all imported documents directly to CSV/TXT from the UI.
* **Style Guide Management**: Create and manage style guides directly in the UI—Avido automatically uses the latest version in evals, or you can pull them into your own app via API.
* **New Scraping Experience**: Scrape websites with full URL visibility, single-call backend processing, automatic “scrape job” creation, and protection against duplicate triggers.
![v0.2.0 update]() Avido v0.2.0 introduces Document Versioning and Knowledge Base Testing�powerful features that enable teams to maintain stable production content while continuously improving their AI knowledge bases. This release empowers organizations to collaborate on documentation updates without risking production stability, while systematically identifying and fixing knowledge gaps.
## Document Versioning
Document versioning provides comprehensive version control for your AI knowledge base, ensuring production stability while enabling continuous improvement. Teams can now iterate on content safely, with clear workflows that separate work-in-progress from production-ready documentation.
### Key Capabilities
* **Four-State Version Lifecycle**: Documents support Approved (production), Draft (work-in-progress), Review (pending approval), and Archived (historical) states
* **Production Stability by Default**: APIs and AI responses use only approved versions unless explicitly requested otherwise
* **Collaborative Workflows**: Multiple team members can work on drafts simultaneously with version notes and clear approval processes
* **Complete Audit Trail**: Track who made changes, when, and why�critical for compliance requirements
### Why We Built This
Document Versioning and Knowledge Base Testing work together to create a robust content management system that balances stability with continuous improvement. Teams in regulated industries now have the tools to maintain high-quality, evolving documentation that powers AI systems�with the confidence that changes won't compromise production stability or compliance requirements.
**For Content Teams**: Safely iterate on documentation without affecting production systems. Create drafts from any document version, collaborate with teammates, and deploy updates only when ready.
**For Engineering Teams**: Maintain API stability while content evolves. Production systems automatically use only approved content, with optional access to draft versions for testing.
**For Compliance Teams**: Full version history with user attribution meets regulatory requirements. Track every change with clear audit trails and approval workflows.
## Knowledge Base Testing
Systematic testing ensures your knowledge base remains comprehensive and consistent. Two new test types help identify gaps and conflicts before they impact your AI applications.
### Document Coverage Test
Automatically identifies gaps in your knowledge base by testing how well your documents cover defined tasks. This ensures AI agents have the information needed to handle all scenarios effectively.
### Overlap and Contradictions Analysis
Tests your knowledge base using the Overlap and Contradictions test to identify:
* **Overlapping Information**: Find redundant content across documents
* **Contradictory Instructions**: Detect conflicting guidance that could confuse AI agents
Avido v0.2.0 introduces Document Versioning and Knowledge Base Testing�powerful features that enable teams to maintain stable production content while continuously improving their AI knowledge bases. This release empowers organizations to collaborate on documentation updates without risking production stability, while systematically identifying and fixing knowledge gaps.
## Document Versioning
Document versioning provides comprehensive version control for your AI knowledge base, ensuring production stability while enabling continuous improvement. Teams can now iterate on content safely, with clear workflows that separate work-in-progress from production-ready documentation.
### Key Capabilities
* **Four-State Version Lifecycle**: Documents support Approved (production), Draft (work-in-progress), Review (pending approval), and Archived (historical) states
* **Production Stability by Default**: APIs and AI responses use only approved versions unless explicitly requested otherwise
* **Collaborative Workflows**: Multiple team members can work on drafts simultaneously with version notes and clear approval processes
* **Complete Audit Trail**: Track who made changes, when, and why�critical for compliance requirements
### Why We Built This
Document Versioning and Knowledge Base Testing work together to create a robust content management system that balances stability with continuous improvement. Teams in regulated industries now have the tools to maintain high-quality, evolving documentation that powers AI systems�with the confidence that changes won't compromise production stability or compliance requirements.
**For Content Teams**: Safely iterate on documentation without affecting production systems. Create drafts from any document version, collaborate with teammates, and deploy updates only when ready.
**For Engineering Teams**: Maintain API stability while content evolves. Production systems automatically use only approved content, with optional access to draft versions for testing.
**For Compliance Teams**: Full version history with user attribution meets regulatory requirements. Track every change with clear audit trails and approval workflows.
## Knowledge Base Testing
Systematic testing ensures your knowledge base remains comprehensive and consistent. Two new test types help identify gaps and conflicts before they impact your AI applications.
### Document Coverage Test
Automatically identifies gaps in your knowledge base by testing how well your documents cover defined tasks. This ensures AI agents have the information needed to handle all scenarios effectively.
### Overlap and Contradictions Analysis
Tests your knowledge base using the Overlap and Contradictions test to identify:
* **Overlapping Information**: Find redundant content across documents
* **Contradictory Instructions**: Detect conflicting guidance that could confuse AI agents
![v0.1.0 update]() Avido v0.1.0 introduces the System Journal—an intelligent monitoring system that automatically tracks and documents all significant changes in your AI deployments. This release also includes performance improvements and stability fixes to make Avido more reliable in production.
The System Journal acts as a "black box recorder" for your AI systems, capturing every meaningful change that could impact model behavior, compliance, or evaluation accuracy. Small changes to AI configurations can cause unexpected regressions—a model version bump, temperature adjustment, or prompt tweak can break functionality in unexpected ways.
### Key Features
* **Automatic Change Detection**: Identifies when model parameters (temperature, max tokens, top-k, etc.) change between deployments
* **Missing Parameter Alerts**: Flags when critical parameters required for evaluation or compliance are absent
* **Intelligent Journal Entries**: Generates human-readable descriptions of what changed, when, and by how much
* **Complete Audit Trail**: Maintains a tamper-proof history for regulatory compliance
* **Zero Manual Overhead**: Operates completely automatically in the background
### Why We Built This
**For Engineering Teams**: Prevent configuration drift, accelerate incident response, and maintain evaluation integrity. Know immediately when model parameters change unexpectedly.\
**For Compliance Teams**: Achieve regulatory readiness with comprehensive audit trails, track risk-relevant parameter changes, and reduce compliance reporting time from weeks to minutes.
## Improvements and Fixes
* Manage multiple evaluations per task simultaneously
* Schedule evaluations with custom criticality levels and intervals
* System journal entries are now visible in dashboard graphs
* Performance optimizations for faster response times
* Enhanced security for production deployments
Avido v0.1.0 introduces the System Journal—an intelligent monitoring system that automatically tracks and documents all significant changes in your AI deployments. This release also includes performance improvements and stability fixes to make Avido more reliable in production.
The System Journal acts as a "black box recorder" for your AI systems, capturing every meaningful change that could impact model behavior, compliance, or evaluation accuracy. Small changes to AI configurations can cause unexpected regressions—a model version bump, temperature adjustment, or prompt tweak can break functionality in unexpected ways.
### Key Features
* **Automatic Change Detection**: Identifies when model parameters (temperature, max tokens, top-k, etc.) change between deployments
* **Missing Parameter Alerts**: Flags when critical parameters required for evaluation or compliance are absent
* **Intelligent Journal Entries**: Generates human-readable descriptions of what changed, when, and by how much
* **Complete Audit Trail**: Maintains a tamper-proof history for regulatory compliance
* **Zero Manual Overhead**: Operates completely automatically in the background
### Why We Built This
**For Engineering Teams**: Prevent configuration drift, accelerate incident response, and maintain evaluation integrity. Know immediately when model parameters change unexpectedly.\
**For Compliance Teams**: Achieve regulatory readiness with comprehensive audit trails, track risk-relevant parameter changes, and reduce compliance reporting time from weeks to minutes.
## Improvements and Fixes
* Manage multiple evaluations per task simultaneously
* Schedule evaluations with custom criticality levels and intervals
* System journal entries are now visible in dashboard graphs
* Performance optimizations for faster response times
* Enhanced security for production deployments
![v0.0.5 update]() Optimise your articles for RAG straight in Avido – use our best practices to process your original knowledge base, help site or similar into split, optimised articles with proper metadata, ready to ingest into RAG. Much more to come!
### 📖 Recall (RAG Evaluation)
The **Recall** feature in Avido provides a comprehensive way to assess how well your AI application's Retrieval-Augmented Generation (RAG) system is performing.
* Measure key aspects of quality, correctness, and relevancy within your RAG workflow.
* **No-code interface** empowers both technical and non-technical stakeholders to interpret metrics.
* Ensure systems meet required quality standards before production.
### 🛠️ SDK & Trace Improvements
* Micro-second precision when ingesting data.
* Group traces to visualise workflow structure at a glance.
### ☁️ OpenAI on Azure Support
* EU customers can now run all inference on models hosted in Europe.
* Regardless of geography, we, or any of our providers, never train on any data.
### 🐞 Bug Fixes & Polishing
Lots of improvements and paper cuts to make your experience with Avido even smoother, faster, and enjoyable.
Optimise your articles for RAG straight in Avido – use our best practices to process your original knowledge base, help site or similar into split, optimised articles with proper metadata, ready to ingest into RAG. Much more to come!
### 📖 Recall (RAG Evaluation)
The **Recall** feature in Avido provides a comprehensive way to assess how well your AI application's Retrieval-Augmented Generation (RAG) system is performing.
* Measure key aspects of quality, correctness, and relevancy within your RAG workflow.
* **No-code interface** empowers both technical and non-technical stakeholders to interpret metrics.
* Ensure systems meet required quality standards before production.
### 🛠️ SDK & Trace Improvements
* Micro-second precision when ingesting data.
* Group traces to visualise workflow structure at a glance.
### ☁️ OpenAI on Azure Support
* EU customers can now run all inference on models hosted in Europe.
* Regardless of geography, we, or any of our providers, never train on any data.
### 🐞 Bug Fixes & Polishing
Lots of improvements and paper cuts to make your experience with Avido even smoother, faster, and enjoyable.
![v0.0.4 update]() We're excited to announce the latest product updates for Avido. Our newest features make it easier and safer to deploy Generative AI, providing peace-of-mind for critical applications.
### 🔍 Enhanced Test View
* Easily dive into each evaluation to pinpoint exactly what's working—and what needs improvement.
* Clearly understand AI performance to rapidly iterate and optimize.
### 📌 System Journal
* Track application changes seamlessly and visualize how these updates impact individual eval performance.
* Stay informed and make confident deployment decisions with clear version tracking.
### 🔐 Single Sign-On (SSO)
* Support for all major identity providers, making it even easier to roll out Avido in enterprises.
### ⚙️ Custom Evaluations
* Create custom evals directly from our UI or via API.
* Test specific business logic, compliance requirements, brand-specific wording, and other critical aspects of your application, ensuring unmatched accuracy and reliability.
With these updates, Avido continues to empower financial services by ensuring safe, transparent, and high-quality deployment of Generative AI.
We're excited to announce the latest product updates for Avido. Our newest features make it easier and safer to deploy Generative AI, providing peace-of-mind for critical applications.
### 🔍 Enhanced Test View
* Easily dive into each evaluation to pinpoint exactly what's working—and what needs improvement.
* Clearly understand AI performance to rapidly iterate and optimize.
### 📌 System Journal
* Track application changes seamlessly and visualize how these updates impact individual eval performance.
* Stay informed and make confident deployment decisions with clear version tracking.
### 🔐 Single Sign-On (SSO)
* Support for all major identity providers, making it even easier to roll out Avido in enterprises.
### ⚙️ Custom Evaluations
* Create custom evals directly from our UI or via API.
* Test specific business logic, compliance requirements, brand-specific wording, and other critical aspects of your application, ensuring unmatched accuracy and reliability.
With these updates, Avido continues to empower financial services by ensuring safe, transparent, and high-quality deployment of Generative AI.
![v0.0.3 update]() We're thrilled to share our first public changelog, marking a step forward in our commitment to enhancing the understanding of AI applications and helping enterprises maximize the value of AI with Avido.
### 🚀 Quickstart Workflow
* Upload existing outputs via CSV to automatically generate evaluation cases
* Smart AI-powered categorization of topics and tasks
* Interactive review interface for selecting benchmark outputs
* Automated evaluation criteria generation based on selected examples
### 📊 Improved Scoring System
* Simplified scoring scale (1-5) for more intuitive evaluation
* Updated benchmarking system for better quality assessment
* Refined evaluation criteria for clearer quality metrics
### 🤖 Smart Analysis
* Automatic topic detection from output patterns
* Task identification based on user intentions
* Intelligent grouping of similar outputs
* Automated quality scoring of historical outputs
### 💡 Enhanced Review Experience
* Visual topic distribution analysis
* Side-by-side conversation comparison
* Guided selection of benchmark outputs
* Contextual feedback collection for evaluation criteria
# Documents
Source: https://docs.avidoai.com/documents
Knowledge management system for creating, versioning, and optimizing RAG-ready content
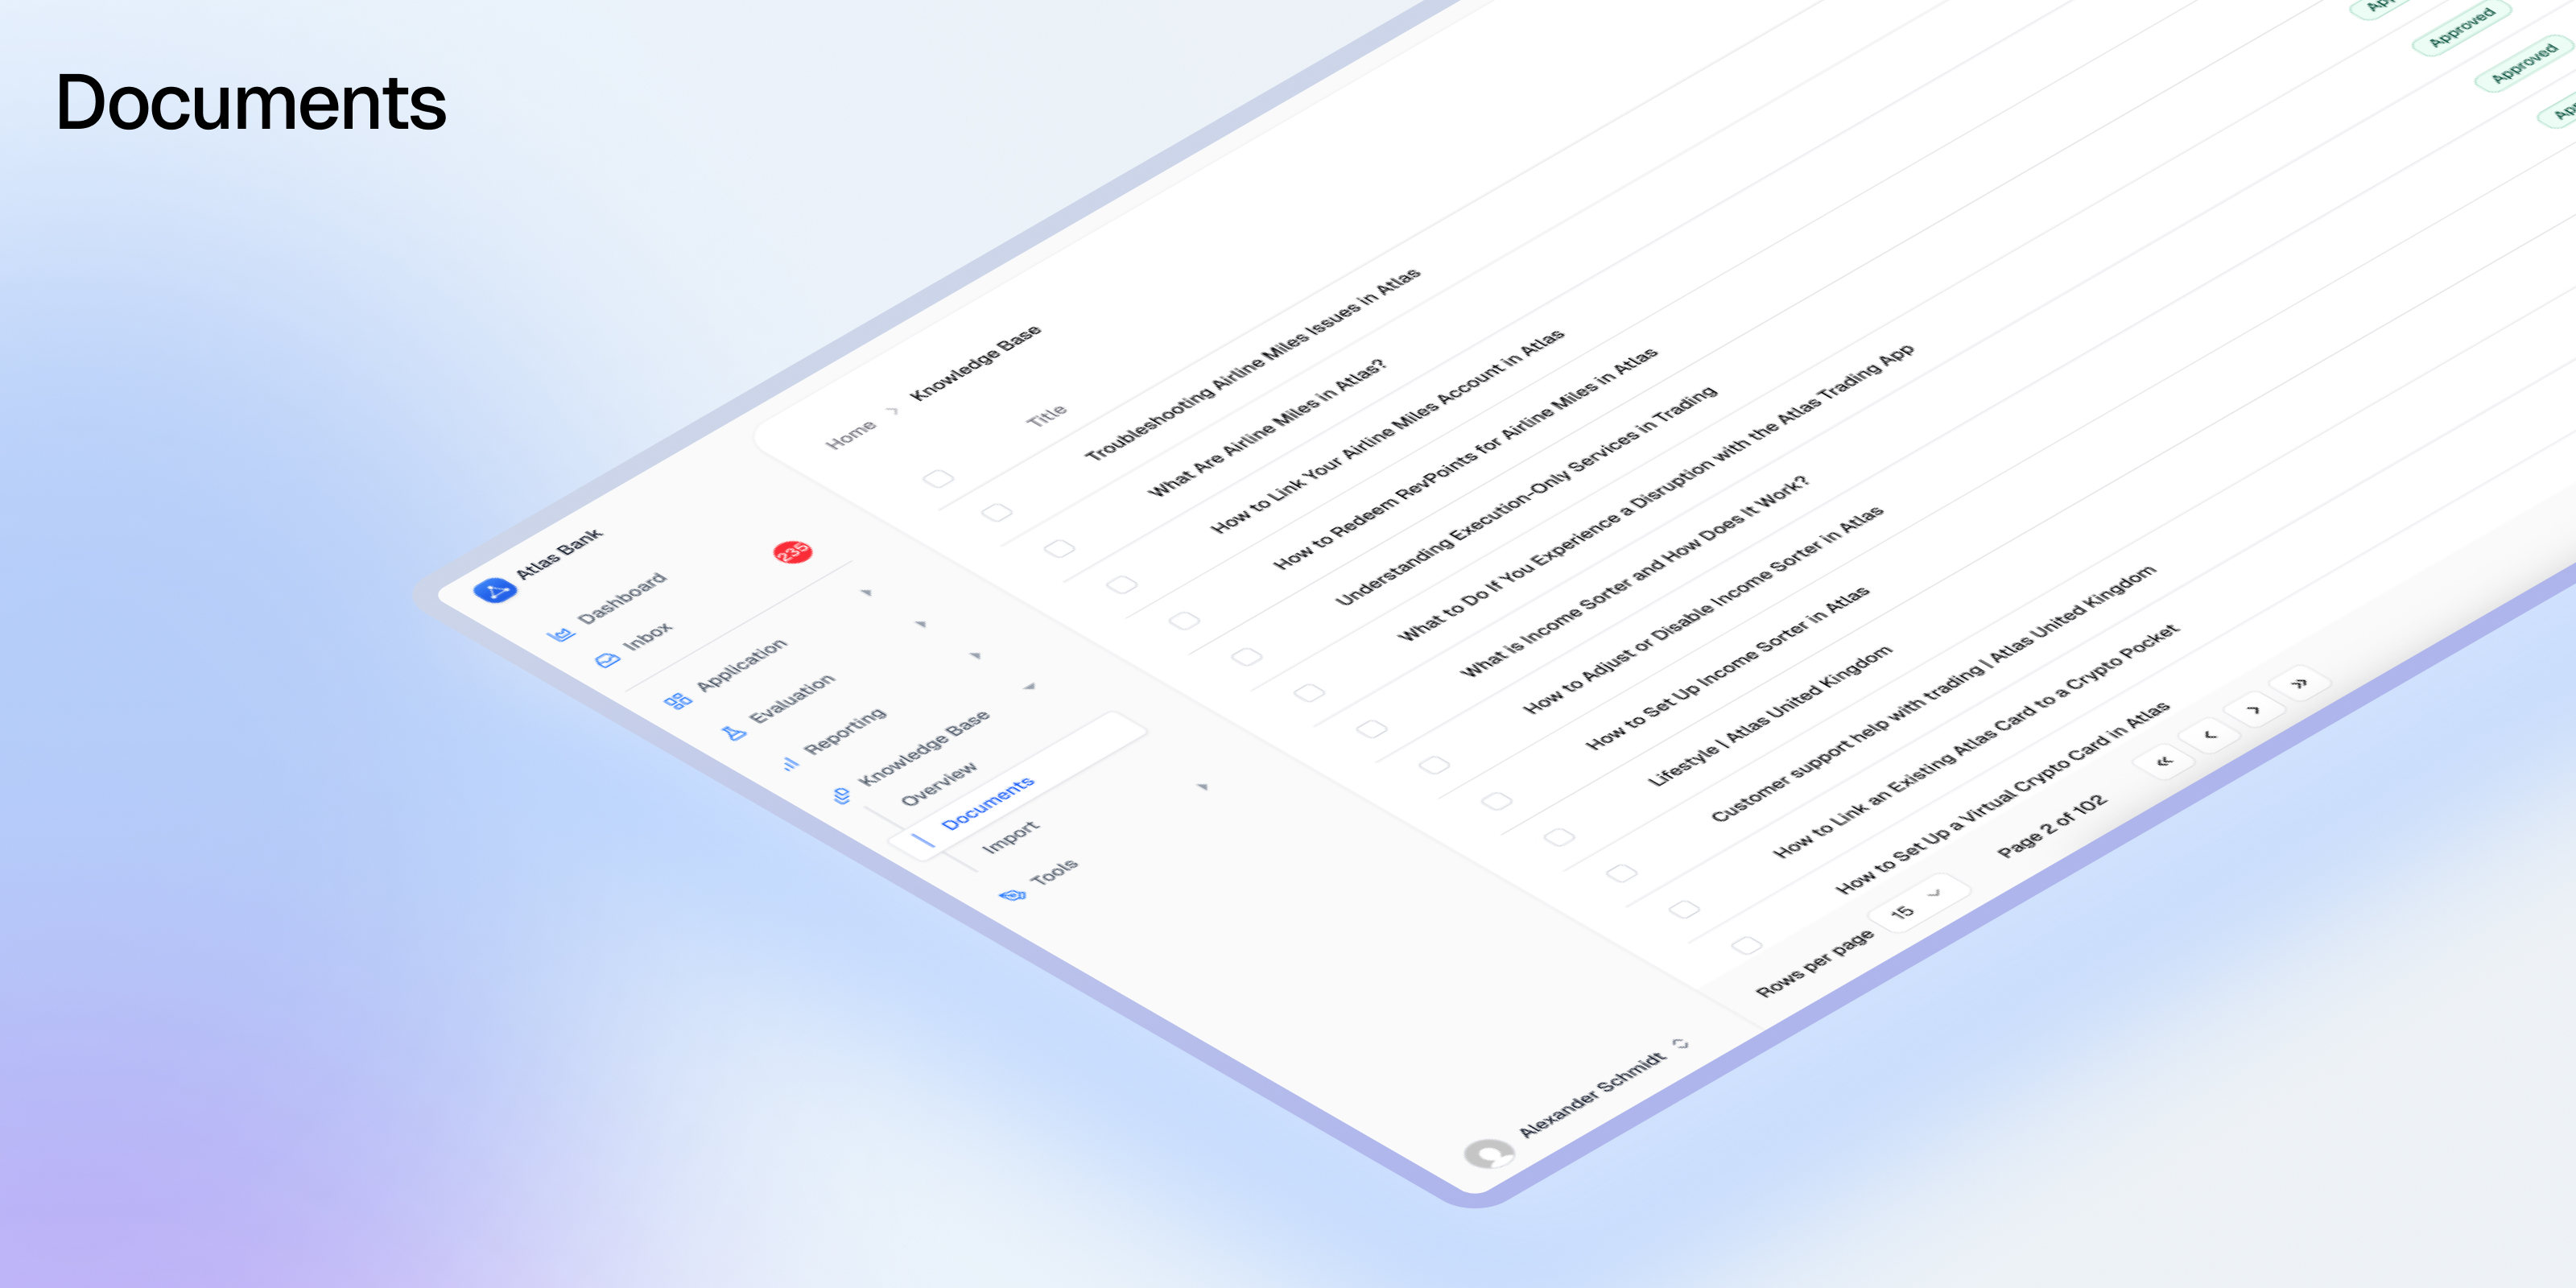
The Documents tool allows you to easily format and split your content into RAG-ready documents. It's your central knowledge base where teams can collaborate on creating, refining, and approving the content that powers your AI application. Whether you're building customer support bots, internal knowledge assistants, or any RAG-based system, Documents ensures your content is properly structured, versioned, and optimized for AI retrieval.
## What are Documents?
Documents in Avido are structured content pieces designed specifically for Retrieval-Augmented Generation (RAG) systems. Unlike traditional document management, Avido Documents are:
* **AI-Optimized**: Automatically chunked and formatted for optimal retrieval
* **Version-Controlled**: Maintain approved versions in production while working on improvements
* **Collaborative**: Multiple team members can work on drafts without affecting live content
* **Traceable**: Every change is tracked for compliance and quality control
## Key Features
### Document Creation & Import
Documents can be created in multiple ways:
* **Manual Creation**: Write and format content directly in the Avido editor
* **Web Scraping**: Import content from any public URL
* **File Upload**: Upload existing documents (coming soon)
* **API Integration**: Programmatically create and manage documents
### AI-Powered Optimization
The platform includes intelligent document optimization that:
* **Reformats for RAG**: Structures content for better chunking and retrieval
* **Improves Clarity**: Enhances readability while preserving meaning
* **Maintains Consistency**: Ensures uniform formatting across your knowledge base
* **Preserves Intent**: Keeps the original message and tone intact
### Version Management
Every document supports comprehensive versioning:
#### Version States
* **APPROVED**: Live production version served by APIs
* **DRAFT**: Work-in-progress version for collaboration
* **REVIEW**: Pending approval from designated reviewers
* **ARCHIVED**: Historical versions for reference
#### Version Workflow
1. Create new versions from any existing version
2. Collaborate on drafts without affecting production
3. Submit for review when ready
4. Approve to make it the live version
5. Previous approved versions are automatically archived
### Approval Workflow
Documents can require approval before going live:
* **Assign Reviewers**: Designate who needs to approve changes
* **Email Notifications**: Reviewers are notified when approval is needed
* **Audit Trail**: Track who approved what and when
* **Compliance Ready**: Meet regulatory requirements for content control
## Using Documents
### Creating Your First Document
1. Navigate to the **Documents** section in your Avido dashboard
2. Click **New Document**
3. Choose your creation method:
* **Write**: Start with the built-in editor
* **Import from URL**: Scrape content from a website
* **Upload**: Import existing files (if enabled)
### Document Editor
The editor provides a rich set of formatting tools:
* **Markdown Support**: Write in markdown for quick formatting
* **Visual Editor**: Use the toolbar for formatting without markdown knowledge
* **Preview Mode**: See how your document will appear to users
* **Auto-Save**: Never lose your work with automatic saving
### Working with Versions
#### Creating a New Version
1. Open any document
2. Click **Create New Version** in the version sidebar
3. Add version notes describing your changes
4. Edit the content as needed
5. Save as draft or submit for review
#### Version History Sidebar
The sidebar shows:
* All versions with their status badges
* Creator and approval information
* Version notes and timestamps
* Quick actions for each version
#### Comparing Versions
1. Select two versions to compare
2. View side-by-side differences
3. See what was added, removed, or changed
4. Understand the evolution of your content
### Document Optimization
Use AI to improve your documents:
1. Open any document
2. Click **Optimize Document**
3. Review the AI-suggested improvements
4. Accept, reject, or modify suggestions
5. Save the optimized version
The optimizer helps with:
* Breaking content into logical sections
* Improving readability and clarity
* Standardizing formatting
* Enhancing retrieval effectiveness
### API Access
Documents are accessible via the Avido API:
```bash theme={null}
# Get all approved documents
GET /v0/documents
Authorization: Bearer YOUR_API_KEY
# Get a specific document
GET /v0/documents/{id}
# Include draft versions
GET /v0/documents?include_drafts=true
# Create a new document
POST /v0/documents
Content-Type: application/json
{
"title": "Product FAQ",
"content": "# Frequently Asked Questions...",
"metadata": {
"category": "support",
"product": "main"
}
}
```
### Integration with Testing
Documents integrate seamlessly with Avido's testing framework:
* **Knowledge Coverage**: Test if your documents cover all required topics
* **MECE Analysis**: Ensure content is Mutually Exclusive and Collectively Exhaustive
* **Task Mapping**: Verify documents address all user tasks
Tests automatically use approved versions unless configured otherwise.
## Best Practices
### Content Organization
* **Use Clear Titles**: Make documents easily discoverable
* **Add Metadata**: Tag documents with categories, products, or teams
* **Structure Hierarchically**: Use headings to create logical sections
* **Keep Focused**: One topic per document for better retrieval
### Version Management
* **Document Changes**: Always add clear version notes
* **Review Before Approval**: Have subject matter experts review changes
* **Test Before Production**: Run coverage tests on new versions
* **Archive Strategically**: Keep important historical versions accessible
### Collaboration
* **Assign Ownership**: Each document should have a clear owner
* **Use Draft Status**: Work on improvements without affecting production
* **Communicate Changes**: Notify stakeholders of significant updates
* **Regular Reviews**: Schedule periodic content audits
### RAG Optimization
* **Chunk-Friendly Content**: Write in digestible sections
* **Avoid Redundancy**: Don't duplicate information across documents
* **Use Examples**: Include concrete examples for better context
* **Update Regularly**: Keep content current and accurate
## Document Lifecycle
### 1. Creation Phase
* Identify knowledge gaps
* Create initial content
* Format for readability
* Add relevant metadata
### 2. Optimization Phase
* Run AI optimization
* Test with knowledge coverage
* Refine based on feedback
* Ensure completeness
### 3. Review Phase
* Submit for approval
* Gather stakeholder feedback
* Make necessary revisions
* Document decisions
### 4. Production Phase
* Approve for production use
* Monitor retrieval performance
* Track usage in traces
* Gather user feedback
### 5. Maintenance Phase
* Regular content audits
* Update outdated information
* Create new versions as needed
* Archive obsolete content
## Advanced Features
### Traceability
When documents are used in AI responses, Avido tracks:
* Which documents were retrieved
* How they influenced the response
This creates a feedback loop for continuous improvement.
## Getting Started
1. **Define Your Knowledge Base**: Identify what content your AI needs
2. **Create Initial Documents**: Start with your most critical content
3. **Optimize and Test**: Use AI optimization and run coverage tests
4. **Review and Approve**: Get stakeholder sign-off
5. **Monitor and Iterate**: Track usage and improve based on feedback
Documents transform static knowledge into dynamic, AI-ready content that evolves with your application's needs, ensuring your AI always has access to accurate, approved, and optimized information.
# Evaluations
Source: https://docs.avidoai.com/evaluations
Built-in and custom evaluation types to measure AI quality, safety, and performance.
## Overview
Avido provides six evaluation types to measure different aspects of AI quality. Each evaluation is applied to tasks, then runs automatically when those tasks execute, providing actionable insights when quality standards aren't met.
| Evaluation Type | Purpose | Score Range | Pass Threshold |
| ---------------- | -------------------------------- | ----------- | -------------- |
| **Naturalness** | Human-like communication quality | 1-5 | 3.5 |
| **Style** | Brand guideline compliance | 1-5 | 3.5 |
| **Recall** | RAG pipeline performance | 0-1 | 0.5 |
| **Fact Checker** | Factual accuracy vs ground truth | 0-1 | 0.8 |
| **Custom** | Domain-specific criteria | 0-1 | 0.5 |
| **Output Match** | Deterministic output validation | 0-1 | 0.8 |
## Naturalness
Measures how natural, engaging, and clear your AI's responses are to users.
### What It Evaluates
The Naturalness evaluation assesses five dimensions of response quality:
* **Coherence** – Logical flow and consistency of ideas
* **Engagingness** – Ability to capture and maintain user interest
* **Naturalness** – Human-like language and tone
* **Relevance** – On-topic responses that address the user's intent
* **Clarity** – Clear, understandable language without ambiguity
### How It Works
An LLM evaluates your AI's response across all five dimensions on a 1-5 scale. The overall score is the average of these dimensions.
**Pass Criteria:**
* All five dimensions must score ≥ 3.5
* Average score ≥ 3.5
This ensures no single dimension fails even if the overall average is high.
### Example Results
| Coherence | Engagingness | Naturalness | Relevance | Clarity | Overall | Result |
| --------- | ------------ | ----------- | --------- | ------- | ------- | ----------------------- |
| 5 | 5 | 5 | 5 | 5 | 5.0 | ✅ Pass |
| 4 | 4 | 4 | 4 | 4 | 4.0 | ✅ Pass |
| 5 | 5 | 5 | 5 | 2 | 4.4 | ❌ Fail (Clarity \< 3.5) |
### When to Use
* Conversational AI and chatbots
* Customer support automation
* Content generation systems
* Any user-facing AI interactions
## Style
Evaluates whether responses adhere to your organization's style guidelines and brand voice.
### What It Evaluates
A single comprehensive score (1-5) based on your custom style guide, measuring:
* Tone and voice consistency
* Terminology usage
* Format and structure requirements
* Brand-specific guidelines
* Reading level and complexity
### How It Works
You provide a style guide document that defines your brand's communication standards. An LLM evaluates each response against this guide and provides:
* A score from 1-5
* Detailed analysis explaining the rating
**Pass Criteria:**
* Score ≥ 3.5
### Example Style Guide Elements
```markdown theme={null}
# Customer Support Style Guide
**Tone:** Professional yet friendly, never casual
**Voice:** Active voice preferred, clear and direct
**Terminology:** Use "account" not "profile", "transfer" not "send"
**Format:** Start with acknowledgment, provide solution, end with offer to help
**Constraints:** Keep responses under 100 words when possible
```
### When to Use
* Brand-critical communications
* Multi-channel consistency (chat, email, voice)
* Customer-facing applications where brand matters
Note: For regulated industries with strict compliance requirements, use Custom evaluations instead.
## Recall (RAG Evaluation)
Comprehensive evaluation of Retrieval-Augmented Generation (RAG) pipeline quality.
### What It Evaluates
Four metrics that measure different aspects of RAG performance:
* **Context Relevancy** – Are retrieved documents relevant to the query?
* **Context Precision** – How well-ranked are the retrieved documents?
* **Faithfulness** – Is the answer grounded in the retrieved context?
* **Answer Relevancy** – Does the answer address the user's question?
### How It Works
Each metric produces a score from 0-1 (higher is better). The overall score is the average of Context Precision, Faithfulness, and Answer Relevancy.
**Pass Criteria:**
* Context Precision ≥ 0.5
* Faithfulness ≥ 0.5
* Answer Relevancy ≥ 0.5
Note: Context Relevancy is computed for observability but doesn't affect pass/fail status.
### Score Interpretation
| Score Range | Interpretation | Action Required |
| ----------- | --------------------- | ----------------------- |
| 0.8 - 1.0 | Excellent performance | Monitor |
| 0.5 - 0.8 | Acceptable quality | Optimize if critical |
| 0.0 - 0.5 | Poor performance | Investigate immediately |
### Common Issues and Solutions
| Low Metric | Likely Cause | Solution |
| ----------------- | ------------------------------------ | ---------------------------------------------- |
| Context Precision | Too many irrelevant chunks retrieved | Reduce top\_k, improve filters |
| Context Relevancy | Embedding/index drift | Retrain embeddings, update index |
| Faithfulness | Model hallucinating | Add grounding instructions, reduce temperature |
| Answer Relevancy | Answer drifts off-topic | Improve prompt focus, add constraints |
### When to Use
* Knowledge base search and retrieval
* Document Q\&A systems
* RAG pipelines
* Any system combining retrieval with generation
## Fact Checker
Validates factual accuracy of AI responses against ground truth.
### What It Evaluates
Compares AI-generated statements with known correct information, classifying each statement as:
* **True Positives (TP)** – Correct facts present in the response
* **False Positives (FP)** – Incorrect facts in the response
* **False Negatives (FN)** – Correct facts omitted from the response
### How It Works
An LLM extracts factual statements from both the AI response and ground truth, then classifies them. The F1 score measures accuracy:
```
F1 = TP / (TP + 0.5 × (FP + FN))
```
**Pass Criteria:**
* F1 score ≥ 0.8
This allows high-quality answers with minor omissions while maintaining strict accuracy standards.
### Example Classification
**Question:** "What powers the sun?"
**Ground Truth:** "The sun is powered by nuclear fusion. In its core, hydrogen atoms fuse to form helium, releasing tremendous energy."
**AI Response:** "The sun is powered by nuclear fission, similar to nuclear reactors, and provides light to the solar system."
**Classification:**
* TP: \["Provides light to the solar system"]
* FP: \["Powered by nuclear fission", "Similar to nuclear reactors"]
* FN: \["Powered by nuclear fusion", "Hydrogen fuses to form helium"]
* F1 Score: 0.20 → ❌ Fail
### Score Examples
| TP | FP | FN | F1 Score | Result | Notes |
| -- | -- | -- | -------- | ------ | ------------------------- |
| 5 | 0 | 0 | 1.0 | ✅ Pass | Perfect accuracy |
| 5 | 0 | 1 | 0.91 | ✅ Pass | Minor omission acceptable |
| 5 | 1 | 0 | 0.91 | ✅ Pass | Minor error acceptable |
| 4 | 1 | 0 | 0.8 | ✅ Pass | Boundary case |
| 3 | 0 | 2 | 0.75 | ❌ Fail | Too many omissions |
| 1 | 4 | 0 | 0.33 | ❌ Fail | Mostly incorrect |
### When to Use
* Financial data and calculations
* Medical or legal information
* Product specifications and features
* Any domain where factual accuracy is critical
## Custom
Create domain-specific evaluations for your unique business requirements.
### What It Evaluates
Whatever you define in a custom criterion. Common use cases:
* Regulatory compliance checks
* Schema or format validation
* Latency or performance SLAs
* Business logic requirements
* Security and privacy rules
### How It Works
You provide a criterion describing what to check. An LLM evaluates the response and returns:
* Binary pass/fail (1 or 0)
* Reasoning explaining the decision
**Pass Criteria:**
* Score = 1 (criterion met)
### Example Criteria
```markdown theme={null}
# Compliance Example
"The response must not mention specific account numbers,
social security numbers, or other PII. Pass if no PII is present."
# Format Example
"The response must be formatted as a JSON object with
'action', 'parameters', and 'reasoning' keys. Pass if valid JSON
with all required keys."
# Business Logic Example
"For loan inquiries, the response must ask for income verification
before discussing loan amounts. Pass if verification is requested first."
# Chatbot Boundaries Example
"When asked to perform actions outside the chatbot's scope (e.g.,
processing refunds, accessing user accounts, making reservations),
the response must politely decline and explain limitations. Pass if
the chatbot appropriately refuses and provides alternative guidance."
```
### When to Use
* Industry-specific compliance requirements
* Custom business rules and workflows
* Structured output validation
* Security and privacy checks
* Chatbot safety and boundaries
* Any evaluation not covered by built-in types
## Output Match
Deterministic validation of AI outputs against expected values, without using an LLM judge.
### What It Evaluates
Compares your AI's actual output against an expected value you define per task. Unlike other evaluations that use LLM judgment, Output Match performs exact comparison — making results fully reproducible and deterministic.
Two comparison modes are available:
* **String mode** – Exact string match between output and expected value
* **List mode** – Compare lists of values with flexible matching strategies
### How It Works
#### String Mode
The AI's response is compared directly against the expected string. Optionally, a regex extraction pattern can be applied first to pull a specific value from the response before comparison.
**Pass Criteria:**
* Extracted (or full) output exactly matches the expected string
* Score = 1 (match) or 0 (mismatch)
**Example:**
If your AI returns `"The order status is: SHIPPED"` and you configure:
* Extract pattern: `status is: (\w+)` (capture group 1)
* Expected: `SHIPPED`
The evaluation extracts `SHIPPED` from the response and compares it to the expected value → ✅ Pass.
#### List Mode
The AI's response is parsed as a list and compared against an expected list of values. Two matching strategies are available:
**Exact Unordered** – Both lists must contain exactly the same items (order doesn't matter).
* Score = 1 (exact match) or 0 (mismatch)
**Contains** – Measures overlap between the output and expected lists using a configurable metric:
* **Precision** – What fraction of the output items are correct?
* **Recall** – What fraction of the expected items are present?
* **F1** – Harmonic mean of precision and recall
**Pass Criteria:**
* Score ≥ 0.8 (default, configurable per evaluation)
### Configuration
| Setting | Applies To | Description |
| ------------------ | --------------- | ------------------------------------------------------------------- |
| **Type** | All | `string` or `list` — determines comparison mode |
| **Expected** | Per task | The expected output value (string) or values (list) |
| **Match Mode** | List only | `exact_unordered` or `contains` |
| **Score Metric** | List (contains) | `precision`, `recall`, or `f1` (default: `recall`) |
| **Pass Threshold** | List only | Override the default 0.8 threshold (0-1) |
| **Extract** | Optional | Regex pattern to extract value(s) from the output before comparison |
### Score Examples
#### String Mode
| Output | Expected | Result |
| --------- | --------- | ----------------------------------- |
| `SHIPPED` | `SHIPPED` | ✅ Pass (score: 1.0) |
| `shipped` | `SHIPPED` | ❌ Fail (score: 0.0, case-sensitive) |
| `PENDING` | `SHIPPED` | ❌ Fail (score: 0.0) |
#### List Mode (Contains, F1)
| Output | Expected | Precision | Recall | F1 | Result |
| ----------------- | ----------------- | --------- | ------ | ---- | ------ |
| `["a", "b", "c"]` | `["a", "b", "c"]` | 1.0 | 1.0 | 1.0 | ✅ Pass |
| `["a", "b"]` | `["a", "b", "c"]` | 1.0 | 0.67 | 0.8 | ✅ Pass |
| `["a", "b", "d"]` | `["a", "b", "c"]` | 0.67 | 0.67 | 0.67 | ❌ Fail |
| `["a"]` | `["a", "b", "c"]` | 1.0 | 0.33 | 0.5 | ❌ Fail |
### When to Use
* Structured output validation (JSON fields, status codes, categories)
* Classification tasks with known correct answers
* Extraction pipelines where output must match expected values
* Regression testing with deterministic expected outputs
* Any task where you need exact, reproducible pass/fail without LLM judgment
## Best Practices
### Combining Evaluations
Use multiple evaluation types together for comprehensive quality assurance. The right combination depends on what your specific task does:
* **Knowledge Base Q\&A (RAG):** Recall + Fact Checker + Naturalness
* **Creative Content Generation:** Naturalness + Style + Fact Checker (if accuracy matters)
* **Retrieval-Based Customer Support:** Recall + Naturalness + Style + Custom (compliance)
* **Direct Response (no retrieval):** Naturalness + Style + Custom (compliance)
* **Chatbot with Boundaries:** Naturalness + Custom (safety/boundaries) + Custom (compliance)
* **Structured Output:** Output Match + Custom (business logic)
* **Classification / Extraction:** Output Match + Naturalness (if user-facing)
Choose evaluations based on your task's behavior, not just your application type. For example, a customer support application might use different evaluation combinations for retrieval-based responses versus direct answers, and might add Custom evaluations to ensure the chatbot properly refuses out-of-scope requests.
## Issue Creation
When an evaluation fails, Avido automatically creates an issue with:
* **Title** – Evaluation type and failure summary
* **Priority** – HIGH, MEDIUM, or LOW based on severity
* **Description** – Scores, reasoning, and context
* **Trace Link** – Direct access to the full conversation
All issues appear in your [Inbox](/inbox) for triage and resolution.
## Need Help?
* **Email** – [support@avidoai.com](mailto:support@avidoai.com)
For API details and integration guides, see the [API Reference](/api-reference).
# Experiments
Source: https://docs.avidoai.com/experiments
Compare different AI configurations to find what works best for your use case
## What are Experiments?
Experiments let you systematically test different AI configurations against a baseline to find what works best. Instead of guessing which model, prompt, or parameter setting will perform better, you run controlled comparisons across a fixed set of tasks and let the results speak for themselves.
Think of it as A/B testing for your AI pipeline — change one variable at a time, measure the impact, and make data-driven decisions about your configuration.
### Why use Experiments?
| Benefit | What it unlocks |
| ---------------------------- | --------------------------------------------------------------------------- |
| **Data-driven optimization** | Stop guessing — measure which configuration actually performs better |
| **Controlled comparisons** | Test one variable at a time against a fixed baseline for clear results |
| **Safe iteration** | Try new models, prompts, or parameters without affecting production |
| **Team collaboration** | Share experiment results with stakeholders to justify configuration changes |
***
## Key Concepts
### Experiment
An experiment is a container that groups **variants** for comparison. Each experiment is scoped to specific **inference steps** and **tasks**, ensuring all variants are tested under the same conditions.
### Baseline
The baseline is your starting point — typically your current production configuration. All other variants are compared against it. Once the baseline runs, its configuration and task set are locked for the duration of the experiment.
### Variant
A variant represents a specific configuration change you want to test. Each variant modifies **one parameter** for **one inference step**, making it easy to isolate what caused any change in performance. Variants can also branch from other variants to explore incremental improvements.
### Inference Step
An inference step is a named, configurable point in your AI pipeline — for example, a specific LLM call like `response_generator` or `classifier`. When you create an experiment, you select which inference steps are in scope for testing.
Inference steps are identified by their `externalId`, which matches the step names in your application code and webhook payloads.
### Tasks
Tasks are the test cases that each variant runs against. By using the same set of tasks for every variant, you get a fair comparison. Tasks are selected when setting up the experiment and locked once the baseline starts running.
***
## How Experiments Work
Create a new experiment with a name and description. Select the **inference steps** you want to test — these are the configurable points in your AI pipeline that variants will override.
Choose which tasks to include in the experiment. These tasks will be used to evaluate every variant, ensuring consistent comparison conditions.
Set your baseline configuration — this is typically your current production setup. Run the baseline to establish your starting metrics. Once the baseline completes, the task set and parameter scope are locked.
Create variants that change a single parameter (e.g., a different temperature, model, or system prompt). Each variant runs against the same tasks, and results are compared to the baseline automatically.
***
## Experiment Lifecycle
An experiment progresses through several stages:
| Status | Description |
| --------------------- | -------------------------------------------------------------- |
| **Draft** | Initial setup — configuring name, inference steps, and tasks |
| **Baseline Pending** | Tasks selected, ready to configure and run the baseline |
| **Running Baseline** | Baseline variant is executing against selected tasks |
| **Baseline Complete** | Baseline has results; ready to create and run variants |
| **Baseline Failed** | Baseline execution failed; review task configuration and retry |
| **Running Variant** | A variant is currently being tested |
| **Idle** | Waiting for you to create or run the next variant |
| **Completed** | All testing is done; review results and pick a winner |
| **Archived** | Experiment has been archived and is no longer active |
***
## Variant Branching
Variants form a tree structure rooted at the baseline. You can:
* **Branch from the baseline** to test a completely different value for a parameter
* **Branch from another variant** to make incremental changes on top of a previous experiment
Each variant applies a **config patch** — a partial override that changes specific parameters for specific inference steps. The effective configuration is computed by walking the chain from the baseline through each parent, overlaying patches in order.
For example, if Variant A changes `temperature` to `0.3` and Variant B (branched from A) changes `model` to `gpt-4o`, then Variant B's effective config includes both changes.
***
## Configurable Parameters
Each variant can override one of these parameters per inference step:
| Parameter | Description | Example |
| ------------- | --------------------------------- | -------------------------------- |
| `system` | The system message / instructions | `"You are a concise assistant."` |
| `temperature` | Randomness of the output | `0.3` |
| `top_p` | Nucleus sampling threshold | `0.9` |
| `max_tokens` | Maximum response length | `500` |
| `model` | The LLM model to use | `gpt-4o` |
| `verbosity` | Output detail level | `low`, `medium`, `high` |
***
## Understanding Results
After each variant completes, you'll see:
* **Pass Rate** — percentage of tasks that passed (0–100%)
* **Pass Rate vs Baseline** — relative change compared to the baseline
* **Task Breakdown** — total, passed, and failed task counts
* **Completed At** — when the variant finished running
When the experiment is complete, Avido highlights the **best-performing variant** so you can quickly identify the winning configuration.
***
## Webhook Integration
When a test runs as part of an experiment, the [webhook payload](/webhooks#experiments) includes an `experiment` field with configuration overrides for each inference step. Your application applies these overrides before running the LLM call.
```json Example webhook payload with experiment theme={null}
{
"prompt": "Write a concise onboarding email.",
"testId": "123e4567-e89b-12d3-a456-426614174000",
"experiment": {
"experimentId": "aaa11111-bbbb-cccc-dddd-eeeeeeeeeeee",
"experimentVariantId": "fff22222-3333-4444-5555-666666666666",
"overrides": {
"response_generator": {
"temperature": 0.3,
"system": "You are a concise assistant."
}
}
}
}
```
The `overrides` object is keyed by inference step name. Each value contains the parameter overrides to apply for that step.
You don't need to change your trace ingestion code. The `testId` already links the trace back to the correct experiment variant. See the [Webhooks guide](/webhooks#experiments) for full implementation details.
***
## Best Practices
**Start with a clear hypothesis**
Before creating a variant, write down what you expect to happen. For example: "Lowering temperature from 0.7 to 0.3 will reduce hallucinations and improve the pass rate."
**Change one variable at a time**
Isolating a single parameter per variant makes it easy to attribute any performance change to that specific modification.
**Use enough tasks**
The more tasks you include, the more statistically meaningful your results will be. A small task set may produce noisy results.
**Branch to iterate**
If a variant shows promise, branch from it to test further refinements rather than starting over from the baseline.
**Document your findings**
Use the experiment description field to record your hypothesis, and review the results to confirm or refute it. This builds institutional knowledge about what works for your AI system.
***
## Getting Started
1. Navigate to **Experiments** in your application dashboard
2. Click **New Experiment** and give it a name and description
3. Select the inference steps you want to test
4. Choose tasks to evaluate against
5. Configure and run your baseline
6. Create variants to test different configurations
7. Compare results and identify the best-performing setup
Learn how experiment overrides are delivered to your application
Understand how evaluations determine pass/fail for experiment tasks
# Inbox
Source: https://docs.avidoai.com/inbox
Central hub for triaging and managing all AI application issues and regressions

The Avido Inbox is where all issues and regressions in your AI application are gathered, triaged, and assigned. With the Inbox, you know where to start your day, and what issues to tackle first. It also allows for smooth and frictionless collaboration between stakeholders. A response is flagged as providing wrong answers? Assign it to the document owner. An answer about a feature is vague or contradictory? Assign the product manager who can clear it up. Technical error? Route it to the dev in charge.
An AI application is never done, nor perfect. It's a continuous cycle of improvement through collaboration. This is what the Inbox solves.
## What is the Inbox?
The Inbox is a real-time, multi-source queue for all high-priority platform issues. It consolidates test failures, System Journal alerts, customer reports, and API-submitted errors into a single, actionable queue. Every incoming item is automatically summarized, categorized, and prioritized before surfacing to users, who can rapidly triage and assign.
This is a focused, high-signal triage and assignment tool—not a deep workbench or collaborative analysis surface. It's designed to help you quickly understand what's wrong and get it to the right person.
## Issues
Issues are the core of the Inbox. Every regression, bug, potential hallucination, or actual error is processed and added into the Inbox as an issue.
### When Issues Appear
Issues show up when:
* **A test run by Avido fails**: Evaluation tests that don't meet their thresholds automatically create issues
* **System Journal entries flag critical changes**: Configuration changes outside acceptable ranges trigger issues
* **External API submissions**: Your application or third-party services call the Avido `/issues` endpoint
* **Future**: Customer reports and AI Core alerts (planned)
Before getting added to the Inbox, Avido's AI pre-processes each issue to make it actionable for your entire team.
### Pre-Processing Pipeline
One of the core benefits of using Avido is the ability to work from the same truth, even when some stakeholders are technical, like engineers, and some are non-technical like SMEs. To enable this, Avido pre-processes all incoming issues before adding them to the Inbox.
During processing, Avido's AI will:
* **Summarize the issue**: Create both business and technical summaries
* **Estimate impact**: Assess the expected effect this issue will have
* **Assign priority**: Set criticality level (Critical, High, Medium, Low)
* **Find similar issues**: Detect duplicates and related problems using AI embeddings
* **Add metadata**: Include source, timestamps, and relevant context
This allows you to focus on the errors that matter most and keeps everyone working from the same truth about what's happening and how it's affecting the application. Less coordination, faster time-to-fix.
## Using the Inbox
### Accessing Your Inbox
Navigate to the **Inbox** section in your Avido dashboard. You'll see a real-time queue of all unresolved issues, sorted by priority and creation time.
### Understanding Issue Cards
Each issue displays:
* **Priority Badge**: Visual indicator of criticality
* **Source**: Where the issue originated (Test, System Journal, API)
* **Title**: Clear description of the problem
* **Business Summary**: Plain-language explanation (default view)
* **Technical Summary**: Detailed technical context (toggle to view)
* **Metadata**: Creation time, affected systems, related traces
* **Similar Issues**: Count of potentially related problems
### Core Actions
#### Triage Workflow
1. **Review**: Scan the queue, starting with highest priority items
2. **Understand**: Read AI-generated summaries to grasp impact
3. **Act**: Take one of these actions:
* **Assign**: Route to a specific user or team with optional notes
* **Dismiss**: Mark as resolved or non-actionable with a reason
* **Merge**: Combine with similar issues to reduce duplication
#### Bulk Operations
Select multiple issues using checkboxes to:
* Assign all to one person
* Dismiss multiple non-issues
* Apply the same action to related problems
### Business vs Technical Views
Every issue comes with two perspectives:
* **Business Summary** (default): What happened and why it matters, in plain English
* **Technical Summary**: Root cause details, stack traces, and technical context
Toggle between views based on your needs and audience.
## The Issues API
The `/issues` endpoint allows you to create issues and send them straight into the Avido Inbox from any application.
### Example Use Cases
* **Catch technical errors**: Send application errors directly to the Inbox
* **User feedback**: Allow users to report hallucinations or unhelpful answers
* **Support integration**: Let customer service reps create issues from support tools
### API Usage
```bash theme={null}
POST /v0/issues
Authorization: Bearer YOUR_API_KEY
Content-Type: application/json
{
"title": "User reported incorrect product pricing",
"description": "AI provided outdated pricing information",
"priority": "HIGH",
"metadata": {
"conversation_id": "conv_123",
"affected_product": "premium_plan"
}
}
```
Issues sent via the API go through the same pre-processing pipeline as any issue that Avido creates. Include as much context as possible for better summarization and categorization.
**Important**: Always PII-scrub any personal information before sending to the API.
## Deduplication & Similar Issues
The Inbox uses AI embeddings to automatically detect similar issues:
* **Automatic Detection**: Flags potential duplicates with similarity percentages
* **Merge Suggestions**: Recommends combining highly similar issues (>90% similarity)
* **Pattern Recognition**: Groups related issues to reveal systemic problems
This prevents alert fatigue and helps you see the bigger picture when multiple related issues occur.
## Best Practices
### Daily Triage
* Start your day by reviewing new issues in the Inbox
* Focus on High priority items first
* Aim for "Inbox Zero" - clearing all unassigned urgent issues
### Effective Assignment
* Assign based on expertise and current workload
* Add notes when assigning to provide context
* Reassign if someone is overwhelmed
### Maintain Inbox Hygiene
* Dismiss false positives promptly with clear reasons
* Merge duplicates to keep the inbox clean
* Don't let issues accumulate - triage regularly
### Leverage AI Summaries
* Use business summaries for quick understanding
* Switch to technical view when diving into implementation
* Trust the AI prioritization but apply your judgment
## Success Metrics
The Inbox helps you track:
* **Response Time**: How quickly issues are triaged and assigned
* **Resolution Rate**: Percentage of issues successfully resolved
* **False Positive Rate**: How many dismissed issues were non-actionable
* **Pattern Detection**: Recurring issues that indicate systemic problems
## Current Limitations
The Inbox is designed as a triage tool, not a full incident management platform:
* No multi-step workflows or root-cause analysis features
* No deep collaboration workspaces within the Inbox
* Limited to standardized `/issues` API for external submissions
## Getting Started
1. **Automatic Setup**: The Inbox is ready to use immediately
2. **First Issues**: Will appear as soon as tests fail or issues are submitted
3. **Customization**: Contact your Avido team to adjust priority thresholds or configure integrations
The Inbox transforms issue management from scattered alerts across multiple systems into a single source of truth, ensuring your team addresses what matters most and nothing falls through the cracks.
# Welcome to Avido Docs 🚀
Source: https://docs.avidoai.com/introduction
The AI Quality Assurance platform built for fintechs and financial services enterprises.
## Why Avido?
Only 10% of financial enterprises have AI in full production. Avido changes that by providing the quality safety net your AI needs.
* **Evaluation & Testing** – Simulate user interactions to rigorously test AI systems before and after deployment
* **Continuous Monitoring** – Track safety, accuracy, and performance in live production environments
* **Collaborative Tools** – SMEs and developers work together through an intuitive GUI – no coding required for domain experts
* **Compliance-First** – Built for GDPR, EU AI Act with audit trails and standardized QA processes
* **Automated System Journal** – Detect configuration changes automatically and prevent hidden regressions
* **Quickstart** – Upload existing conversations to auto-generate test cases and evaluation criteria
* **Documents** – AI-optimized knowledge management with version control and approval workflows
Whether you're building a support assistant, an autonomous agent, or a RAG pipeline, Avido ensures your AI performs safely, accurately, and in compliance from launch through ongoing operations.
***
## How Avido fits into your app
We're thrilled to share our first public changelog, marking a step forward in our commitment to enhancing the understanding of AI applications and helping enterprises maximize the value of AI with Avido.
### 🚀 Quickstart Workflow
* Upload existing outputs via CSV to automatically generate evaluation cases
* Smart AI-powered categorization of topics and tasks
* Interactive review interface for selecting benchmark outputs
* Automated evaluation criteria generation based on selected examples
### 📊 Improved Scoring System
* Simplified scoring scale (1-5) for more intuitive evaluation
* Updated benchmarking system for better quality assessment
* Refined evaluation criteria for clearer quality metrics
### 🤖 Smart Analysis
* Automatic topic detection from output patterns
* Task identification based on user intentions
* Intelligent grouping of similar outputs
* Automated quality scoring of historical outputs
### 💡 Enhanced Review Experience
* Visual topic distribution analysis
* Side-by-side conversation comparison
* Guided selection of benchmark outputs
* Contextual feedback collection for evaluation criteria
# Documents
Source: https://docs.avidoai.com/documents
Knowledge management system for creating, versioning, and optimizing RAG-ready content

The Documents tool allows you to easily format and split your content into RAG-ready documents. It's your central knowledge base where teams can collaborate on creating, refining, and approving the content that powers your AI application. Whether you're building customer support bots, internal knowledge assistants, or any RAG-based system, Documents ensures your content is properly structured, versioned, and optimized for AI retrieval.
## What are Documents?
Documents in Avido are structured content pieces designed specifically for Retrieval-Augmented Generation (RAG) systems. Unlike traditional document management, Avido Documents are:
* **AI-Optimized**: Automatically chunked and formatted for optimal retrieval
* **Version-Controlled**: Maintain approved versions in production while working on improvements
* **Collaborative**: Multiple team members can work on drafts without affecting live content
* **Traceable**: Every change is tracked for compliance and quality control
## Key Features
### Document Creation & Import
Documents can be created in multiple ways:
* **Manual Creation**: Write and format content directly in the Avido editor
* **Web Scraping**: Import content from any public URL
* **File Upload**: Upload existing documents (coming soon)
* **API Integration**: Programmatically create and manage documents
### AI-Powered Optimization
The platform includes intelligent document optimization that:
* **Reformats for RAG**: Structures content for better chunking and retrieval
* **Improves Clarity**: Enhances readability while preserving meaning
* **Maintains Consistency**: Ensures uniform formatting across your knowledge base
* **Preserves Intent**: Keeps the original message and tone intact
### Version Management
Every document supports comprehensive versioning:
#### Version States
* **APPROVED**: Live production version served by APIs
* **DRAFT**: Work-in-progress version for collaboration
* **REVIEW**: Pending approval from designated reviewers
* **ARCHIVED**: Historical versions for reference
#### Version Workflow
1. Create new versions from any existing version
2. Collaborate on drafts without affecting production
3. Submit for review when ready
4. Approve to make it the live version
5. Previous approved versions are automatically archived
### Approval Workflow
Documents can require approval before going live:
* **Assign Reviewers**: Designate who needs to approve changes
* **Email Notifications**: Reviewers are notified when approval is needed
* **Audit Trail**: Track who approved what and when
* **Compliance Ready**: Meet regulatory requirements for content control
## Using Documents
### Creating Your First Document
1. Navigate to the **Documents** section in your Avido dashboard
2. Click **New Document**
3. Choose your creation method:
* **Write**: Start with the built-in editor
* **Import from URL**: Scrape content from a website
* **Upload**: Import existing files (if enabled)
### Document Editor
The editor provides a rich set of formatting tools:
* **Markdown Support**: Write in markdown for quick formatting
* **Visual Editor**: Use the toolbar for formatting without markdown knowledge
* **Preview Mode**: See how your document will appear to users
* **Auto-Save**: Never lose your work with automatic saving
### Working with Versions
#### Creating a New Version
1. Open any document
2. Click **Create New Version** in the version sidebar
3. Add version notes describing your changes
4. Edit the content as needed
5. Save as draft or submit for review
#### Version History Sidebar
The sidebar shows:
* All versions with their status badges
* Creator and approval information
* Version notes and timestamps
* Quick actions for each version
#### Comparing Versions
1. Select two versions to compare
2. View side-by-side differences
3. See what was added, removed, or changed
4. Understand the evolution of your content
### Document Optimization
Use AI to improve your documents:
1. Open any document
2. Click **Optimize Document**
3. Review the AI-suggested improvements
4. Accept, reject, or modify suggestions
5. Save the optimized version
The optimizer helps with:
* Breaking content into logical sections
* Improving readability and clarity
* Standardizing formatting
* Enhancing retrieval effectiveness
### API Access
Documents are accessible via the Avido API:
```bash theme={null}
# Get all approved documents
GET /v0/documents
Authorization: Bearer YOUR_API_KEY
# Get a specific document
GET /v0/documents/{id}
# Include draft versions
GET /v0/documents?include_drafts=true
# Create a new document
POST /v0/documents
Content-Type: application/json
{
"title": "Product FAQ",
"content": "# Frequently Asked Questions...",
"metadata": {
"category": "support",
"product": "main"
}
}
```
### Integration with Testing
Documents integrate seamlessly with Avido's testing framework:
* **Knowledge Coverage**: Test if your documents cover all required topics
* **MECE Analysis**: Ensure content is Mutually Exclusive and Collectively Exhaustive
* **Task Mapping**: Verify documents address all user tasks
Tests automatically use approved versions unless configured otherwise.
## Best Practices
### Content Organization
* **Use Clear Titles**: Make documents easily discoverable
* **Add Metadata**: Tag documents with categories, products, or teams
* **Structure Hierarchically**: Use headings to create logical sections
* **Keep Focused**: One topic per document for better retrieval
### Version Management
* **Document Changes**: Always add clear version notes
* **Review Before Approval**: Have subject matter experts review changes
* **Test Before Production**: Run coverage tests on new versions
* **Archive Strategically**: Keep important historical versions accessible
### Collaboration
* **Assign Ownership**: Each document should have a clear owner
* **Use Draft Status**: Work on improvements without affecting production
* **Communicate Changes**: Notify stakeholders of significant updates
* **Regular Reviews**: Schedule periodic content audits
### RAG Optimization
* **Chunk-Friendly Content**: Write in digestible sections
* **Avoid Redundancy**: Don't duplicate information across documents
* **Use Examples**: Include concrete examples for better context
* **Update Regularly**: Keep content current and accurate
## Document Lifecycle
### 1. Creation Phase
* Identify knowledge gaps
* Create initial content
* Format for readability
* Add relevant metadata
### 2. Optimization Phase
* Run AI optimization
* Test with knowledge coverage
* Refine based on feedback
* Ensure completeness
### 3. Review Phase
* Submit for approval
* Gather stakeholder feedback
* Make necessary revisions
* Document decisions
### 4. Production Phase
* Approve for production use
* Monitor retrieval performance
* Track usage in traces
* Gather user feedback
### 5. Maintenance Phase
* Regular content audits
* Update outdated information
* Create new versions as needed
* Archive obsolete content
## Advanced Features
### Traceability
When documents are used in AI responses, Avido tracks:
* Which documents were retrieved
* How they influenced the response
This creates a feedback loop for continuous improvement.
## Getting Started
1. **Define Your Knowledge Base**: Identify what content your AI needs
2. **Create Initial Documents**: Start with your most critical content
3. **Optimize and Test**: Use AI optimization and run coverage tests
4. **Review and Approve**: Get stakeholder sign-off
5. **Monitor and Iterate**: Track usage and improve based on feedback
Documents transform static knowledge into dynamic, AI-ready content that evolves with your application's needs, ensuring your AI always has access to accurate, approved, and optimized information.
# Evaluations
Source: https://docs.avidoai.com/evaluations
Built-in and custom evaluation types to measure AI quality, safety, and performance.
## Overview
Avido provides six evaluation types to measure different aspects of AI quality. Each evaluation is applied to tasks, then runs automatically when those tasks execute, providing actionable insights when quality standards aren't met.
| Evaluation Type | Purpose | Score Range | Pass Threshold |
| ---------------- | -------------------------------- | ----------- | -------------- |
| **Naturalness** | Human-like communication quality | 1-5 | 3.5 |
| **Style** | Brand guideline compliance | 1-5 | 3.5 |
| **Recall** | RAG pipeline performance | 0-1 | 0.5 |
| **Fact Checker** | Factual accuracy vs ground truth | 0-1 | 0.8 |
| **Custom** | Domain-specific criteria | 0-1 | 0.5 |
| **Output Match** | Deterministic output validation | 0-1 | 0.8 |
## Naturalness
Measures how natural, engaging, and clear your AI's responses are to users.
### What It Evaluates
The Naturalness evaluation assesses five dimensions of response quality:
* **Coherence** – Logical flow and consistency of ideas
* **Engagingness** – Ability to capture and maintain user interest
* **Naturalness** – Human-like language and tone
* **Relevance** – On-topic responses that address the user's intent
* **Clarity** – Clear, understandable language without ambiguity
### How It Works
An LLM evaluates your AI's response across all five dimensions on a 1-5 scale. The overall score is the average of these dimensions.
**Pass Criteria:**
* All five dimensions must score ≥ 3.5
* Average score ≥ 3.5
This ensures no single dimension fails even if the overall average is high.
### Example Results
| Coherence | Engagingness | Naturalness | Relevance | Clarity | Overall | Result |
| --------- | ------------ | ----------- | --------- | ------- | ------- | ----------------------- |
| 5 | 5 | 5 | 5 | 5 | 5.0 | ✅ Pass |
| 4 | 4 | 4 | 4 | 4 | 4.0 | ✅ Pass |
| 5 | 5 | 5 | 5 | 2 | 4.4 | ❌ Fail (Clarity \< 3.5) |
### When to Use
* Conversational AI and chatbots
* Customer support automation
* Content generation systems
* Any user-facing AI interactions
## Style
Evaluates whether responses adhere to your organization's style guidelines and brand voice.
### What It Evaluates
A single comprehensive score (1-5) based on your custom style guide, measuring:
* Tone and voice consistency
* Terminology usage
* Format and structure requirements
* Brand-specific guidelines
* Reading level and complexity
### How It Works
You provide a style guide document that defines your brand's communication standards. An LLM evaluates each response against this guide and provides:
* A score from 1-5
* Detailed analysis explaining the rating
**Pass Criteria:**
* Score ≥ 3.5
### Example Style Guide Elements
```markdown theme={null}
# Customer Support Style Guide
**Tone:** Professional yet friendly, never casual
**Voice:** Active voice preferred, clear and direct
**Terminology:** Use "account" not "profile", "transfer" not "send"
**Format:** Start with acknowledgment, provide solution, end with offer to help
**Constraints:** Keep responses under 100 words when possible
```
### When to Use
* Brand-critical communications
* Multi-channel consistency (chat, email, voice)
* Customer-facing applications where brand matters
Note: For regulated industries with strict compliance requirements, use Custom evaluations instead.
## Recall (RAG Evaluation)
Comprehensive evaluation of Retrieval-Augmented Generation (RAG) pipeline quality.
### What It Evaluates
Four metrics that measure different aspects of RAG performance:
* **Context Relevancy** – Are retrieved documents relevant to the query?
* **Context Precision** – How well-ranked are the retrieved documents?
* **Faithfulness** – Is the answer grounded in the retrieved context?
* **Answer Relevancy** – Does the answer address the user's question?
### How It Works
Each metric produces a score from 0-1 (higher is better). The overall score is the average of Context Precision, Faithfulness, and Answer Relevancy.
**Pass Criteria:**
* Context Precision ≥ 0.5
* Faithfulness ≥ 0.5
* Answer Relevancy ≥ 0.5
Note: Context Relevancy is computed for observability but doesn't affect pass/fail status.
### Score Interpretation
| Score Range | Interpretation | Action Required |
| ----------- | --------------------- | ----------------------- |
| 0.8 - 1.0 | Excellent performance | Monitor |
| 0.5 - 0.8 | Acceptable quality | Optimize if critical |
| 0.0 - 0.5 | Poor performance | Investigate immediately |
### Common Issues and Solutions
| Low Metric | Likely Cause | Solution |
| ----------------- | ------------------------------------ | ---------------------------------------------- |
| Context Precision | Too many irrelevant chunks retrieved | Reduce top\_k, improve filters |
| Context Relevancy | Embedding/index drift | Retrain embeddings, update index |
| Faithfulness | Model hallucinating | Add grounding instructions, reduce temperature |
| Answer Relevancy | Answer drifts off-topic | Improve prompt focus, add constraints |
### When to Use
* Knowledge base search and retrieval
* Document Q\&A systems
* RAG pipelines
* Any system combining retrieval with generation
## Fact Checker
Validates factual accuracy of AI responses against ground truth.
### What It Evaluates
Compares AI-generated statements with known correct information, classifying each statement as:
* **True Positives (TP)** – Correct facts present in the response
* **False Positives (FP)** – Incorrect facts in the response
* **False Negatives (FN)** – Correct facts omitted from the response
### How It Works
An LLM extracts factual statements from both the AI response and ground truth, then classifies them. The F1 score measures accuracy:
```
F1 = TP / (TP + 0.5 × (FP + FN))
```
**Pass Criteria:**
* F1 score ≥ 0.8
This allows high-quality answers with minor omissions while maintaining strict accuracy standards.
### Example Classification
**Question:** "What powers the sun?"
**Ground Truth:** "The sun is powered by nuclear fusion. In its core, hydrogen atoms fuse to form helium, releasing tremendous energy."
**AI Response:** "The sun is powered by nuclear fission, similar to nuclear reactors, and provides light to the solar system."
**Classification:**
* TP: \["Provides light to the solar system"]
* FP: \["Powered by nuclear fission", "Similar to nuclear reactors"]
* FN: \["Powered by nuclear fusion", "Hydrogen fuses to form helium"]
* F1 Score: 0.20 → ❌ Fail
### Score Examples
| TP | FP | FN | F1 Score | Result | Notes |
| -- | -- | -- | -------- | ------ | ------------------------- |
| 5 | 0 | 0 | 1.0 | ✅ Pass | Perfect accuracy |
| 5 | 0 | 1 | 0.91 | ✅ Pass | Minor omission acceptable |
| 5 | 1 | 0 | 0.91 | ✅ Pass | Minor error acceptable |
| 4 | 1 | 0 | 0.8 | ✅ Pass | Boundary case |
| 3 | 0 | 2 | 0.75 | ❌ Fail | Too many omissions |
| 1 | 4 | 0 | 0.33 | ❌ Fail | Mostly incorrect |
### When to Use
* Financial data and calculations
* Medical or legal information
* Product specifications and features
* Any domain where factual accuracy is critical
## Custom
Create domain-specific evaluations for your unique business requirements.
### What It Evaluates
Whatever you define in a custom criterion. Common use cases:
* Regulatory compliance checks
* Schema or format validation
* Latency or performance SLAs
* Business logic requirements
* Security and privacy rules
### How It Works
You provide a criterion describing what to check. An LLM evaluates the response and returns:
* Binary pass/fail (1 or 0)
* Reasoning explaining the decision
**Pass Criteria:**
* Score = 1 (criterion met)
### Example Criteria
```markdown theme={null}
# Compliance Example
"The response must not mention specific account numbers,
social security numbers, or other PII. Pass if no PII is present."
# Format Example
"The response must be formatted as a JSON object with
'action', 'parameters', and 'reasoning' keys. Pass if valid JSON
with all required keys."
# Business Logic Example
"For loan inquiries, the response must ask for income verification
before discussing loan amounts. Pass if verification is requested first."
# Chatbot Boundaries Example
"When asked to perform actions outside the chatbot's scope (e.g.,
processing refunds, accessing user accounts, making reservations),
the response must politely decline and explain limitations. Pass if
the chatbot appropriately refuses and provides alternative guidance."
```
### When to Use
* Industry-specific compliance requirements
* Custom business rules and workflows
* Structured output validation
* Security and privacy checks
* Chatbot safety and boundaries
* Any evaluation not covered by built-in types
## Output Match
Deterministic validation of AI outputs against expected values, without using an LLM judge.
### What It Evaluates
Compares your AI's actual output against an expected value you define per task. Unlike other evaluations that use LLM judgment, Output Match performs exact comparison — making results fully reproducible and deterministic.
Two comparison modes are available:
* **String mode** – Exact string match between output and expected value
* **List mode** – Compare lists of values with flexible matching strategies
### How It Works
#### String Mode
The AI's response is compared directly against the expected string. Optionally, a regex extraction pattern can be applied first to pull a specific value from the response before comparison.
**Pass Criteria:**
* Extracted (or full) output exactly matches the expected string
* Score = 1 (match) or 0 (mismatch)
**Example:**
If your AI returns `"The order status is: SHIPPED"` and you configure:
* Extract pattern: `status is: (\w+)` (capture group 1)
* Expected: `SHIPPED`
The evaluation extracts `SHIPPED` from the response and compares it to the expected value → ✅ Pass.
#### List Mode
The AI's response is parsed as a list and compared against an expected list of values. Two matching strategies are available:
**Exact Unordered** – Both lists must contain exactly the same items (order doesn't matter).
* Score = 1 (exact match) or 0 (mismatch)
**Contains** – Measures overlap between the output and expected lists using a configurable metric:
* **Precision** – What fraction of the output items are correct?
* **Recall** – What fraction of the expected items are present?
* **F1** – Harmonic mean of precision and recall
**Pass Criteria:**
* Score ≥ 0.8 (default, configurable per evaluation)
### Configuration
| Setting | Applies To | Description |
| ------------------ | --------------- | ------------------------------------------------------------------- |
| **Type** | All | `string` or `list` — determines comparison mode |
| **Expected** | Per task | The expected output value (string) or values (list) |
| **Match Mode** | List only | `exact_unordered` or `contains` |
| **Score Metric** | List (contains) | `precision`, `recall`, or `f1` (default: `recall`) |
| **Pass Threshold** | List only | Override the default 0.8 threshold (0-1) |
| **Extract** | Optional | Regex pattern to extract value(s) from the output before comparison |
### Score Examples
#### String Mode
| Output | Expected | Result |
| --------- | --------- | ----------------------------------- |
| `SHIPPED` | `SHIPPED` | ✅ Pass (score: 1.0) |
| `shipped` | `SHIPPED` | ❌ Fail (score: 0.0, case-sensitive) |
| `PENDING` | `SHIPPED` | ❌ Fail (score: 0.0) |
#### List Mode (Contains, F1)
| Output | Expected | Precision | Recall | F1 | Result |
| ----------------- | ----------------- | --------- | ------ | ---- | ------ |
| `["a", "b", "c"]` | `["a", "b", "c"]` | 1.0 | 1.0 | 1.0 | ✅ Pass |
| `["a", "b"]` | `["a", "b", "c"]` | 1.0 | 0.67 | 0.8 | ✅ Pass |
| `["a", "b", "d"]` | `["a", "b", "c"]` | 0.67 | 0.67 | 0.67 | ❌ Fail |
| `["a"]` | `["a", "b", "c"]` | 1.0 | 0.33 | 0.5 | ❌ Fail |
### When to Use
* Structured output validation (JSON fields, status codes, categories)
* Classification tasks with known correct answers
* Extraction pipelines where output must match expected values
* Regression testing with deterministic expected outputs
* Any task where you need exact, reproducible pass/fail without LLM judgment
## Best Practices
### Combining Evaluations
Use multiple evaluation types together for comprehensive quality assurance. The right combination depends on what your specific task does:
* **Knowledge Base Q\&A (RAG):** Recall + Fact Checker + Naturalness
* **Creative Content Generation:** Naturalness + Style + Fact Checker (if accuracy matters)
* **Retrieval-Based Customer Support:** Recall + Naturalness + Style + Custom (compliance)
* **Direct Response (no retrieval):** Naturalness + Style + Custom (compliance)
* **Chatbot with Boundaries:** Naturalness + Custom (safety/boundaries) + Custom (compliance)
* **Structured Output:** Output Match + Custom (business logic)
* **Classification / Extraction:** Output Match + Naturalness (if user-facing)
Choose evaluations based on your task's behavior, not just your application type. For example, a customer support application might use different evaluation combinations for retrieval-based responses versus direct answers, and might add Custom evaluations to ensure the chatbot properly refuses out-of-scope requests.
## Issue Creation
When an evaluation fails, Avido automatically creates an issue with:
* **Title** – Evaluation type and failure summary
* **Priority** – HIGH, MEDIUM, or LOW based on severity
* **Description** – Scores, reasoning, and context
* **Trace Link** – Direct access to the full conversation
All issues appear in your [Inbox](/inbox) for triage and resolution.
## Need Help?
* **Email** – [support@avidoai.com](mailto:support@avidoai.com)
For API details and integration guides, see the [API Reference](/api-reference).
# Experiments
Source: https://docs.avidoai.com/experiments
Compare different AI configurations to find what works best for your use case
## What are Experiments?
Experiments let you systematically test different AI configurations against a baseline to find what works best. Instead of guessing which model, prompt, or parameter setting will perform better, you run controlled comparisons across a fixed set of tasks and let the results speak for themselves.
Think of it as A/B testing for your AI pipeline — change one variable at a time, measure the impact, and make data-driven decisions about your configuration.
### Why use Experiments?
| Benefit | What it unlocks |
| ---------------------------- | --------------------------------------------------------------------------- |
| **Data-driven optimization** | Stop guessing — measure which configuration actually performs better |
| **Controlled comparisons** | Test one variable at a time against a fixed baseline for clear results |
| **Safe iteration** | Try new models, prompts, or parameters without affecting production |
| **Team collaboration** | Share experiment results with stakeholders to justify configuration changes |
***
## Key Concepts
### Experiment
An experiment is a container that groups **variants** for comparison. Each experiment is scoped to specific **inference steps** and **tasks**, ensuring all variants are tested under the same conditions.
### Baseline
The baseline is your starting point — typically your current production configuration. All other variants are compared against it. Once the baseline runs, its configuration and task set are locked for the duration of the experiment.
### Variant
A variant represents a specific configuration change you want to test. Each variant modifies **one parameter** for **one inference step**, making it easy to isolate what caused any change in performance. Variants can also branch from other variants to explore incremental improvements.
### Inference Step
An inference step is a named, configurable point in your AI pipeline — for example, a specific LLM call like `response_generator` or `classifier`. When you create an experiment, you select which inference steps are in scope for testing.
Inference steps are identified by their `externalId`, which matches the step names in your application code and webhook payloads.
### Tasks
Tasks are the test cases that each variant runs against. By using the same set of tasks for every variant, you get a fair comparison. Tasks are selected when setting up the experiment and locked once the baseline starts running.
***
## How Experiments Work
Create a new experiment with a name and description. Select the **inference steps** you want to test — these are the configurable points in your AI pipeline that variants will override.
Choose which tasks to include in the experiment. These tasks will be used to evaluate every variant, ensuring consistent comparison conditions.
Set your baseline configuration — this is typically your current production setup. Run the baseline to establish your starting metrics. Once the baseline completes, the task set and parameter scope are locked.
Create variants that change a single parameter (e.g., a different temperature, model, or system prompt). Each variant runs against the same tasks, and results are compared to the baseline automatically.
***
## Experiment Lifecycle
An experiment progresses through several stages:
| Status | Description |
| --------------------- | -------------------------------------------------------------- |
| **Draft** | Initial setup — configuring name, inference steps, and tasks |
| **Baseline Pending** | Tasks selected, ready to configure and run the baseline |
| **Running Baseline** | Baseline variant is executing against selected tasks |
| **Baseline Complete** | Baseline has results; ready to create and run variants |
| **Baseline Failed** | Baseline execution failed; review task configuration and retry |
| **Running Variant** | A variant is currently being tested |
| **Idle** | Waiting for you to create or run the next variant |
| **Completed** | All testing is done; review results and pick a winner |
| **Archived** | Experiment has been archived and is no longer active |
***
## Variant Branching
Variants form a tree structure rooted at the baseline. You can:
* **Branch from the baseline** to test a completely different value for a parameter
* **Branch from another variant** to make incremental changes on top of a previous experiment
Each variant applies a **config patch** — a partial override that changes specific parameters for specific inference steps. The effective configuration is computed by walking the chain from the baseline through each parent, overlaying patches in order.
For example, if Variant A changes `temperature` to `0.3` and Variant B (branched from A) changes `model` to `gpt-4o`, then Variant B's effective config includes both changes.
***
## Configurable Parameters
Each variant can override one of these parameters per inference step:
| Parameter | Description | Example |
| ------------- | --------------------------------- | -------------------------------- |
| `system` | The system message / instructions | `"You are a concise assistant."` |
| `temperature` | Randomness of the output | `0.3` |
| `top_p` | Nucleus sampling threshold | `0.9` |
| `max_tokens` | Maximum response length | `500` |
| `model` | The LLM model to use | `gpt-4o` |
| `verbosity` | Output detail level | `low`, `medium`, `high` |
***
## Understanding Results
After each variant completes, you'll see:
* **Pass Rate** — percentage of tasks that passed (0–100%)
* **Pass Rate vs Baseline** — relative change compared to the baseline
* **Task Breakdown** — total, passed, and failed task counts
* **Completed At** — when the variant finished running
When the experiment is complete, Avido highlights the **best-performing variant** so you can quickly identify the winning configuration.
***
## Webhook Integration
When a test runs as part of an experiment, the [webhook payload](/webhooks#experiments) includes an `experiment` field with configuration overrides for each inference step. Your application applies these overrides before running the LLM call.
```json Example webhook payload with experiment theme={null}
{
"prompt": "Write a concise onboarding email.",
"testId": "123e4567-e89b-12d3-a456-426614174000",
"experiment": {
"experimentId": "aaa11111-bbbb-cccc-dddd-eeeeeeeeeeee",
"experimentVariantId": "fff22222-3333-4444-5555-666666666666",
"overrides": {
"response_generator": {
"temperature": 0.3,
"system": "You are a concise assistant."
}
}
}
}
```
The `overrides` object is keyed by inference step name. Each value contains the parameter overrides to apply for that step.
You don't need to change your trace ingestion code. The `testId` already links the trace back to the correct experiment variant. See the [Webhooks guide](/webhooks#experiments) for full implementation details.
***
## Best Practices
**Start with a clear hypothesis**
Before creating a variant, write down what you expect to happen. For example: "Lowering temperature from 0.7 to 0.3 will reduce hallucinations and improve the pass rate."
**Change one variable at a time**
Isolating a single parameter per variant makes it easy to attribute any performance change to that specific modification.
**Use enough tasks**
The more tasks you include, the more statistically meaningful your results will be. A small task set may produce noisy results.
**Branch to iterate**
If a variant shows promise, branch from it to test further refinements rather than starting over from the baseline.
**Document your findings**
Use the experiment description field to record your hypothesis, and review the results to confirm or refute it. This builds institutional knowledge about what works for your AI system.
***
## Getting Started
1. Navigate to **Experiments** in your application dashboard
2. Click **New Experiment** and give it a name and description
3. Select the inference steps you want to test
4. Choose tasks to evaluate against
5. Configure and run your baseline
6. Create variants to test different configurations
7. Compare results and identify the best-performing setup
Learn how experiment overrides are delivered to your application
Understand how evaluations determine pass/fail for experiment tasks
# Inbox
Source: https://docs.avidoai.com/inbox
Central hub for triaging and managing all AI application issues and regressions

The Avido Inbox is where all issues and regressions in your AI application are gathered, triaged, and assigned. With the Inbox, you know where to start your day, and what issues to tackle first. It also allows for smooth and frictionless collaboration between stakeholders. A response is flagged as providing wrong answers? Assign it to the document owner. An answer about a feature is vague or contradictory? Assign the product manager who can clear it up. Technical error? Route it to the dev in charge.
An AI application is never done, nor perfect. It's a continuous cycle of improvement through collaboration. This is what the Inbox solves.
## What is the Inbox?
The Inbox is a real-time, multi-source queue for all high-priority platform issues. It consolidates test failures, System Journal alerts, customer reports, and API-submitted errors into a single, actionable queue. Every incoming item is automatically summarized, categorized, and prioritized before surfacing to users, who can rapidly triage and assign.
This is a focused, high-signal triage and assignment tool—not a deep workbench or collaborative analysis surface. It's designed to help you quickly understand what's wrong and get it to the right person.
## Issues
Issues are the core of the Inbox. Every regression, bug, potential hallucination, or actual error is processed and added into the Inbox as an issue.
### When Issues Appear
Issues show up when:
* **A test run by Avido fails**: Evaluation tests that don't meet their thresholds automatically create issues
* **System Journal entries flag critical changes**: Configuration changes outside acceptable ranges trigger issues
* **External API submissions**: Your application or third-party services call the Avido `/issues` endpoint
* **Future**: Customer reports and AI Core alerts (planned)
Before getting added to the Inbox, Avido's AI pre-processes each issue to make it actionable for your entire team.
### Pre-Processing Pipeline
One of the core benefits of using Avido is the ability to work from the same truth, even when some stakeholders are technical, like engineers, and some are non-technical like SMEs. To enable this, Avido pre-processes all incoming issues before adding them to the Inbox.
During processing, Avido's AI will:
* **Summarize the issue**: Create both business and technical summaries
* **Estimate impact**: Assess the expected effect this issue will have
* **Assign priority**: Set criticality level (Critical, High, Medium, Low)
* **Find similar issues**: Detect duplicates and related problems using AI embeddings
* **Add metadata**: Include source, timestamps, and relevant context
This allows you to focus on the errors that matter most and keeps everyone working from the same truth about what's happening and how it's affecting the application. Less coordination, faster time-to-fix.
## Using the Inbox
### Accessing Your Inbox
Navigate to the **Inbox** section in your Avido dashboard. You'll see a real-time queue of all unresolved issues, sorted by priority and creation time.
### Understanding Issue Cards
Each issue displays:
* **Priority Badge**: Visual indicator of criticality
* **Source**: Where the issue originated (Test, System Journal, API)
* **Title**: Clear description of the problem
* **Business Summary**: Plain-language explanation (default view)
* **Technical Summary**: Detailed technical context (toggle to view)
* **Metadata**: Creation time, affected systems, related traces
* **Similar Issues**: Count of potentially related problems
### Core Actions
#### Triage Workflow
1. **Review**: Scan the queue, starting with highest priority items
2. **Understand**: Read AI-generated summaries to grasp impact
3. **Act**: Take one of these actions:
* **Assign**: Route to a specific user or team with optional notes
* **Dismiss**: Mark as resolved or non-actionable with a reason
* **Merge**: Combine with similar issues to reduce duplication
#### Bulk Operations
Select multiple issues using checkboxes to:
* Assign all to one person
* Dismiss multiple non-issues
* Apply the same action to related problems
### Business vs Technical Views
Every issue comes with two perspectives:
* **Business Summary** (default): What happened and why it matters, in plain English
* **Technical Summary**: Root cause details, stack traces, and technical context
Toggle between views based on your needs and audience.
## The Issues API
The `/issues` endpoint allows you to create issues and send them straight into the Avido Inbox from any application.
### Example Use Cases
* **Catch technical errors**: Send application errors directly to the Inbox
* **User feedback**: Allow users to report hallucinations or unhelpful answers
* **Support integration**: Let customer service reps create issues from support tools
### API Usage
```bash theme={null}
POST /v0/issues
Authorization: Bearer YOUR_API_KEY
Content-Type: application/json
{
"title": "User reported incorrect product pricing",
"description": "AI provided outdated pricing information",
"priority": "HIGH",
"metadata": {
"conversation_id": "conv_123",
"affected_product": "premium_plan"
}
}
```
Issues sent via the API go through the same pre-processing pipeline as any issue that Avido creates. Include as much context as possible for better summarization and categorization.
**Important**: Always PII-scrub any personal information before sending to the API.
## Deduplication & Similar Issues
The Inbox uses AI embeddings to automatically detect similar issues:
* **Automatic Detection**: Flags potential duplicates with similarity percentages
* **Merge Suggestions**: Recommends combining highly similar issues (>90% similarity)
* **Pattern Recognition**: Groups related issues to reveal systemic problems
This prevents alert fatigue and helps you see the bigger picture when multiple related issues occur.
## Best Practices
### Daily Triage
* Start your day by reviewing new issues in the Inbox
* Focus on High priority items first
* Aim for "Inbox Zero" - clearing all unassigned urgent issues
### Effective Assignment
* Assign based on expertise and current workload
* Add notes when assigning to provide context
* Reassign if someone is overwhelmed
### Maintain Inbox Hygiene
* Dismiss false positives promptly with clear reasons
* Merge duplicates to keep the inbox clean
* Don't let issues accumulate - triage regularly
### Leverage AI Summaries
* Use business summaries for quick understanding
* Switch to technical view when diving into implementation
* Trust the AI prioritization but apply your judgment
## Success Metrics
The Inbox helps you track:
* **Response Time**: How quickly issues are triaged and assigned
* **Resolution Rate**: Percentage of issues successfully resolved
* **False Positive Rate**: How many dismissed issues were non-actionable
* **Pattern Detection**: Recurring issues that indicate systemic problems
## Current Limitations
The Inbox is designed as a triage tool, not a full incident management platform:
* No multi-step workflows or root-cause analysis features
* No deep collaboration workspaces within the Inbox
* Limited to standardized `/issues` API for external submissions
## Getting Started
1. **Automatic Setup**: The Inbox is ready to use immediately
2. **First Issues**: Will appear as soon as tests fail or issues are submitted
3. **Customization**: Contact your Avido team to adjust priority thresholds or configure integrations
The Inbox transforms issue management from scattered alerts across multiple systems into a single source of truth, ensuring your team addresses what matters most and nothing falls through the cracks.
# Welcome to Avido Docs 🚀
Source: https://docs.avidoai.com/introduction
The AI Quality Assurance platform built for fintechs and financial services enterprises.
## Why Avido?
Only 10% of financial enterprises have AI in full production. Avido changes that by providing the quality safety net your AI needs.
* **Evaluation & Testing** – Simulate user interactions to rigorously test AI systems before and after deployment
* **Continuous Monitoring** – Track safety, accuracy, and performance in live production environments
* **Collaborative Tools** – SMEs and developers work together through an intuitive GUI – no coding required for domain experts
* **Compliance-First** – Built for GDPR, EU AI Act with audit trails and standardized QA processes
* **Automated System Journal** – Detect configuration changes automatically and prevent hidden regressions
* **Quickstart** – Upload existing conversations to auto-generate test cases and evaluation criteria
* **Documents** – AI-optimized knowledge management with version control and approval workflows
Whether you're building a support assistant, an autonomous agent, or a RAG pipeline, Avido ensures your AI performs safely, accurately, and in compliance from launch through ongoing operations.
***
## How Avido fits into your app
![Diagram showing how Avido fits into your app]() 1. **Avido sends a webhook** – When a test is triggered, Avido sends a POST request to your endpoint with synthetic input and a testId.
2. **You validate the request** – Verify the webhook signature to ensure it's really from Avido.
3. **Run your AI workflow** – Process the synthetic input through your normal application flow.
4. **Log events along the way** – Capture LLM calls, tool usage, retrievals, and other key steps.
5. **Send the trace to Avido** – When your workflow completes, send the full event trace back to Avido.
6. **View evaluation results** – Avido runs your configured evaluations and displays results in the dashboard.
***
## Getting Started
1. **Install an SDK**
```bash theme={null}
npm i @avidoai/sdk-node # Node
pip install avido # Python
```
2. **Setup a webhook endpoint** in your application [Learn more](/webhooks)
3. **Start tracing events** in your application [Learn more](/traces)
4. **Create your knowledge base** with Documents [Learn more](/documents)
```ts theme={null}
client.ingest.create({ events })
```
5. **Upload existing data** to auto-generate test cases and evaluations [Learn more](/quickstart)
6. **Review your baseline performance** in the dashboard
> Prefer pure HTTP? All endpoints are [documented here](/api-reference).
***
## Core concepts
| Concept | TL;DR |
| ------------------ | ------------------------------------------------------------------------------------- |
| **Tests** | Automated runs of your workflow using synthetic input without exposing customer data. |
| **Tasks** | Test cases that can be auto-generated from existing data or created manually. |
| **Webhooks** | Avido triggers tests via POST requests – automated or through the UI. |
| **Traces** | Ordered lists of events that reconstruct a conversation / agent run. |
| **Events** | Atomic pieces of work (`llm`, `tool`, `retriever`, `log`). |
| **Evaluations** | Built-in metrics + custom business logic tests created without code. |
| **Documents** | Version-controlled, RAG-ready content that powers your AI's knowledge base. |
| **Inbox** | Central hub where all issues are captured, summarized, and triaged automatically. |
| **System Journal** | Automatic log of configuration changes and their impact on performance. |
Dive deeper with the sidebar or jump straight to **[Traces](/traces)** to see how instrumentation works.
***
## Need help?
* **Email** – [support@avidoai.com](mailto:support@avidoai.com)
Happy building! ✨
# OpenTelemetry Integration
Source: https://docs.avidoai.com/opentelemetry
Send traces to Avido using standard OpenTelemetry tooling and OpenInference instrumentation.
Already using **OpenTelemetry** or a framework with built-in tracing (Vercel AI SDK, LangChain, LlamaIndex)?
You can send traces straight to Avido — no custom integration code required.
Avido accepts standard **OTLP JSON** payloads and automatically maps
[OpenInference](https://github.com/Arize-ai/openinference) span attributes
and [OTel GenAI semantic conventions](https://opentelemetry.io/docs/specs/semconv/gen-ai/)
into its trace model.
***
## Quick setup
Point your OpenTelemetry exporter at Avido by setting three environment variables:
```bash theme={null}
OTEL_EXPORTER_OTLP_PROTOCOL="http/json"
OTEL_EXPORTER_OTLP_ENDPOINT="https://api.avidoai.com/v0/otel/traces"
OTEL_EXPORTER_OTLP_HEADERS="x-application-id=,x-api-key="
```
| Variable | Description |
| ----------------------------- | --------------------------------------------------------------- |
| `OTEL_EXPORTER_OTLP_PROTOCOL` | Must be `http/json`. Avido does not support gRPC or protobuf. |
| `OTEL_EXPORTER_OTLP_ENDPOINT` | `https://api.avidoai.com/v0/otel/traces` |
| `OTEL_EXPORTER_OTLP_HEADERS` | Your Avido `x-application-id` and `x-api-key`, comma-separated. |
You can find your Application ID and API key in the Avido dashboard under **Settings > API Keys**.
**Disabling instrumentation:** If `OTEL_EXPORTER_OTLP_ENDPOINT` is not set, the Avido
OpenTelemetry integration is automatically disabled. This lets you turn tracing on and off
per environment without code changes.
***
## Sending traces
Once your exporter is configured, traces are sent automatically by your instrumentation library.
You can also send an OTLP payload manually:
```bash cURL theme={null}
curl -X POST https://api.avidoai.com/v0/otel/traces \
-H "Content-Type: application/json" \
-H "x-application-id: " \
-H "x-api-key: " \
-d '{
"resourceSpans": [
{
"scopeSpans": [
{
"spans": [
{
"traceId": "4bf92f3577b34da6a3ce929d0e0e4736",
"spanId": "00f067aa0ba902b7",
"name": "llm.generate",
"startTimeUnixNano": "1737052800000000000",
"endTimeUnixNano": "1737052800500000000",
"attributes": [
{
"key": "openinference.span.kind",
"value": { "stringValue": "LLM" }
},
{
"key": "llm.model_name",
"value": { "stringValue": "gpt-4o-2024-08-06" }
},
{
"key": "input.value",
"value": { "stringValue": "Tell me a joke." }
},
{
"key": "output.value",
"value": { "stringValue": "Why did the chicken cross the road?" }
},
{
"key": "llm.token_count.prompt",
"value": { "intValue": 12 }
},
{
"key": "llm.token_count.completion",
"value": { "intValue": 18 }
}
]
}
]
}
]
}
]
}'
```
A successful request returns the created trace and step IDs — the same response shape as the [`/v0/ingest`](/api-reference/ingestion) endpoint.
***
## How spans are mapped
Avido reads the `openinference.span.kind` attribute on each span and converts it into the
matching Avido step type:
| OpenInference span kind | Avido step type | What gets extracted |
| ------------------------------------- | --------------- | -------------------------------------------------------------- |
| `LLM` | `llm` | Model, input/output messages, token usage, finish reason, cost |
| `TOOL` | `tool` | Tool name, parameters, output, tool call ID |
| `RETRIEVER` / `RERANKER` | `retriever` | Query, retrieved documents |
| `AGENT` | `group` | Agent name, agent ID, child spans nested underneath |
| `CHAIN` | `group` | Orchestration chain name, child spans nested underneath |
| `EMBEDDING`, `GUARDRAIL`, `EVALUATOR` | `log` | Name and metadata |
Spans without a recognised `openinference.span.kind` are stored as `log` steps so nothing is lost.
**Agentic trace support:** `AGENT` and `CHAIN` spans are mapped to `group` steps, preserving
the hierarchical structure of agentic workflows. This means multi-turn agent loops, tool-calling
chains, and orchestration flows are displayed with their full parent-child relationships in the
Avido trace viewer.
***
## Attribute reference
The tables below list every attribute Avido extracts from spans. Any attributes not listed here
are preserved in the step's `metadata` field.
### LLM spans
| Attribute | Mapped to |
| -------------------------------- | ------------------------------------------------------------------------------------------------ |
| `llm.model_name` | Model ID |
| `input.value` | Input |
| `output.value` | Output |
| `llm.input_messages` | Input (preferred over `input.value`) |
| `llm.output_messages` | Output (preferred over `output.value`) |
| `llm.token_count.prompt` | Prompt token count |
| `llm.token_count.completion` | Completion token count |
| `gen_ai.response.finish_reasons` | Finish reason on the LLM end step (`"stop"`, `"tool_calls"`, `"tool_use"`, `"max_tokens"`, etc.) |
### Tool spans
| Attribute | Mapped to |
| ------------------------------ | ----------------------------------------------------------------------- |
| `tool.name` | Step name |
| `tool.parameters` | Tool input |
| `tool.output` | Tool output |
| `tool_call.function.name` | Step name (fallback) |
| `tool_call.function.arguments` | Tool input (fallback) |
| `gen_ai.tool.call.id` | Tool call ID (links the tool invocation to the LLM's tool\_use request) |
### Group spans (Agent / Chain)
| Attribute | Mapped to |
| ------------------- | ---------------------------------------------------- |
| `gen_ai.agent.name` | Step name (falls back to span name) |
| `gen_ai.agent.id` | Group key (falls back to agent name, then span name) |
### Retriever spans
| Attribute | Mapped to |
| --------------------- | --------- |
| `retrieval.query` | Query |
| `retrieval.documents` | Result |
### Common attributes
| Attribute | Mapped to |
| ------------------------ | ----------------------------------------------------- |
| `session.id` | Trace reference ID (links conversations in a session) |
| `gen_ai.conversation.id` | Trace reference ID (alternative to `session.id`) |
| `avido.test.id` | Test ID (connects the trace to an Avido test run) |
**Linking test runs:** `avido.test.id` is a custom Avido attribute — it is not part of
the OpenInference spec. If you're running Avido tests via [webhooks](/webhooks), set this
span attribute to the `testId` from the webhook payload so the trace is automatically
connected to the test run and evaluation results are linked.
***
## Error and status tracking
Avido maps the **OTel span status** to structured error fields on each step:
| OTel span `status.code` | Avido step status |
| ----------------------- | ----------------- |
| `0` (UNSET) | `success` |
| `1` (OK) | `success` |
| `2` (ERROR) | `error` |
When a span has `status.code = 2` (ERROR):
* The step's `status` is set to `error`
* The span's `status.message` is stored in the step's `error` field
* The numeric status code is preserved in `statusCode`
This means failed LLM calls, tool errors, and timeout spans are automatically flagged in
Avido's trace viewer without any extra instrumentation on your side.
***
## Cost tracking
Avido automatically computes the **cost** of LLM steps when token counts are present.
### How it works
1. When an LLM span includes `llm.token_count.prompt` and `llm.token_count.completion`, Avido
looks up the model in the **Model Pricing** table (configurable in your dashboard).
2. Cost is computed as:
`(promptTokens x inputCostPer1kTokens + completionTokens x outputCostPer1kTokens) / 1000`
3. The resulting `costAmount` is stored on the step.
### Trace-level aggregation
After all steps are ingested, Avido computes summary fields on the trace:
| Field | Description |
| ----------------------- | --------------------------------------------- |
| `totalCost` | Sum of all step costs |
| `totalPromptTokens` | Sum of prompt tokens across all LLM steps |
| `totalCompletionTokens` | Sum of completion tokens across all LLM steps |
| `totalDurationMs` | End-to-end trace duration |
| `hasError` | `true` if any step has an error status |
| `stepCount` | Total number of steps in the trace |
These pre-computed fields power the trace list view and enable filtering by cost, duration,
and error state without scanning individual steps.
**Set up Model Pricing** in the Avido dashboard or via the API to enable automatic cost
computation. If no pricing entry exists for a model, the step is ingested without a cost value.
***
## Trace structure
Each OTLP batch creates **one trace** in Avido:
* If a **root span** (no `parentSpanId`) is present, it becomes the trace container.
Its `session.id` or `gen_ai.conversation.id` attribute is used as the trace's `referenceId`.
* If no root span exists, the first span in the batch is used.
* All spans become **steps** nested under the trace, preserving parent-child relationships
via `parentSpanId`.
* Timing fields (`startTimeUnixNano`, `endTimeUnixNano`) are stored as step timestamps with
millisecond duration.
### Understanding `testId` and `traceId`
Two IDs can appear on OTEL traces — here's what each one does:
| Field | How to set it | When to include |
| ---------------- | ----------------------- | ---------------------------------------------------------------------------------------------------------------------------------------------------------------------- |
| `avido.test.id` | Set as a span attribute | **Only** when the trace originates from an Avido test. Pass the `testId` from the webhook payload. Do **not** set it for traces that come from real user interactions. |
| `traceId` (OTLP) | Set on the span | The OTLP `traceId` is converted to a UUID and used to group all spans into a single Avido trace. Keep the **same** `traceId` across all spans in the batch. |
`avido.test.id` links the trace to an Avido test run for evaluation. The OTLP `traceId` groups
spans together. They serve different purposes — do not confuse them.
***
## Agentic trace patterns
Avido is designed to capture complex agentic workflows. Here's how common patterns map through
the OTEL converter:
### Multi-turn tool-calling agent
```
AGENT span (openinference.span.kind=AGENT)
+-- LLM span (kind=LLM, finishReason="tool_calls")
+-- TOOL span (kind=TOOL, gen_ai.tool.call.id="call_abc123")
+-- TOOL span (kind=TOOL, gen_ai.tool.call.id="call_def456")
+-- LLM span (kind=LLM, finishReason="stop")
```
This becomes in Avido:
```
group step (agent)
+-- llm start/end (finishReason: "tool_calls")
+-- tool step (toolCallId: "call_abc123")
+-- tool step (toolCallId: "call_def456")
+-- llm start/end (finishReason: "stop")
```
### Orchestration chain
```
CHAIN span (kind=CHAIN)
+-- RETRIEVER span (kind=RETRIEVER)
+-- LLM span (kind=LLM)
```
Both the outer CHAIN and inner spans are preserved with their full hierarchy.
### Error handling in agents
When a span has `status.code = 2`, the step is marked as `error`. This is useful for tracking
retry patterns:
```
LLM span (status.code=2, status.message="Rate limited") -> status: error
LLM span (status.code=1) -> status: success
```
***
## Vercel AI SDK
If you're using the [Vercel AI SDK](https://sdk.vercel.ai/), Avido also recognises its telemetry attributes as fallbacks:
| Vercel AI SDK attribute | Mapped to |
| --------------------------- | --------------------------------- |
| `ai.response.model` | Model ID (highest priority) |
| `ai.model.id` | Model ID (fallback) |
| `ai.response.text` | Output (fallback) |
| `ai.usage.promptTokens` | Prompt token count (fallback) |
| `ai.usage.completionTokens` | Completion token count (fallback) |
***
## Next steps
* View your traces in the **Traces** page in the dashboard.
* Set up **Model Pricing** in the dashboard to enable automatic cost tracking.
* Compare with the [SDK-based ingestion](/traces) approach if you need finer control.
* Explore the [OpenInference instrumentation libraries](https://github.com/Arize-ai/openinference) for ready-made integrations.
* Check the full endpoint schema in API > Ingestion.
Need help wiring up your stack? [Contact us](mailto:support@avidoai.com) and we'll help you get connected.
# QuickStart
Source: https://docs.avidoai.com/quickstart
The fastest way to set up evaluations for your AI application
Setting up evaluations for an AI application is hard. You need to know what your users actually ask, what your AI is supposed to know, and what rules it has to follow. Then you need to turn all of that into evaluation criteria that catch real problems without flagging false ones. For most teams, this takes weeks of manual work and a lot of guessing.
QuickStart removes the guessing. You hand over your real conversations, your knowledge base, and your policies. Avido reads through everything and builds an evaluation suite that reflects how your AI is actually used and what it's supposed to do. You stay in control: every output is reviewed and approved by your team before it goes live.
## Why QuickStart exists
Most teams trying to evaluate an AI application run into the same wall.
You sit down to write evaluations and quickly realise you don't really know what tasks your users perform with the application. You think you do, but you're guessing. You write evaluations based on what the AI is *supposed* to do, not what users actually ask it. The result is an evaluation suite that misses the real failure modes and over-flags safe responses.
Even when you know the tasks, mapping them to your knowledge base is its own problem. Which articles support which questions? Are there contradictions between documents that would confuse the AI? Are there topics users ask about that nobody has written documentation for yet? You can't answer these questions without reading through everything, and nobody has time for that.
QuickStart solves both. It analyses your conversations to find the tasks that actually matter, checks your knowledge base for gaps and contradictions, turns your policies into evaluation criteria, and runs a first baseline so you have a starting point. What used to take weeks of manual work and produce a guess becomes a structured workflow with full traceability.
## What you get at the end
When QuickStart finishes, your application has:
* A **deduplicated set of tasks** grouped into topics, derived from your real conversations
* **Evaluations** at three scopes (global, topic, task) tied back to the source material that produced them
* A **style guide** generated from your conversations and writing guidelines
* A **baseline evaluation run** with scores you can build from
* **Sign-off from every reviewer** on your team
* Optionally, a **structured knowledge base** if you asked QuickStart to build or restructure one
Everything is traceable. Every evaluation criterion can be traced back through a rule statement to the original sentence in the source document that produced it. When someone asks "why does this rule exist?" months later, you can always answer.
***
## Three tiers of evaluation
Not every rule applies to every conversation. A rule about investment risk disclaimers shouldn't fire on a question about branch opening hours. QuickStart organises evaluations into three tiers so each one runs in the right context.
| Tier | Applies to | Example |
| ---------- | ------------------------ | --------------------------------------------------------- |
| **Global** | Every conversation | No emojis, no swearing, prompt injection protection |
| **Topic** | All tasks within a topic | Investment queries require a risk disclaimer |
| **Task** | A single task | "What is the price of X?" should return an accurate price |
This structure stays with your application after setup and shapes how new evaluations get added later.
***
## What you upload
QuickStart works with three categories of input. Bring whatever combination you have. The system adapts: you can run it with just conversations, just a knowledge base, just a website to scrape, or any mix of the above plus policies and style guides on top. The more you provide, the richer the output, but you don't need a complete set to get started.
### Conversations
Real conversation data from the process you want to evaluate, for example customer support transcripts or chat logs. The dataset should be large enough that the same kind of question appears multiple times, so deduplication has something to work with. Upload via API, direct upload, or a data dump.
### Knowledge base
The articles, help-centre content, or internal documentation your AI relies on. Add it via website scraping or file upload. If you don't have a structured knowledge base yet, QuickStart can build one for you (see below).
### Policies and guidelines
Policies, SOPs, training materials, brand voice guides: any "how we talk to our customers" documents. If rules aren't explicitly written down, QuickStart can also infer them from patterns in your conversations. For example, if no emojis appear anywhere in your conversation data, that becomes "don't use emojis."
***
## Don't have a knowledge base? QuickStart can build one
Plenty of teams don't have a clean, structured knowledge base sitting ready to upload. Maybe the documentation lives across a public help site, a few internal wikis, and the heads of your support team. QuickStart handles this directly: you can ask it to build a knowledge base for you as part of the run.
There are two ways it works, and you can use either or both.
**Build from conversations and scraped pages.** Point QuickStart at your help-centre URL or any other public documentation, and optionally upload your conversations alongside. The system extracts the underlying facts and structures them into proper knowledge base articles, organised by topic, ready to be reviewed and approved.
**Restructure your existing knowledge base.** If you do have documentation but it's messy, scattered, or not organised the way you'd want it organised, QuickStart can ingest it and produce a cleaner, structured version. Same review and approval flow as everything else.
Either way, the knowledge base QuickStart builds is yours. It lives in [Documents](/documents), versioned and editable, and you can keep using it after QuickStart finishes.
***
## How QuickStart works
QuickStart runs as a sequence of stages that alternate between system processing and human review. You approve at each gate before the next stage begins, so you never review evaluations only to discover the underlying knowledge base had contradictions.
The exact stages depend on what you uploaded. If you didn't provide a knowledge base, the KB stages are skipped (or replaced with KB-building if you asked QuickStart to build one). If you didn't provide policies, the policy stages are skipped. The flow adapts to your inputs.
A single screen where you upload everything at once: conversations, knowledge base, and policies. Web scraping runs in the background while you continue.
Avido classifies each uploaded item and routes it to the right downstream processing: conversations, knowledge documents, or policy documents.
Each distinct question or request in your conversations becomes a task. Multi-question conversations get split into multiple tasks. Tasks and topics are then deduplicated within and across conversations. All examples are scrubbed for personally identifiable information before anyone reviews them.
Worked example: 1,000 conversations might produce 1,100 raw tasks (some conversations contain multiple) which deduplicate down to roughly 800 unique tasks.
Your first review gate. You see:
* Every topic with the conversations that produced it
* Conversation count per task, so you can see which tasks come up most
* Topic volume distribution as a percentage
Open a topic to see the underlying tasks. Rename topics to match your internal conventions (for example "credit cards" becomes "cards and payments"). Edit, approve, or remove tasks.
Sign-off requires a confirmation step ("Are you sure? This will be locked"). You can skip the review, but skipping is recorded.
Three checks run against your documentation in parallel:
* **Contradictions and overlaps.** Avido finds documents that say conflicting things, and documents that duplicate each other.
* **Coverage.** For each approved task, Avido checks whether your documentation can actually answer it. Tasks with no supporting article get flagged as gaps.
* **Orphans.** Documents that aren't tied to any task get surfaced, so you can see what's no longer relevant.
For every covered task, Avido extracts atomic fact statements like "The annual fee for a gold credit card is \$150" with full source provenance. These aren't used as evaluation criteria. They're a quality check on the knowledge base itself: surfacing them lets you confirm what your documentation actually says before it gets approved. Once the KB is signed off, you can trust hallucination findings later because you know what the KB was supposed to say in the first place.
Your knowledge base audit, surfaced in one place:
* Coverage percentage per topic, so you know which areas have solid backing and which don't
* Contradictions between documents, with the conflicting passages displayed side by side. You pick which document is authoritative.
* Orphaned documents that aren't tied to any task
* White spots: topics that come up in conversations but have no KB article
You can edit documents in place without leaving the review. Different team members can be assigned to different topic areas, so infrastructure docs go to one reviewer and front-of-house docs go to another. If contradictions remain unresolved, you confirm explicitly that you accept the risk before moving on.
Avido maps the rules in your policy documents to the right scope (global, topic, or task) and produces evaluation definitions for each. A separate process extracts a style guide from your conversations and any explicit writing guidelines.
If you uploaded conversations but no policies, Avido still infers a small set of global rules from conversation patterns.
Review the generated evaluation definitions, grouped by topic, each tagged with its scope. Review the generated style guide. Reviews can be assigned to specific team members the same way as the KB review.
Avido finalises evaluations across all three tiers and links each one back through its rule statement to the original sentence in the source document. This traceability chain is preserved permanently.
Avido runs the new evaluations against your uploaded conversations to produce a first set of scores. This is your starting point for everything that follows.
Sample good and bad results from the baseline. Confirm whether you agree with each verdict. QuickStart cannot close until every assigned reviewer has signed off. Once it does, you get a final report listing the evaluation definitions and the style guide, and your application is ready for ongoing evaluation.
***
## Reviewing as a team
QuickStart is built around the assumption that different parts of the review need different domain experts. The workflow supports this directly.
**Assign reviews to specific team members.** Each topic area can go to a different person. They review on their own schedule.
**Sign-off is tracked per assignee.** QuickStart cannot close until every assigned reviewer has approved their area.
**Skip-with-warning.** Any review step can be skipped, but the system warns you and audit-locks the decision: who skipped what, when, and how long they spent.
**Double opt-in on approvals.** Every approval requires a confirmation step. Once locked, the decision is recorded.
**Full audit log.** Track who reviewed what, how long they spent, how many warnings were skipped, and what was approved. This matters for regulated industries where you need to demonstrate due diligence later.
For most teams setting up QuickStart for the first time, we recommend running 3 to 4 review workshops with the relevant stakeholders rather than reviewing in isolation. Live discussion catches things that asynchronous review misses, especially during the task and topic review stage.
***
## Traceability
Every evaluation produced by QuickStart carries its full origin story:
> Evaluation criterion → rule statement → original sentence or paragraph in the source document (with title)
This matters because evaluations only work if your team trusts them. When an evaluation flags a response and someone asks "why does this rule exist?", you can always trace it back to the policy document, the page, and the exact sentence.
For the fact statements extracted during KB review, each fact stores the source document, the exact quote at the time of extraction (preserved even if the document is later edited), and whether it was generated by QuickStart or added manually by your team. This is what lets you trust hallucination findings later: when the AI says something the KB doesn't support, you can see exactly what the KB *did* say at the moment your team signed off on it.
***
## Scale and timing
A typical QuickStart run takes a few weeks end-to-end, mostly because of stakeholder coordination, not processing time. The processing itself is much faster.
| Stage | Typical bank (\~300 docs) | Large enterprise (\~3,000 docs) |
| -------------------------------- | ------------------------- | ------------------------------- |
| Knowledge base preprocessing | \~3 minutes | \~10 minutes |
| Verification (3 parallel checks) | \~10 minutes | \~30 minutes |
| Fact extraction | \~5 minutes | \~15 minutes |
| **Total processing time** | **\~15 minutes** | **\~45 minutes** |
Expected output: 3 to 8 fact statements per covered task, and somewhere between 5 and 100 contradictions surfaced in the KB review depending on the size and health of your documentation.
***
## Best practices
**Upload more than you think you need.** Deduplication only works if the same task shows up multiple times in your conversation data. Bias towards uploading too much, not too little.
**Don't try to review alone.** The first task and topic review especially benefits from a live workshop with people who actually handle the conversations. They will spot category errors that nobody else will.
**Treat the KB review as a free audit.** The contradictions and white spots QuickStart surfaces are real problems in your knowledge base regardless of whether you ever ship an AI application. Fix them.
**Use your internal language.** Rename auto-generated topics to match the labels your team already uses. This makes evaluations and reports immediately readable when you go live.
**Don't skip review steps without a reason.** They exist because the next stage builds on what you approve. If you have to skip one, leave a note explaining why.
***
## Getting started
Navigate to **QuickStart** in your application dashboard.
Drop in conversations, knowledge base files or URLs, and any policies or style guides you have.
Assign each review stage to the right person on your team. Different topics can go to different people.
Approve as you go. Avido handles the processing in between; you handle the judgement calls.
Once every reviewer has signed off, QuickStart closes and your evaluations are live.
Manage the knowledge base content QuickStart surfaces and reviews
Understand how the evaluations QuickStart generates actually run
# SDK Reference
Source: https://docs.avidoai.com/sdk
Complete reference for the Avido Node.js and Python SDKs.
Avido provides official SDKs for **Node.js / TypeScript** and **Python**.
## Installation
```bash Node theme={null}
npm install @avidoai/sdk-node
```
```bash Python theme={null}
pip install avido
```
***
## Client initialization
Create a client instance with your Application ID and API key.
You can find these in the Avido dashboard under **Settings > API Keys**.
```ts Node theme={null}
import Avido from '@avidoai/sdk-node';
const client = new Avido({
applicationId: process.env['AVIDO_APPLICATION_ID'],
apiKey: process.env['AVIDO_API_KEY'],
});
```
```python Python theme={null}
import os
from avido import Avido
client = Avido(
application_id=os.environ.get("AVIDO_APPLICATION_ID"),
api_key=os.environ.get("AVIDO_API_KEY"),
)
```
Both SDKs read `AVIDO_API_KEY` and `AVIDO_APPLICATION_ID` from environment variables by default.
You only need to pass them explicitly if you want to override the defaults.
***
## Resources
### Ingest
Send trace events to Avido. See the [Tracing guide](/traces) for detailed event type documentation.
```ts Node theme={null}
const response = await client.ingest.create({
events: [
{ type: 'trace', timestamp: new Date().toISOString(), testId: '...' },
{ type: 'llm', event: 'start', timestamp: '...', modelId: 'gpt-4o', input: [...] },
],
});
```
```python Python theme={null}
response = client.ingest.create(
events=[
{"type": "trace", "timestamp": "...", "testId": "..."},
{"type": "llm", "event": "start", "timestamp": "...", "modelId": "gpt-4o", "input": [...]},
],
)
```
| Method | Endpoint | Description |
| ----------------- | ----------------- | ------------------------------- |
| `ingest.create()` | `POST /v0/ingest` | Ingest an array of trace events |
***
### Validate Webhook
Verify that an incoming webhook request was signed by Avido. See the [Webhooks guide](/webhooks) for a full integration example.
```ts Node theme={null}
const { valid } = await client.validateWebhook.validate({
signature: req.get('x-avido-signature'),
timestamp: req.get('x-avido-timestamp'),
body: req.body,
});
```
```python Python theme={null}
resp = client.validate_webhook.validate(
signature=request.headers.get("x-avido-signature"),
timestamp=request.headers.get("x-avido-timestamp"),
body=request.get_json(),
)
# resp.valid -> bool
```
| Method | Endpoint | Description |
| ---------------------------- | --------------------------- | ---------------------------- |
| `validateWebhook.validate()` | `POST /v0/validate-webhook` | Validate a webhook signature |
***
### Traces
Retrieve and list traces that have been ingested.
```ts Node theme={null}
// List traces with pagination
const traces = await client.traces.list({ limit: 20, offset: 0 });
// Get a specific trace
const trace = await client.traces.retrieve('trace-uuid');
```
```python Python theme={null}
# List traces with pagination
traces = client.traces.list(limit=20, offset=0)
# Get a specific trace
trace = client.traces.retrieve("trace-uuid")
```
| Method | Endpoint | Description |
| --------------------- | --------------------- | ------------------------ |
| `traces.list()` | `GET /v0/traces` | List traces (paginated) |
| `traces.retrieve(id)` | `GET /v0/traces/{id}` | Get a single trace by ID |
***
### Applications
Manage your Avido applications programmatically.
```ts Node theme={null}
// Create a new application
const newApp = await client.applications.create({ name: 'My Chatbot' });
// List all applications
const apps = await client.applications.list({ limit: 10 });
// Get a specific application
const app = await client.applications.retrieve('app-uuid');
```
```python Python theme={null}
# Create a new application
app = client.applications.create(name="My Chatbot")
# List all applications
apps = client.applications.list(limit=10)
# Get a specific application
app = client.applications.retrieve("app-uuid")
```
| Method | Endpoint | Description |
| --------------------------- | --------------------------- | ----------------------------- |
| `applications.create()` | `POST /v0/applications` | Create a new application |
| `applications.retrieve(id)` | `GET /v0/applications/{id}` | Get an application |
| `applications.list()` | `GET /v0/applications` | List applications (paginated) |
***
### Tasks
Manage test tasks and trigger them programmatically.
```ts Node theme={null}
// Create a task
const task = await client.tasks.create({
name: 'Onboarding email test',
prompt: 'Write a concise onboarding email for new users.',
});
// List tasks
const tasks = await client.tasks.list({ limit: 10 });
// Trigger a task
await client.tasks.trigger({ taskId: 'task-uuid' });
```
```python Python theme={null}
# Create a task
task = client.tasks.create(
name="Onboarding email test",
prompt="Write a concise onboarding email for new users.",
)
# List tasks
tasks = client.tasks.list(limit=10)
# Trigger a task
client.tasks.trigger(task_id="task-uuid")
```
| Method | Endpoint | Description |
| -------------------- | ------------------------ | ---------------------- |
| `tasks.create()` | `POST /v0/tasks` | Create a new task |
| `tasks.retrieve(id)` | `GET /v0/tasks/{id}` | Get a task |
| `tasks.list()` | `GET /v0/tasks` | List tasks (paginated) |
| `tasks.trigger()` | `POST /v0/tasks/trigger` | Trigger a task to run |
***
### Tests
View test definitions and results.
```ts Node theme={null}
const tests = await client.tests.list({ limit: 10 });
const test = await client.tests.retrieve('test-uuid');
```
```python Python theme={null}
tests = client.tests.list(limit=10)
test = client.tests.retrieve("test-uuid")
```
| Method | Endpoint | Description |
| -------------------- | -------------------- | ---------------------- |
| `tests.retrieve(id)` | `GET /v0/tests/{id}` | Get a test |
| `tests.list()` | `GET /v0/tests` | List tests (paginated) |
***
### Annotations
Add annotations to traces for labeling and review.
```ts Node theme={null}
const annotation = await client.annotations.create({
traceId: 'trace-uuid',
label: 'incorrect',
comment: 'The response contained outdated pricing.',
});
const annotations = await client.annotations.list({ limit: 10 });
```
```python Python theme={null}
annotation = client.annotations.create(
trace_id="trace-uuid",
label="incorrect",
comment="The response contained outdated pricing.",
)
annotations = client.annotations.list(limit=10)
```
| Method | Endpoint | Description |
| -------------------------- | -------------------------- | ---------------------------- |
| `annotations.create()` | `POST /v0/annotations` | Create an annotation |
| `annotations.retrieve(id)` | `GET /v0/annotations/{id}` | Get an annotation |
| `annotations.list()` | `GET /v0/annotations` | List annotations (paginated) |
***
### Runs
View test run history and results.
```ts Node theme={null}
const runs = await client.runs.list({ limit: 10 });
const run = await client.runs.retrieve('run-uuid');
```
```python Python theme={null}
runs = client.runs.list(limit=10)
run = client.runs.retrieve("run-uuid")
```
| Method | Endpoint | Description |
| ------------------- | ------------------- | --------------------- |
| `runs.retrieve(id)` | `GET /v0/runs/{id}` | Get a run |
| `runs.list()` | `GET /v0/runs` | List runs (paginated) |
***
### Topics
Organize and group related content.
```ts Node theme={null}
const topic = await client.topics.create({ name: 'Pricing questions' });
const topics = await client.topics.list({ limit: 10 });
```
```python Python theme={null}
topic = client.topics.create(name="Pricing questions")
topics = client.topics.list(limit=10)
```
| Method | Endpoint | Description |
| --------------------- | --------------------- | ----------------------- |
| `topics.create()` | `POST /v0/topics` | Create a topic |
| `topics.retrieve(id)` | `GET /v0/topics/{id}` | Get a topic |
| `topics.list()` | `GET /v0/topics` | List topics (paginated) |
***
### Style Guides
Manage evaluation style guides.
```ts Node theme={null}
const guide = await client.styleGuides.create({
name: 'Formal tone',
content: 'Responses should use professional language...',
});
const guides = await client.styleGuides.list({ limit: 10 });
```
```python Python theme={null}
guide = client.style_guides.create(
name="Formal tone",
content="Responses should use professional language...",
)
guides = client.style_guides.list(limit=10)
```
| Method | Endpoint | Description |
| -------------------------- | --------------------------- | ----------------------------- |
| `styleGuides.create()` | `POST /v0/style-guides` | Create a style guide |
| `styleGuides.retrieve(id)` | `GET /v0/style-guides/{id}` | Get a style guide |
| `styleGuides.list()` | `GET /v0/style-guides` | List style guides (paginated) |
***
### Documents
Manage knowledge base documents for RAG workflows.
```ts Node theme={null}
// Upload a document
const doc = await client.documents.create({
name: 'Product FAQ',
content: 'Frequently asked questions about our product...',
});
// List documents
const docs = await client.documents.list({ limit: 10 });
// List chunked documents (for RAG inspection)
const chunks = await client.documents.listChunks({ limit: 10 });
```
```python Python theme={null}
# Upload a document
doc = client.documents.create(
name="Product FAQ",
content="Frequently asked questions about our product...",
)
# List documents
docs = client.documents.list(limit=10)
# List chunked documents (for RAG inspection)
chunks = client.documents.list_chunks(limit=10)
```
| Method | Endpoint | Description |
| ------------------------ | --------------------------- | -------------------------------- |
| `documents.create()` | `POST /v0/documents` | Upload a document |
| `documents.retrieve(id)` | `GET /v0/documents/{id}` | Get a document |
| `documents.list()` | `GET /v0/documents` | List documents (paginated) |
| `documents.listChunks()` | `GET /v0/documents/chunked` | List document chunks (paginated) |
***
## Error handling
Both SDKs throw typed errors for API failures.
```ts Node theme={null}
import Avido from '@avidoai/sdk-node';
try {
await client.traces.retrieve('nonexistent-id');
} catch (err) {
if (err instanceof Avido.NotFoundError) {
console.log('Trace not found');
} else if (err instanceof Avido.AuthenticationError) {
console.log('Invalid API key');
} else {
throw err;
}
}
```
```python Python theme={null}
from avido import Avido, NotFoundError, AuthenticationError
try:
client.traces.retrieve("nonexistent-id")
except NotFoundError:
print("Trace not found")
except AuthenticationError:
print("Invalid API key")
```
***
## Pagination
List endpoints return paginated results. Use `limit` and `offset` to page through data.
```ts Node theme={null}
// Fetch all traces in pages of 50
let offset = 0;
const limit = 50;
while (true) {
const page = await client.traces.list({ limit, offset });
for (const trace of page.data) {
console.log(trace.id);
}
if (page.data.length < limit) break;
offset += limit;
}
```
```python Python theme={null}
# Fetch all traces in pages of 50
offset = 0
limit = 50
while True:
page = client.traces.list(limit=limit, offset=offset)
for trace in page.data:
print(trace.id)
if len(page.data) < limit:
break
offset += limit
```
***
## TypeScript types
The Node SDK exports all request and response types for full type safety.
```ts theme={null}
import Avido from '@avidoai/sdk-node';
import type {
IngestCreateResponse,
ValidateWebhookValidateResponse,
TraceRetrieveResponse,
TraceListResponse,
} from '@avidoai/sdk-node/resources';
```
***
## Python type imports
The Python SDK exports typed response objects.
```python theme={null}
from avido.types import (
IngestCreateResponse,
ValidateWebhookValidateResponse,
TraceRetrieveResponse,
TraceListResponse,
Task,
TaskResponse,
Annotation,
AnnotationResponse,
)
```
***
## Next steps
* Follow the [Tracing guide](/traces) to instrument your LLM pipeline.
* Set up [Webhooks](/webhooks) for automated test triggering.
* Explore the full HTTP API in the API Reference.
# System Journal
Source: https://docs.avidoai.com/system-journal
Automated monitoring and documentation of AI model changes for compliance and operational excellence

## What is the System Journal?
The System Journal is an intelligent monitoring system that automatically tracks and documents all significant changes in your AI model deployments. It serves as your automated compliance officer and operational guardian, creating a comprehensive audit trail of configuration changes, parameter modifications, and data anomalies across all your AI traces.
Think of it as a "black box recorder" for your AI systems—capturing every meaningful change that could impact model behavior, compliance, or evaluation accuracy.
### Key Capabilities
* **Automatic Change Detection**: Identifies when model parameters (temperature, max tokens, top-k, etc.) change between deployments
* **Missing Parameter Alerts**: Flags when critical parameters required for evaluation or compliance are absent
* **Intelligent Journal Entries**: Generates human-readable descriptions of what changed, when, and by how much
* **Complete Audit Trail**: Maintains a tamper-proof history of all configuration changes for regulatory compliance
* **Zero Manual Overhead**: Operates completely automatically in the background
## Why Use the System Journal?
### For Engineering Teams
**Prevent Configuration Drift**
You'll immediately know when model parameters change unexpectedly. No more debugging mysterious behavior changes or performance degradations caused by unnoticed configuration updates.
**Accelerate Incident Response**
When something goes wrong, the System Journal provides instant visibility into what changed and when. Instead of digging through logs, you can see at a glance: "LLM Temperature Changed: 0.4 → 0.9" with timestamps and context.
**Maintain Evaluation Integrity**
Missing parameters can invalidate your evaluation results. The System Journal ensures you catch these gaps before they impact your metrics or decision-making.
### For Compliance Teams
**Regulatory Readiness**
Financial institutions face strict requirements for AI transparency and explainability. The System Journal automatically maintains the comprehensive audit trails regulators expect, reducing preparation time from weeks to minutes.
**Risk Management**
Track when risk-relevant parameters change (like content filtering thresholds or decision boundaries) and ensure they stay within approved ranges.
**Evidence Collection**
Every journal entry includes timestamps, before/after values, and trace context—everything needed for compliance reporting or incident investigation.
### Real-World Impact
Consider this scenario: A wealth management firm's AI-powered client communication system suddenly starts generating longer, more creative responses. Without the System Journal, this could go unnoticed for weeks. With it, compliance immediately sees: "LLM Temperature Changed: 0.2 → 0.8" and "Max Tokens Changed: 150 → 500"—catching a potentially risky configuration change before it impacts clients.
## How to Use the System Journal
### Accessing the System Journal
1. Navigate to the **System Journal** section in your Avido dashboard
2. You'll see a chronological list of all journal entries across your AI systems
### Understanding Journal Entries
Each System Journal entry includes:
* **Type Indicator**: Visual icon showing the category (change, missing parameter, error)
* **Clear Description**: Plain-language explanation like "Model version changed from gpt-4-turbo to gpt-4o"
* **Timestamp**: Exact time the change was detected
* **Trace Link**: Direct connection to the affected trace for deeper investigation
* **Change Details**: Before and after values for parameter changes
### Viewing Journal Entries in Context
#### On the Dashboard
System Journal entries appear as reference lines on your metric graphs, showing exactly when changes occurred relative to performance shifts.
#### In Trace Details
When viewing individual traces, associated journal entries are displayed inline, providing immediate context for that specific execution.
#### In the System Journal List
The dedicated System Journal page provides:
* Filtering by entry type, date range, or affected system
* Sorting by relevance, time, or severity
* Bulk actions for reviewing multiple entries
### Common Workflows
#### Investigating Performance Changes
1. Notice a metric shift on your dashboard
2. Check for System Journal markers at the same timestamp
3. Click through to see what parameters changed
4. Review the trace details to understand the impact
#### Compliance Review
1. Access the System Journal for your reporting period
2. Filter by the relevant AI system or model
3. Export the journal entries for your compliance report
4. Document any required explanations or approvals
#### Responding to Alerts
When the System Journal detects missing required parameters:
1. The entry clearly identifies what's missing (e.g., "Missing Parameter: topK")
2. Click through to the affected trace
3. Update your configuration to include the missing parameter
4. Verify the fix in subsequent traces
### Best Practices
**Regular Review Schedule**
Set up a weekly review of System Journal entries to catch trends before they become issues.
**Tag Critical Parameters**
Work with your compliance team to identify which parameters are critical for your use case, ensuring the System Journal prioritizes these in its monitoring.
**Integrate with Your Workflow**
* Set up alerts for critical changes
* Include System Journal reviews in your deployment checklist
* Reference journal entries in incident post-mortems
**Use Journal Entries for Documentation**
The System Journal creates a natural documentation trail. Use it to:
* Track experiment results
* Document approved configuration changes
* Build a knowledge base of parameter impacts
### Advanced Features
#### Entry Classification
Different System Journal entry types use distinct visual indicators:
* 🔄 **Configuration Changes**: Parameter modifications
* ⚠️ **Missing Data**: Required fields not present
* 🔍 **Anomalies**: Unusual patterns detected
* ✅ **Resolutions**: Issues that have been addressed
#### Intelligent Grouping
When multiple parameters change simultaneously, the System Journal groups related changes into a single entry for easier understanding.
#### Historical Analysis
Compare current configurations against any point in history to understand evolution and drift over time.
## Getting Started
1. **No Setup Required**: The System Journal begins working automatically as soon as you start sending traces to Avido
2. **First Journal Entries**: You'll see your first entries within minutes of trace ingestion
3. **Customization**: Contact your Avido representative to configure specific parameters to monitor or adjust sensitivity thresholds
The System Journal transforms AI observability from reactive firefighting to proactive governance, ensuring your AI deployments remain compliant, performant, and predictable.
# Tracing
Source: https://docs.avidoai.com/traces
Capture every step of your LLM workflow and send it to Avido for replay, evaluation, and monitoring.
When your chatbot conversation or agent run is in flight, **every action becomes an *event***.\
Bundled together they form a **trace** – a structured replay of what happened, step‑by‑step.
| Event | When to use |
| ----------- | ------------------------------------------------------------------------------- |
| `trace` | The root container for a whole conversation / agent run. |
| `llm` | Start and end of every LLM call. |
| `tool` | Calls to a function / external tool invoked by the model. |
| `retriever` | RAG queries and the chunks they return. |
| `log` | Anything else worth seeing while debugging (system prompts, branches, errors…). |
The full schema lives in API ▸ Ingestion.
***
## Understanding `testId` and `traceId`
Two IDs appear on trace events — here's what each one does:
| Field | Who sets it | When to include |
| --------- | -------------------------------- | --------------------------------------------------------------------------------------------------------------------------------------------------------------------------------------------------- |
| `testId` | Avido (via [webhook](/webhooks)) | **Only** when the trace originates from an Avido test. Pass the `testId` from the webhook payload. Do **not** set it for traces that come from real user interactions. |
| `traceId` | You (optional) | Setting `traceId` client-side is **optional** — the server generates one automatically if you don't. If you do set it, use a random UUID and keep the **same value across all steps** in the trace. |
Do **not** set `traceId` equal to `testId`. They serve different purposes: `testId` links the trace to an Avido test run for evaluation, while `traceId` groups events together into a single trace.
***
## Recommended workflow
1. **Collect events in memory** as they happen.
2. **Flush** once at the end (or on fatal error).
3. **Add a `log` event** describing the error if things blow up.
4. **Keep tracing async** – never block your user.
5. **Evaluation‑only mode?** Only ingest when the run came from an Avido test → check for `testId` from the [Webhook](/webhooks).
6. **LLM events** should contain the *raw* prompt & completion – strip provider JSON wrappers.
***
## SDK installation
```bash Node theme={null}
npm install @avidoai/sdk-node
```
```bash Python theme={null}
pip install avido
```
***
## Ingesting events
You can send events:
* **Directly via HTTP**
* **Via our SDKs** (Node: `@avidoai/sdk-node`, Python: `avido`)
When authenticating with an API key, include both the `x-api-key` and `x-application-id`
headers. The application ID should match the application that owns the key so the
request can be authorized.
```bash cURL (default) theme={null}
curl --request POST \
--url https://api.avidoai.com/v0/ingest \
--header 'Content-Type: application/json' \
--header 'x-application-id: ' \
--header 'x-api-key: ' \
--data '{
"events": [
{
"type": "trace",
"timestamp": "2025-05-15T12:34:56.123455Z",
"referenceId": "123e4567-e89b-12d3-a456-426614174000",
"metadata": {
"source": "chatbot"
}
},
{
"type": "llm",
"event": "start",
"traceId": "123e4567-e89b-12d3-a456-426614174000",
"timestamp": "2025-05-15T12:34:56.123456Z",
"modelId": "gpt-4o-2024-08-06",
"params": {
"temperature": 1.2
},
"input": [
{
"role": "user",
"content": "Tell me a joke."
}
]
}
]
}'
```
```ts Node theme={null}
import Avido from '@avidoai/sdk-node';
const client = new Avido({
applicationId: process.env['AVIDO_APPLICATION_ID'],
apiKey: process.env['AVIDO_API_KEY'],
});
// testId comes from the webhook payload — only include it for
// Avido test runs, not for real user interactions.
const ingest = await client.ingest.create({
events: [
{
timestamp: '2025-05-15T12:34:56.123456Z',
type: 'trace',
testId: webhookBody.testId, // omit for user-originated traces
},
{
timestamp: '2025-05-15T12:34:56.123456Z',
type: 'tool',
toolInput: 'the input to a tool call',
toolOutput: 'the output from the tool call',
}
],
});
console.log(ingest.data);
```
```python Python theme={null}
import os
from avido import Avido
client = Avido(
application_id=os.environ.get("AVIDO_APPLICATION_ID"),
api_key=os.environ.get("AVIDO_API_KEY"),
)
# test_id comes from the webhook payload — only include it for
# Avido test runs, not for real user interactions.
ingest = client.ingest.create(
events=[
{
"timestamp": "2025-05-15T12:34:56.123456Z",
"type": "trace",
"testId": webhook_body.get("testId"), # omit for user-originated traces
},
{
"timestamp": "2025-05-15T12:34:56.123456Z",
"type": "tool",
"toolInput": "the input to a tool call",
"toolOutput": "the output from the tool call",
},
],
)
print(ingest.data)
```
***
## Tip: map your IDs
If you already track a conversation / run in your own DB, pass that same ID as `referenceId`.\
It makes liftover between your system and Avido effortless.
***
## Event types in depth
Every call to `client.ingest.create()` accepts an array of events.
The first event is usually a `trace` (the root container), followed by one or more step events.
### `trace` — root container
Every ingestion batch should start with a `trace` event. It groups all subsequent steps together.
```ts Node theme={null}
await client.ingest.create({
events: [
{
type: 'trace',
timestamp: new Date().toISOString(),
referenceId: 'your-internal-conversation-id', // links to your system
testId: webhookBody.testId, // links to an Avido test run
metadata: { source: 'chatbot', userId: '42' },
},
],
});
```
```python Python theme={null}
client.ingest.create(
events=[
{
"type": "trace",
"timestamp": datetime.now(timezone.utc).isoformat(),
"referenceId": "your-internal-conversation-id",
"testId": webhook_body.get("testId"),
"metadata": {"source": "chatbot", "userId": "42"},
},
],
)
```
| Field | Required | Description |
| ------------- | -------- | -------------------------------------------------------------------------------------------------------------------------------------------------------------------------- |
| `type` | Yes | Always `"trace"` |
| `timestamp` | Yes | ISO 8601 timestamp |
| `referenceId` | No | Your own ID for this conversation / run |
| `traceId` | No | Client-provided UUID to identify this trace. Optional — the server generates one if omitted. If set, use the **same** random UUID for all steps in the trace. |
| `testId` | No | The `testId` from a [webhook payload](/webhooks) — links the trace to an Avido test run. **Only set this for test-originated traces; omit it for real user interactions.** |
| `metadata` | No | Arbitrary key-value pairs for filtering and search |
### `llm` — LLM calls
Track every call to a language model. Use `event: "start"` when the call begins and `event: "end"` when it completes, or send a single event with both input and output after the call finishes.
```ts Node theme={null}
await client.ingest.create({
events: [
{
type: 'trace',
timestamp: new Date().toISOString(),
},
{
type: 'llm',
event: 'start',
timestamp: startTime.toISOString(),
modelId: 'gpt-4o-2024-08-06',
params: { temperature: 0.7, maxTokens: 1024 },
input: [
{ role: 'system', content: 'You are a helpful assistant.' },
{ role: 'user', content: 'Summarize this document.' },
],
},
{
type: 'llm',
event: 'end',
timestamp: endTime.toISOString(),
output: [
{ role: 'assistant', content: 'Here is the summary...' },
],
tokenUsage: { prompt: 120, completion: 85 },
},
],
});
```
```python Python theme={null}
client.ingest.create(
events=[
{
"type": "trace",
"timestamp": datetime.now(timezone.utc).isoformat(),
},
{
"type": "llm",
"event": "start",
"timestamp": start_time.isoformat(),
"modelId": "gpt-4o-2024-08-06",
"params": {"temperature": 0.7, "maxTokens": 1024},
"input": [
{"role": "system", "content": "You are a helpful assistant."},
{"role": "user", "content": "Summarize this document."},
],
},
{
"type": "llm",
"event": "end",
"timestamp": end_time.isoformat(),
"output": [
{"role": "assistant", "content": "Here is the summary..."},
],
"tokenUsage": {"prompt": 120, "completion": 85},
},
],
)
```
Send the **raw** prompt and completion values. Strip any provider-specific JSON wrappers so Avido can display and evaluate them consistently.
### `tool` — function / tool calls
Log every tool or function call your model makes.
```ts Node theme={null}
{
type: 'tool',
timestamp: new Date().toISOString(),
toolInput: JSON.stringify({ query: 'AAPL stock price' }),
toolOutput: JSON.stringify({ price: 187.42, currency: 'USD' }),
}
```
```python Python theme={null}
{
"type": "tool",
"timestamp": datetime.now(timezone.utc).isoformat(),
"toolInput": json.dumps({"query": "AAPL stock price"}),
"toolOutput": json.dumps({"price": 187.42, "currency": "USD"}),
}
```
### `retriever` — RAG queries
Track retrieval-augmented generation lookups and the chunks they return.
```ts Node theme={null}
{
type: 'retriever',
timestamp: new Date().toISOString(),
query: 'What is the refund policy?',
result: JSON.stringify([
{ chunk: 'Refunds are available within 30 days...', score: 0.92 },
{ chunk: 'For premium plans, contact support...', score: 0.87 },
]),
}
```
```python Python theme={null}
{
"type": "retriever",
"timestamp": datetime.now(timezone.utc).isoformat(),
"query": "What is the refund policy?",
"result": json.dumps([
{"chunk": "Refunds are available within 30 days...", "score": 0.92},
{"chunk": "For premium plans, contact support...", "score": 0.87},
]),
}
```
### `log` — everything else
Use `log` events for system prompts, branching decisions, error details, or anything else worth seeing during debugging.
```ts Node theme={null}
{
type: 'log',
timestamp: new Date().toISOString(),
body: 'User triggered fallback branch — no documents matched above threshold',
}
```
```python Python theme={null}
{
"type": "log",
"timestamp": datetime.now(timezone.utc).isoformat(),
"body": "User triggered fallback branch — no documents matched above threshold",
}
```
***
## Full end-to-end example
A complete example capturing a realistic agent run with multiple event types:
```ts Node theme={null}
import Avido from '@avidoai/sdk-node';
const client = new Avido({
applicationId: process.env['AVIDO_APPLICATION_ID'],
apiKey: process.env['AVIDO_API_KEY'],
});
async function handleRequest(prompt: string, testId?: string) {
const events: Record[] = [];
const traceStart = new Date();
// 1. Root trace
events.push({
type: 'trace',
timestamp: traceStart.toISOString(),
testId,
metadata: { source: 'api' },
});
// 2. Retriever step
const docs = await vectorSearch(prompt);
events.push({
type: 'retriever',
timestamp: new Date().toISOString(),
query: prompt,
result: JSON.stringify(docs),
});
// 3. LLM call
const llmStart = new Date();
const completion = await callLLM(prompt, docs);
events.push(
{
type: 'llm',
event: 'start',
timestamp: llmStart.toISOString(),
modelId: 'gpt-4o-2024-08-06',
input: [
{ role: 'system', content: 'Answer using the provided context.' },
{ role: 'user', content: prompt },
],
},
{
type: 'llm',
event: 'end',
timestamp: new Date().toISOString(),
output: [{ role: 'assistant', content: completion.text }],
tokenUsage: {
prompt: completion.usage.promptTokens,
completion: completion.usage.completionTokens,
},
},
);
// 4. Flush everything in one call
await client.ingest.create({ events });
return completion.text;
}
```
```python Python theme={null}
import json
import os
from datetime import datetime, timezone
from avido import Avido
client = Avido(
application_id=os.environ.get("AVIDO_APPLICATION_ID"),
api_key=os.environ.get("AVIDO_API_KEY"),
)
def handle_request(prompt: str, test_id: str | None = None) -> str:
events: list[dict] = []
trace_start = datetime.now(timezone.utc)
# 1. Root trace
events.append({
"type": "trace",
"timestamp": trace_start.isoformat(),
"testId": test_id,
"metadata": {"source": "api"},
})
# 2. Retriever step
docs = vector_search(prompt)
events.append({
"type": "retriever",
"timestamp": datetime.now(timezone.utc).isoformat(),
"query": prompt,
"result": json.dumps(docs),
})
# 3. LLM call
llm_start = datetime.now(timezone.utc)
completion = call_llm(prompt, docs)
events.extend([
{
"type": "llm",
"event": "start",
"timestamp": llm_start.isoformat(),
"modelId": "gpt-4o-2024-08-06",
"input": [
{"role": "system", "content": "Answer using the provided context."},
{"role": "user", "content": prompt},
],
},
{
"type": "llm",
"event": "end",
"timestamp": datetime.now(timezone.utc).isoformat(),
"output": [
{"role": "assistant", "content": completion.text},
],
"tokenUsage": {
"prompt": completion.usage.prompt_tokens,
"completion": completion.usage.completion_tokens,
},
},
])
# 4. Flush everything in one call
client.ingest.create(events=events)
return completion.text
```
***
## Fetching traces
Use the SDK to list or retrieve traces for debugging and analysis.
```ts Node theme={null}
// List recent traces
const traces = await client.traces.list({ limit: 10 });
for (const trace of traces.data) {
console.log(trace.id, trace.referenceId);
}
// Retrieve a specific trace by ID
const trace = await client.traces.retrieve('trace-uuid-here');
console.log(trace.data);
```
```python Python theme={null}
# List recent traces
traces = client.traces.list(limit=10)
for trace in traces.data:
print(trace.id, trace.reference_id)
# Retrieve a specific trace by ID
trace = client.traces.retrieve("trace-uuid-here")
print(trace.data)
```
***
## Error handling
Wrap your ingestion calls so a tracing failure never crashes your application.
```ts Node theme={null}
try {
await client.ingest.create({ events });
} catch (err) {
// Log but don't crash — tracing is secondary to your user's request
console.error('Avido ingestion failed:', err);
}
```
```python Python theme={null}
try:
client.ingest.create(events=events)
except Exception as e:
# Log but don't crash — tracing is secondary to your user's request
logger.error("Avido ingestion failed: %s", e)
```
***
## Next steps
* Inspect traces in **Traces** inside the dashboard.
* Already using OpenTelemetry? See the [OpenTelemetry Integration](/opentelemetry) guide.
* Set up [Webhooks](/webhooks) to trigger tests automatically.
* Explore the full schema in the API Reference.
# Webhooks
Source: https://docs.avidoai.com/webhooks
Trigger automated Avido tests from outside your code and validate payloads securely.
## Why webhook‑triggered tests?
**Part of Avido's secret sauce is that you can kick off a test *without touching your code*.**\
Instead of waiting for CI or redeploys, Avido sends an HTTP `POST` to an endpoint that **you** control.
| Benefit | What it unlocks |
| ----------------------- | ------------------------------------------------------------- |
| **Continuous coverage** | Run tests on prod/staging as often as you like and automated. |
| **SME‑friendly** | Non‑developers trigger & tweak tasks from the Avido UI. |
***
## How it works
1. **A test is triggered** in the dashboard or automatically.
2. **Avido POSTs** to your configured endpoint.
3. **Validate** the `signature` + `timestamp` with our API/SDK.
4. **Run your LLM flow** using `prompt` from the payload.
5. **Emit a trace** that includes `testId` to connect results in Avido.\
*Using OpenTelemetry?* Set the `avido.test.id` span attribute instead — see the [OpenTelemetry guide](/opentelemetry#common-attributes).
6. **Return `200 OK`** – any other status tells Avido the test failed.
Validating a webhook with the API requires both `x-api-key` and `x-application-id`
headers. Use the application ID that issued the API key.
### Payload example
When Avido triggers your webhook endpoint, it sends:
```json Webhook payload theme={null}
{
"prompt": "Write a concise onboarding email for new users.",
"testId": "123e4567-e89b-12d3-a456-426614174000",
"metadata": {
"customerId": "1",
"priority": "high"
}
}
```
Headers:
| Header | Purpose |
| ------------------- | ---------------------------------------------------------- |
| `x-avido-signature` | HMAC signature of the payload |
| `x-avido-timestamp` | Unix ms timestamp (in milliseconds) the request was signed |
**Notes:**
* `testId` is **always** included in webhook payloads and is unique per test run. Pass it to your `ingest.create()` call so the trace is linked to the Avido test.
* `metadata` is optional and only included when available from the originating task.
* The webhook body **may contain additional fields** beyond those shown above. For example, experiment-related data is included when tests are part of an experiment. Do not assume a fixed schema — always handle unknown fields gracefully.
You do **not** need to set `traceId` when responding to a webhook. The server generates one automatically. If you do set it, use a random UUID — do not reuse the `testId` as the `traceId`. See the [Tracing guide](/traces#understanding-testid-and-traceid) for details.
**Always validate the raw body.** The HMAC signature is computed over the exact JSON payload sent by Avido. You must forward the **raw, unmodified request body** to the `/v0/validate-webhook` endpoint (or use it directly when verifying the signature). If you parse and re-serialize the body, differences in key ordering or whitespace can cause signature verification to fail.
***
## Verification flow
```mermaid theme={null}
sequenceDiagram
Avido->>Your Endpoint: POST payload + headers
Your Endpoint->>Avido API: /v0/validate-webhook
Avido API-->>Your Endpoint: { valid: true }
Your Endpoint->>LLM: run(prompt)
Your Endpoint->>Avido Ingest API: POST /v0/ingest (testId)
```
If validation fails, respond **401** (or other 4xx/5xx). Avido marks the test as **failed**.
***
## Body validation best practices
The webhook body **is not a fixed schema**. While the most common fields are `prompt`, `testId`, and `metadata`, the payload may include additional fields at any time (for example, `experiment` data when a test is part of an experiment). Your endpoint should:
1. **Accept any valid JSON body** — do not reject requests that contain unknown fields.
2. **Forward the entire raw body for signature validation** — the HMAC signature covers every field in the payload. If you strip, rename, or re-order fields before calling `/v0/validate-webhook`, the signature check will fail.
3. **Read only the fields you need** after validation succeeds — safely ignore fields you don't recognize.
When using a framework that automatically parses JSON (e.g., Express, Flask, FastAPI), pass the **parsed object** directly to the validation endpoint or SDK method. Avoid manually re-serializing it, as subtle differences (key order, whitespace) can break signature verification.
***
## Code examples
```bash cURL (default) theme={null}
curl --request POST \
--url https://api.avidoai.com/v0/validate-webhook \
--header 'Content-Type: application/json' \
--header 'x-application-id: ' \
--header 'x-api-key: ' \
--data '{
"signature": "abc123signature",
"timestamp": 1687802842609,
"body": {
"prompt": "Write a concise onboarding email for new users.",
"testId": "123e4567-e89b-12d3-a456-426614174000",
"metadata": {
"customerId": "1",
"priority": "high"
}
}
}'
```
```ts Node theme={null}
import express from 'express';
import Avido from '@avidoai/sdk-node';
const app = express();
// Use express.json() to parse the body — the SDK handles
// sending the parsed object for validation.
app.use(express.json());
const client = new Avido({
applicationId: process.env.AVIDO_APPLICATION_ID!,
apiKey: process.env.AVIDO_API_KEY!,
});
app.post('/avido/webhook', async (req, res) => {
const signature = req.get('x-avido-signature');
const timestamp = req.get('x-avido-timestamp');
// Pass the full body as-is — do not pick specific fields before
// validation. The body may contain additional fields such as
// experiment data, and all fields are covered by the signature.
const body = req.body;
try {
const { valid } = await client.validateWebhook.validate({
signature,
timestamp,
body
});
if (!valid) return res.status(401).send('Invalid webhook');
const result = await runAgent(body.prompt); // your LLM call
// Send the trace linked to the test — pass testId from the webhook payload.
// You do NOT need to set traceId; the server generates one automatically.
await client.ingest.create({
events: [
{
type: 'trace',
timestamp: new Date().toISOString(),
testId: body.testId,
input: body.prompt,
output: result,
},
],
});
return res.status(200).send('OK');
} catch (err) {
console.error(err);
return res.status(500).send('Internal error');
}
});
```
```python Python theme={null}
import os
from datetime import datetime, timezone
from flask import Flask, request, jsonify
from avido import Avido
app = Flask(__name__)
client = Avido(
application_id=os.environ["AVIDO_APPLICATION_ID"],
api_key=os.environ["AVIDO_API_KEY"],
)
@app.route("/avido/webhook", methods=["POST"])
def handle_webhook():
# Parse the full JSON body as-is. Do not discard or reshape
# fields before validation — the signature covers the entire
# payload, which may include additional fields like experiment data.
body = request.get_json(force=True) or {}
signature = request.headers.get("x-avido-signature")
timestamp = request.headers.get("x-avido-timestamp")
if not signature or not timestamp:
return jsonify({"error": "Missing signature or timestamp"}), 400
try:
resp = client.validate_webhook.validate(
signature=signature,
timestamp=timestamp,
body=body
)
if not resp.valid:
return jsonify({"error": "Invalid webhook signature"}), 401
except Exception as e:
return jsonify({"error": str(e)}), 401
result = run_agent(body.get("prompt")) # your LLM pipeline
# Send the trace linked to the test — pass testId from the webhook payload.
# You do NOT need to set traceId; the server generates one automatically.
client.ingest.create(
events=[
{
"type": "trace",
"timestamp": datetime.now(timezone.utc).isoformat(),
"testId": body.get("testId"),
"input": body.get("prompt"),
"output": result,
},
],
)
return jsonify({"status": "ok"}), 200
```
***
## SDK method reference
### `validateWebhook.validate()`
Verifies that an incoming webhook request was signed by Avido.
```ts Node theme={null}
const { valid } = await client.validateWebhook.validate({
signature, // from x-avido-signature header
timestamp, // from x-avido-timestamp header
body, // the full parsed request body
});
```
```python Python theme={null}
resp = client.validate_webhook.validate(
signature=signature, # from x-avido-signature header
timestamp=timestamp, # from x-avido-timestamp header
body=body, # the full parsed request body
)
# resp.valid -> bool
```
| Parameter | Type | Description |
| ----------- | ------ | ------------------------------------------- |
| `signature` | string | The `x-avido-signature` header value |
| `timestamp` | string | The `x-avido-timestamp` header value |
| `body` | object | The full webhook request body (parsed JSON) |
Returns an object with a `valid` boolean field.
***
## Experiments
When a test is triggered as part of an **experiment**, the webhook payload includes an additional `experiment` field. Experiments let you compare different configurations (variants) of your LLM pipeline against a baseline, and the `experiment` field tells your application which overrides to apply.
### Experiment payload
```json Webhook payload with experiment theme={null}
{
"prompt": "Write a concise onboarding email for new users.",
"testId": "123e4567-e89b-12d3-a456-426614174000",
"metadata": {
"customerId": "1",
"priority": "high"
},
"experiment": {
"experimentId": "aaa11111-bbbb-cccc-dddd-eeeeeeeeeeee",
"experimentVariantId": "fff22222-3333-4444-5555-666666666666",
"overrides": {
"response_generator": {
"model": "reasoning",
"system": "You are a concise assistant."
}
}
}
}
```
| Field | Type | Description |
| -------------------------------- | ----------------------------------------- | ------------------------------------------------------------------------------------------------------------------------------------------------------------------------------------------------------- |
| `experiment.experimentId` | `string (uuid)` | Unique identifier for the experiment |
| `experiment.experimentVariantId` | `string (uuid)` | Unique identifier for the variant being tested |
| `experiment.overrides` | `Record>` | Configuration overrides keyed by **inference step name** (e.g. `response_generator`, `classifier`). Each step's value is an object of parameter overrides (e.g. `model`, `system`, `max_output_tokens`) |
**How overrides work:**
Your application already has its own configuration (prompts, models, parameters, etc.) for each step in your LLM pipeline. The `overrides` object tells you **what to change**: each key is a step name, and each value contains the specific settings to overwrite for that step.
For example, if `overrides` contains `{ "response_generator": { "model": "reasoning" } }`, you should use the `reasoning` model for your `response_generator` step instead of whatever your default is — and keep all other settings as-is.
### Using experiments in your application
When your webhook handler receives a payload with `experiment`, apply the overrides to the corresponding steps in your LLM pipeline:
```ts Node theme={null}
app.post('/avido/webhook', async (req, res) => {
// ... validation omitted for brevity ...
const body = req.body;
// Check if this test is part of an experiment
if (body.experiment) {
const { overrides } = body.experiment;
// Apply overrides to each inference step in your pipeline.
// The keys in `overrides` match the step names you defined in Avido.
for (const [stepName, params] of Object.entries(overrides)) {
// Example: override the model and system prompt
// for your "response_generator" step
applyStepConfig(stepName, params);
}
}
const result = await runAgent(body.prompt); // your LLM call
await client.ingest.create({
events: [
{
type: 'trace',
timestamp: new Date().toISOString(),
testId: body.testId,
input: body.prompt,
output: result,
},
],
});
return res.status(200).send('OK');
});
// Example helper — adapt to your framework / LLM client
function applyStepConfig(stepName: string, params: Record) {
// Look up the step in your pipeline config and merge overrides
pipelineConfig[stepName] = {
...pipelineConfig[stepName],
...params,
};
}
```
```python Python theme={null}
@app.route("/avido/webhook", methods=["POST"])
def handle_webhook():
# ... validation omitted for brevity ...
body = request.get_json(force=True) or {}
# Check if this test is part of an experiment
experiment = body.get("experiment")
if experiment:
overrides = experiment.get("overrides", {})
# Apply overrides to each inference step in your pipeline.
# The keys in `overrides` match the step names you defined in Avido.
for step_name, params in overrides.items():
# Example: override the model and system prompt
# for your "response_generator" step
apply_step_config(step_name, params)
result = run_agent(body.get("prompt")) # your LLM pipeline
client.ingest.create(
events=[
{
"type": "trace",
"timestamp": datetime.now(timezone.utc).isoformat(),
"testId": body.get("testId"),
"input": body.get("prompt"),
"output": result,
},
],
)
return jsonify({"status": "ok"}), 200
# Example helper — adapt to your framework / LLM client
def apply_step_config(step_name: str, params: dict):
# Look up the step in your pipeline config and merge overrides
pipeline_config[step_name] = {**pipeline_config.get(step_name, {}), **params}
```
**You don't need to change your trace ingestion code.** The `testId` already links the trace back to the correct experiment variant in Avido. Just pass `body.testId` as usual.
If your application doesn't run experiments yet, you can safely ignore the `experiment` field — its presence is optional and your existing webhook handler will continue to work without changes.
***
## Troubleshooting
| Problem | Cause | Fix |
| -------------------------------- | ---------------------------------------- | ----------------------------------------------------------------------------------------------------- |
| Signature always invalid | Body was re-serialized before validation | Pass the parsed JSON object directly; don't `JSON.stringify` it first |
| Missing signature header | Framework strips custom headers | Check your reverse proxy / load balancer isn't dropping `x-avido-*` headers |
| Test shows as failed | Endpoint returned non-200 status | Ensure you return `200 OK` after successful processing |
| Trace not linked to test | Missing `testId` in ingestion | Pass `body.testId` in your `ingest.create()` call |
| Experiment overrides not applied | `experiment` field ignored in handler | Check for `body.experiment` and apply `overrides` to your pipeline config before running the LLM call |
***
## Next steps
* Send us [Trace events](/traces) to capture your full LLM workflow.
* Using OpenTelemetry? See the [OpenTelemetry Integration](/opentelemetry) guide.
* Schedule or trigger tasks from **Tasks** in the dashboard.
* Invite teammates so they can craft evals and review results directly in Avido.
***
1. **Avido sends a webhook** – When a test is triggered, Avido sends a POST request to your endpoint with synthetic input and a testId.
2. **You validate the request** – Verify the webhook signature to ensure it's really from Avido.
3. **Run your AI workflow** – Process the synthetic input through your normal application flow.
4. **Log events along the way** – Capture LLM calls, tool usage, retrievals, and other key steps.
5. **Send the trace to Avido** – When your workflow completes, send the full event trace back to Avido.
6. **View evaluation results** – Avido runs your configured evaluations and displays results in the dashboard.
***
## Getting Started
1. **Install an SDK**
```bash theme={null}
npm i @avidoai/sdk-node # Node
pip install avido # Python
```
2. **Setup a webhook endpoint** in your application [Learn more](/webhooks)
3. **Start tracing events** in your application [Learn more](/traces)
4. **Create your knowledge base** with Documents [Learn more](/documents)
```ts theme={null}
client.ingest.create({ events })
```
5. **Upload existing data** to auto-generate test cases and evaluations [Learn more](/quickstart)
6. **Review your baseline performance** in the dashboard
> Prefer pure HTTP? All endpoints are [documented here](/api-reference).
***
## Core concepts
| Concept | TL;DR |
| ------------------ | ------------------------------------------------------------------------------------- |
| **Tests** | Automated runs of your workflow using synthetic input without exposing customer data. |
| **Tasks** | Test cases that can be auto-generated from existing data or created manually. |
| **Webhooks** | Avido triggers tests via POST requests – automated or through the UI. |
| **Traces** | Ordered lists of events that reconstruct a conversation / agent run. |
| **Events** | Atomic pieces of work (`llm`, `tool`, `retriever`, `log`). |
| **Evaluations** | Built-in metrics + custom business logic tests created without code. |
| **Documents** | Version-controlled, RAG-ready content that powers your AI's knowledge base. |
| **Inbox** | Central hub where all issues are captured, summarized, and triaged automatically. |
| **System Journal** | Automatic log of configuration changes and their impact on performance. |
Dive deeper with the sidebar or jump straight to **[Traces](/traces)** to see how instrumentation works.
***
## Need help?
* **Email** – [support@avidoai.com](mailto:support@avidoai.com)
Happy building! ✨
# OpenTelemetry Integration
Source: https://docs.avidoai.com/opentelemetry
Send traces to Avido using standard OpenTelemetry tooling and OpenInference instrumentation.
Already using **OpenTelemetry** or a framework with built-in tracing (Vercel AI SDK, LangChain, LlamaIndex)?
You can send traces straight to Avido — no custom integration code required.
Avido accepts standard **OTLP JSON** payloads and automatically maps
[OpenInference](https://github.com/Arize-ai/openinference) span attributes
and [OTel GenAI semantic conventions](https://opentelemetry.io/docs/specs/semconv/gen-ai/)
into its trace model.
***
## Quick setup
Point your OpenTelemetry exporter at Avido by setting three environment variables:
```bash theme={null}
OTEL_EXPORTER_OTLP_PROTOCOL="http/json"
OTEL_EXPORTER_OTLP_ENDPOINT="https://api.avidoai.com/v0/otel/traces"
OTEL_EXPORTER_OTLP_HEADERS="x-application-id=,x-api-key="
```
| Variable | Description |
| ----------------------------- | --------------------------------------------------------------- |
| `OTEL_EXPORTER_OTLP_PROTOCOL` | Must be `http/json`. Avido does not support gRPC or protobuf. |
| `OTEL_EXPORTER_OTLP_ENDPOINT` | `https://api.avidoai.com/v0/otel/traces` |
| `OTEL_EXPORTER_OTLP_HEADERS` | Your Avido `x-application-id` and `x-api-key`, comma-separated. |
You can find your Application ID and API key in the Avido dashboard under **Settings > API Keys**.
**Disabling instrumentation:** If `OTEL_EXPORTER_OTLP_ENDPOINT` is not set, the Avido
OpenTelemetry integration is automatically disabled. This lets you turn tracing on and off
per environment without code changes.
***
## Sending traces
Once your exporter is configured, traces are sent automatically by your instrumentation library.
You can also send an OTLP payload manually:
```bash cURL theme={null}
curl -X POST https://api.avidoai.com/v0/otel/traces \
-H "Content-Type: application/json" \
-H "x-application-id: " \
-H "x-api-key: " \
-d '{
"resourceSpans": [
{
"scopeSpans": [
{
"spans": [
{
"traceId": "4bf92f3577b34da6a3ce929d0e0e4736",
"spanId": "00f067aa0ba902b7",
"name": "llm.generate",
"startTimeUnixNano": "1737052800000000000",
"endTimeUnixNano": "1737052800500000000",
"attributes": [
{
"key": "openinference.span.kind",
"value": { "stringValue": "LLM" }
},
{
"key": "llm.model_name",
"value": { "stringValue": "gpt-4o-2024-08-06" }
},
{
"key": "input.value",
"value": { "stringValue": "Tell me a joke." }
},
{
"key": "output.value",
"value": { "stringValue": "Why did the chicken cross the road?" }
},
{
"key": "llm.token_count.prompt",
"value": { "intValue": 12 }
},
{
"key": "llm.token_count.completion",
"value": { "intValue": 18 }
}
]
}
]
}
]
}
]
}'
```
A successful request returns the created trace and step IDs — the same response shape as the [`/v0/ingest`](/api-reference/ingestion) endpoint.
***
## How spans are mapped
Avido reads the `openinference.span.kind` attribute on each span and converts it into the
matching Avido step type:
| OpenInference span kind | Avido step type | What gets extracted |
| ------------------------------------- | --------------- | -------------------------------------------------------------- |
| `LLM` | `llm` | Model, input/output messages, token usage, finish reason, cost |
| `TOOL` | `tool` | Tool name, parameters, output, tool call ID |
| `RETRIEVER` / `RERANKER` | `retriever` | Query, retrieved documents |
| `AGENT` | `group` | Agent name, agent ID, child spans nested underneath |
| `CHAIN` | `group` | Orchestration chain name, child spans nested underneath |
| `EMBEDDING`, `GUARDRAIL`, `EVALUATOR` | `log` | Name and metadata |
Spans without a recognised `openinference.span.kind` are stored as `log` steps so nothing is lost.
**Agentic trace support:** `AGENT` and `CHAIN` spans are mapped to `group` steps, preserving
the hierarchical structure of agentic workflows. This means multi-turn agent loops, tool-calling
chains, and orchestration flows are displayed with their full parent-child relationships in the
Avido trace viewer.
***
## Attribute reference
The tables below list every attribute Avido extracts from spans. Any attributes not listed here
are preserved in the step's `metadata` field.
### LLM spans
| Attribute | Mapped to |
| -------------------------------- | ------------------------------------------------------------------------------------------------ |
| `llm.model_name` | Model ID |
| `input.value` | Input |
| `output.value` | Output |
| `llm.input_messages` | Input (preferred over `input.value`) |
| `llm.output_messages` | Output (preferred over `output.value`) |
| `llm.token_count.prompt` | Prompt token count |
| `llm.token_count.completion` | Completion token count |
| `gen_ai.response.finish_reasons` | Finish reason on the LLM end step (`"stop"`, `"tool_calls"`, `"tool_use"`, `"max_tokens"`, etc.) |
### Tool spans
| Attribute | Mapped to |
| ------------------------------ | ----------------------------------------------------------------------- |
| `tool.name` | Step name |
| `tool.parameters` | Tool input |
| `tool.output` | Tool output |
| `tool_call.function.name` | Step name (fallback) |
| `tool_call.function.arguments` | Tool input (fallback) |
| `gen_ai.tool.call.id` | Tool call ID (links the tool invocation to the LLM's tool\_use request) |
### Group spans (Agent / Chain)
| Attribute | Mapped to |
| ------------------- | ---------------------------------------------------- |
| `gen_ai.agent.name` | Step name (falls back to span name) |
| `gen_ai.agent.id` | Group key (falls back to agent name, then span name) |
### Retriever spans
| Attribute | Mapped to |
| --------------------- | --------- |
| `retrieval.query` | Query |
| `retrieval.documents` | Result |
### Common attributes
| Attribute | Mapped to |
| ------------------------ | ----------------------------------------------------- |
| `session.id` | Trace reference ID (links conversations in a session) |
| `gen_ai.conversation.id` | Trace reference ID (alternative to `session.id`) |
| `avido.test.id` | Test ID (connects the trace to an Avido test run) |
**Linking test runs:** `avido.test.id` is a custom Avido attribute — it is not part of
the OpenInference spec. If you're running Avido tests via [webhooks](/webhooks), set this
span attribute to the `testId` from the webhook payload so the trace is automatically
connected to the test run and evaluation results are linked.
***
## Error and status tracking
Avido maps the **OTel span status** to structured error fields on each step:
| OTel span `status.code` | Avido step status |
| ----------------------- | ----------------- |
| `0` (UNSET) | `success` |
| `1` (OK) | `success` |
| `2` (ERROR) | `error` |
When a span has `status.code = 2` (ERROR):
* The step's `status` is set to `error`
* The span's `status.message` is stored in the step's `error` field
* The numeric status code is preserved in `statusCode`
This means failed LLM calls, tool errors, and timeout spans are automatically flagged in
Avido's trace viewer without any extra instrumentation on your side.
***
## Cost tracking
Avido automatically computes the **cost** of LLM steps when token counts are present.
### How it works
1. When an LLM span includes `llm.token_count.prompt` and `llm.token_count.completion`, Avido
looks up the model in the **Model Pricing** table (configurable in your dashboard).
2. Cost is computed as:
`(promptTokens x inputCostPer1kTokens + completionTokens x outputCostPer1kTokens) / 1000`
3. The resulting `costAmount` is stored on the step.
### Trace-level aggregation
After all steps are ingested, Avido computes summary fields on the trace:
| Field | Description |
| ----------------------- | --------------------------------------------- |
| `totalCost` | Sum of all step costs |
| `totalPromptTokens` | Sum of prompt tokens across all LLM steps |
| `totalCompletionTokens` | Sum of completion tokens across all LLM steps |
| `totalDurationMs` | End-to-end trace duration |
| `hasError` | `true` if any step has an error status |
| `stepCount` | Total number of steps in the trace |
These pre-computed fields power the trace list view and enable filtering by cost, duration,
and error state without scanning individual steps.
**Set up Model Pricing** in the Avido dashboard or via the API to enable automatic cost
computation. If no pricing entry exists for a model, the step is ingested without a cost value.
***
## Trace structure
Each OTLP batch creates **one trace** in Avido:
* If a **root span** (no `parentSpanId`) is present, it becomes the trace container.
Its `session.id` or `gen_ai.conversation.id` attribute is used as the trace's `referenceId`.
* If no root span exists, the first span in the batch is used.
* All spans become **steps** nested under the trace, preserving parent-child relationships
via `parentSpanId`.
* Timing fields (`startTimeUnixNano`, `endTimeUnixNano`) are stored as step timestamps with
millisecond duration.
### Understanding `testId` and `traceId`
Two IDs can appear on OTEL traces — here's what each one does:
| Field | How to set it | When to include |
| ---------------- | ----------------------- | ---------------------------------------------------------------------------------------------------------------------------------------------------------------------- |
| `avido.test.id` | Set as a span attribute | **Only** when the trace originates from an Avido test. Pass the `testId` from the webhook payload. Do **not** set it for traces that come from real user interactions. |
| `traceId` (OTLP) | Set on the span | The OTLP `traceId` is converted to a UUID and used to group all spans into a single Avido trace. Keep the **same** `traceId` across all spans in the batch. |
`avido.test.id` links the trace to an Avido test run for evaluation. The OTLP `traceId` groups
spans together. They serve different purposes — do not confuse them.
***
## Agentic trace patterns
Avido is designed to capture complex agentic workflows. Here's how common patterns map through
the OTEL converter:
### Multi-turn tool-calling agent
```
AGENT span (openinference.span.kind=AGENT)
+-- LLM span (kind=LLM, finishReason="tool_calls")
+-- TOOL span (kind=TOOL, gen_ai.tool.call.id="call_abc123")
+-- TOOL span (kind=TOOL, gen_ai.tool.call.id="call_def456")
+-- LLM span (kind=LLM, finishReason="stop")
```
This becomes in Avido:
```
group step (agent)
+-- llm start/end (finishReason: "tool_calls")
+-- tool step (toolCallId: "call_abc123")
+-- tool step (toolCallId: "call_def456")
+-- llm start/end (finishReason: "stop")
```
### Orchestration chain
```
CHAIN span (kind=CHAIN)
+-- RETRIEVER span (kind=RETRIEVER)
+-- LLM span (kind=LLM)
```
Both the outer CHAIN and inner spans are preserved with their full hierarchy.
### Error handling in agents
When a span has `status.code = 2`, the step is marked as `error`. This is useful for tracking
retry patterns:
```
LLM span (status.code=2, status.message="Rate limited") -> status: error
LLM span (status.code=1) -> status: success
```
***
## Vercel AI SDK
If you're using the [Vercel AI SDK](https://sdk.vercel.ai/), Avido also recognises its telemetry attributes as fallbacks:
| Vercel AI SDK attribute | Mapped to |
| --------------------------- | --------------------------------- |
| `ai.response.model` | Model ID (highest priority) |
| `ai.model.id` | Model ID (fallback) |
| `ai.response.text` | Output (fallback) |
| `ai.usage.promptTokens` | Prompt token count (fallback) |
| `ai.usage.completionTokens` | Completion token count (fallback) |
***
## Next steps
* View your traces in the **Traces** page in the dashboard.
* Set up **Model Pricing** in the dashboard to enable automatic cost tracking.
* Compare with the [SDK-based ingestion](/traces) approach if you need finer control.
* Explore the [OpenInference instrumentation libraries](https://github.com/Arize-ai/openinference) for ready-made integrations.
* Check the full endpoint schema in API > Ingestion.
Need help wiring up your stack? [Contact us](mailto:support@avidoai.com) and we'll help you get connected.
# QuickStart
Source: https://docs.avidoai.com/quickstart
The fastest way to set up evaluations for your AI application
Setting up evaluations for an AI application is hard. You need to know what your users actually ask, what your AI is supposed to know, and what rules it has to follow. Then you need to turn all of that into evaluation criteria that catch real problems without flagging false ones. For most teams, this takes weeks of manual work and a lot of guessing.
QuickStart removes the guessing. You hand over your real conversations, your knowledge base, and your policies. Avido reads through everything and builds an evaluation suite that reflects how your AI is actually used and what it's supposed to do. You stay in control: every output is reviewed and approved by your team before it goes live.
## Why QuickStart exists
Most teams trying to evaluate an AI application run into the same wall.
You sit down to write evaluations and quickly realise you don't really know what tasks your users perform with the application. You think you do, but you're guessing. You write evaluations based on what the AI is *supposed* to do, not what users actually ask it. The result is an evaluation suite that misses the real failure modes and over-flags safe responses.
Even when you know the tasks, mapping them to your knowledge base is its own problem. Which articles support which questions? Are there contradictions between documents that would confuse the AI? Are there topics users ask about that nobody has written documentation for yet? You can't answer these questions without reading through everything, and nobody has time for that.
QuickStart solves both. It analyses your conversations to find the tasks that actually matter, checks your knowledge base for gaps and contradictions, turns your policies into evaluation criteria, and runs a first baseline so you have a starting point. What used to take weeks of manual work and produce a guess becomes a structured workflow with full traceability.
## What you get at the end
When QuickStart finishes, your application has:
* A **deduplicated set of tasks** grouped into topics, derived from your real conversations
* **Evaluations** at three scopes (global, topic, task) tied back to the source material that produced them
* A **style guide** generated from your conversations and writing guidelines
* A **baseline evaluation run** with scores you can build from
* **Sign-off from every reviewer** on your team
* Optionally, a **structured knowledge base** if you asked QuickStart to build or restructure one
Everything is traceable. Every evaluation criterion can be traced back through a rule statement to the original sentence in the source document that produced it. When someone asks "why does this rule exist?" months later, you can always answer.
***
## Three tiers of evaluation
Not every rule applies to every conversation. A rule about investment risk disclaimers shouldn't fire on a question about branch opening hours. QuickStart organises evaluations into three tiers so each one runs in the right context.
| Tier | Applies to | Example |
| ---------- | ------------------------ | --------------------------------------------------------- |
| **Global** | Every conversation | No emojis, no swearing, prompt injection protection |
| **Topic** | All tasks within a topic | Investment queries require a risk disclaimer |
| **Task** | A single task | "What is the price of X?" should return an accurate price |
This structure stays with your application after setup and shapes how new evaluations get added later.
***
## What you upload
QuickStart works with three categories of input. Bring whatever combination you have. The system adapts: you can run it with just conversations, just a knowledge base, just a website to scrape, or any mix of the above plus policies and style guides on top. The more you provide, the richer the output, but you don't need a complete set to get started.
### Conversations
Real conversation data from the process you want to evaluate, for example customer support transcripts or chat logs. The dataset should be large enough that the same kind of question appears multiple times, so deduplication has something to work with. Upload via API, direct upload, or a data dump.
### Knowledge base
The articles, help-centre content, or internal documentation your AI relies on. Add it via website scraping or file upload. If you don't have a structured knowledge base yet, QuickStart can build one for you (see below).
### Policies and guidelines
Policies, SOPs, training materials, brand voice guides: any "how we talk to our customers" documents. If rules aren't explicitly written down, QuickStart can also infer them from patterns in your conversations. For example, if no emojis appear anywhere in your conversation data, that becomes "don't use emojis."
***
## Don't have a knowledge base? QuickStart can build one
Plenty of teams don't have a clean, structured knowledge base sitting ready to upload. Maybe the documentation lives across a public help site, a few internal wikis, and the heads of your support team. QuickStart handles this directly: you can ask it to build a knowledge base for you as part of the run.
There are two ways it works, and you can use either or both.
**Build from conversations and scraped pages.** Point QuickStart at your help-centre URL or any other public documentation, and optionally upload your conversations alongside. The system extracts the underlying facts and structures them into proper knowledge base articles, organised by topic, ready to be reviewed and approved.
**Restructure your existing knowledge base.** If you do have documentation but it's messy, scattered, or not organised the way you'd want it organised, QuickStart can ingest it and produce a cleaner, structured version. Same review and approval flow as everything else.
Either way, the knowledge base QuickStart builds is yours. It lives in [Documents](/documents), versioned and editable, and you can keep using it after QuickStart finishes.
***
## How QuickStart works
QuickStart runs as a sequence of stages that alternate between system processing and human review. You approve at each gate before the next stage begins, so you never review evaluations only to discover the underlying knowledge base had contradictions.
The exact stages depend on what you uploaded. If you didn't provide a knowledge base, the KB stages are skipped (or replaced with KB-building if you asked QuickStart to build one). If you didn't provide policies, the policy stages are skipped. The flow adapts to your inputs.
A single screen where you upload everything at once: conversations, knowledge base, and policies. Web scraping runs in the background while you continue.
Avido classifies each uploaded item and routes it to the right downstream processing: conversations, knowledge documents, or policy documents.
Each distinct question or request in your conversations becomes a task. Multi-question conversations get split into multiple tasks. Tasks and topics are then deduplicated within and across conversations. All examples are scrubbed for personally identifiable information before anyone reviews them.
Worked example: 1,000 conversations might produce 1,100 raw tasks (some conversations contain multiple) which deduplicate down to roughly 800 unique tasks.
Your first review gate. You see:
* Every topic with the conversations that produced it
* Conversation count per task, so you can see which tasks come up most
* Topic volume distribution as a percentage
Open a topic to see the underlying tasks. Rename topics to match your internal conventions (for example "credit cards" becomes "cards and payments"). Edit, approve, or remove tasks.
Sign-off requires a confirmation step ("Are you sure? This will be locked"). You can skip the review, but skipping is recorded.
Three checks run against your documentation in parallel:
* **Contradictions and overlaps.** Avido finds documents that say conflicting things, and documents that duplicate each other.
* **Coverage.** For each approved task, Avido checks whether your documentation can actually answer it. Tasks with no supporting article get flagged as gaps.
* **Orphans.** Documents that aren't tied to any task get surfaced, so you can see what's no longer relevant.
For every covered task, Avido extracts atomic fact statements like "The annual fee for a gold credit card is \$150" with full source provenance. These aren't used as evaluation criteria. They're a quality check on the knowledge base itself: surfacing them lets you confirm what your documentation actually says before it gets approved. Once the KB is signed off, you can trust hallucination findings later because you know what the KB was supposed to say in the first place.
Your knowledge base audit, surfaced in one place:
* Coverage percentage per topic, so you know which areas have solid backing and which don't
* Contradictions between documents, with the conflicting passages displayed side by side. You pick which document is authoritative.
* Orphaned documents that aren't tied to any task
* White spots: topics that come up in conversations but have no KB article
You can edit documents in place without leaving the review. Different team members can be assigned to different topic areas, so infrastructure docs go to one reviewer and front-of-house docs go to another. If contradictions remain unresolved, you confirm explicitly that you accept the risk before moving on.
Avido maps the rules in your policy documents to the right scope (global, topic, or task) and produces evaluation definitions for each. A separate process extracts a style guide from your conversations and any explicit writing guidelines.
If you uploaded conversations but no policies, Avido still infers a small set of global rules from conversation patterns.
Review the generated evaluation definitions, grouped by topic, each tagged with its scope. Review the generated style guide. Reviews can be assigned to specific team members the same way as the KB review.
Avido finalises evaluations across all three tiers and links each one back through its rule statement to the original sentence in the source document. This traceability chain is preserved permanently.
Avido runs the new evaluations against your uploaded conversations to produce a first set of scores. This is your starting point for everything that follows.
Sample good and bad results from the baseline. Confirm whether you agree with each verdict. QuickStart cannot close until every assigned reviewer has signed off. Once it does, you get a final report listing the evaluation definitions and the style guide, and your application is ready for ongoing evaluation.
***
## Reviewing as a team
QuickStart is built around the assumption that different parts of the review need different domain experts. The workflow supports this directly.
**Assign reviews to specific team members.** Each topic area can go to a different person. They review on their own schedule.
**Sign-off is tracked per assignee.** QuickStart cannot close until every assigned reviewer has approved their area.
**Skip-with-warning.** Any review step can be skipped, but the system warns you and audit-locks the decision: who skipped what, when, and how long they spent.
**Double opt-in on approvals.** Every approval requires a confirmation step. Once locked, the decision is recorded.
**Full audit log.** Track who reviewed what, how long they spent, how many warnings were skipped, and what was approved. This matters for regulated industries where you need to demonstrate due diligence later.
For most teams setting up QuickStart for the first time, we recommend running 3 to 4 review workshops with the relevant stakeholders rather than reviewing in isolation. Live discussion catches things that asynchronous review misses, especially during the task and topic review stage.
***
## Traceability
Every evaluation produced by QuickStart carries its full origin story:
> Evaluation criterion → rule statement → original sentence or paragraph in the source document (with title)
This matters because evaluations only work if your team trusts them. When an evaluation flags a response and someone asks "why does this rule exist?", you can always trace it back to the policy document, the page, and the exact sentence.
For the fact statements extracted during KB review, each fact stores the source document, the exact quote at the time of extraction (preserved even if the document is later edited), and whether it was generated by QuickStart or added manually by your team. This is what lets you trust hallucination findings later: when the AI says something the KB doesn't support, you can see exactly what the KB *did* say at the moment your team signed off on it.
***
## Scale and timing
A typical QuickStart run takes a few weeks end-to-end, mostly because of stakeholder coordination, not processing time. The processing itself is much faster.
| Stage | Typical bank (\~300 docs) | Large enterprise (\~3,000 docs) |
| -------------------------------- | ------------------------- | ------------------------------- |
| Knowledge base preprocessing | \~3 minutes | \~10 minutes |
| Verification (3 parallel checks) | \~10 minutes | \~30 minutes |
| Fact extraction | \~5 minutes | \~15 minutes |
| **Total processing time** | **\~15 minutes** | **\~45 minutes** |
Expected output: 3 to 8 fact statements per covered task, and somewhere between 5 and 100 contradictions surfaced in the KB review depending on the size and health of your documentation.
***
## Best practices
**Upload more than you think you need.** Deduplication only works if the same task shows up multiple times in your conversation data. Bias towards uploading too much, not too little.
**Don't try to review alone.** The first task and topic review especially benefits from a live workshop with people who actually handle the conversations. They will spot category errors that nobody else will.
**Treat the KB review as a free audit.** The contradictions and white spots QuickStart surfaces are real problems in your knowledge base regardless of whether you ever ship an AI application. Fix them.
**Use your internal language.** Rename auto-generated topics to match the labels your team already uses. This makes evaluations and reports immediately readable when you go live.
**Don't skip review steps without a reason.** They exist because the next stage builds on what you approve. If you have to skip one, leave a note explaining why.
***
## Getting started
Navigate to **QuickStart** in your application dashboard.
Drop in conversations, knowledge base files or URLs, and any policies or style guides you have.
Assign each review stage to the right person on your team. Different topics can go to different people.
Approve as you go. Avido handles the processing in between; you handle the judgement calls.
Once every reviewer has signed off, QuickStart closes and your evaluations are live.
Manage the knowledge base content QuickStart surfaces and reviews
Understand how the evaluations QuickStart generates actually run
# SDK Reference
Source: https://docs.avidoai.com/sdk
Complete reference for the Avido Node.js and Python SDKs.
Avido provides official SDKs for **Node.js / TypeScript** and **Python**.
## Installation
```bash Node theme={null}
npm install @avidoai/sdk-node
```
```bash Python theme={null}
pip install avido
```
***
## Client initialization
Create a client instance with your Application ID and API key.
You can find these in the Avido dashboard under **Settings > API Keys**.
```ts Node theme={null}
import Avido from '@avidoai/sdk-node';
const client = new Avido({
applicationId: process.env['AVIDO_APPLICATION_ID'],
apiKey: process.env['AVIDO_API_KEY'],
});
```
```python Python theme={null}
import os
from avido import Avido
client = Avido(
application_id=os.environ.get("AVIDO_APPLICATION_ID"),
api_key=os.environ.get("AVIDO_API_KEY"),
)
```
Both SDKs read `AVIDO_API_KEY` and `AVIDO_APPLICATION_ID` from environment variables by default.
You only need to pass them explicitly if you want to override the defaults.
***
## Resources
### Ingest
Send trace events to Avido. See the [Tracing guide](/traces) for detailed event type documentation.
```ts Node theme={null}
const response = await client.ingest.create({
events: [
{ type: 'trace', timestamp: new Date().toISOString(), testId: '...' },
{ type: 'llm', event: 'start', timestamp: '...', modelId: 'gpt-4o', input: [...] },
],
});
```
```python Python theme={null}
response = client.ingest.create(
events=[
{"type": "trace", "timestamp": "...", "testId": "..."},
{"type": "llm", "event": "start", "timestamp": "...", "modelId": "gpt-4o", "input": [...]},
],
)
```
| Method | Endpoint | Description |
| ----------------- | ----------------- | ------------------------------- |
| `ingest.create()` | `POST /v0/ingest` | Ingest an array of trace events |
***
### Validate Webhook
Verify that an incoming webhook request was signed by Avido. See the [Webhooks guide](/webhooks) for a full integration example.
```ts Node theme={null}
const { valid } = await client.validateWebhook.validate({
signature: req.get('x-avido-signature'),
timestamp: req.get('x-avido-timestamp'),
body: req.body,
});
```
```python Python theme={null}
resp = client.validate_webhook.validate(
signature=request.headers.get("x-avido-signature"),
timestamp=request.headers.get("x-avido-timestamp"),
body=request.get_json(),
)
# resp.valid -> bool
```
| Method | Endpoint | Description |
| ---------------------------- | --------------------------- | ---------------------------- |
| `validateWebhook.validate()` | `POST /v0/validate-webhook` | Validate a webhook signature |
***
### Traces
Retrieve and list traces that have been ingested.
```ts Node theme={null}
// List traces with pagination
const traces = await client.traces.list({ limit: 20, offset: 0 });
// Get a specific trace
const trace = await client.traces.retrieve('trace-uuid');
```
```python Python theme={null}
# List traces with pagination
traces = client.traces.list(limit=20, offset=0)
# Get a specific trace
trace = client.traces.retrieve("trace-uuid")
```
| Method | Endpoint | Description |
| --------------------- | --------------------- | ------------------------ |
| `traces.list()` | `GET /v0/traces` | List traces (paginated) |
| `traces.retrieve(id)` | `GET /v0/traces/{id}` | Get a single trace by ID |
***
### Applications
Manage your Avido applications programmatically.
```ts Node theme={null}
// Create a new application
const newApp = await client.applications.create({ name: 'My Chatbot' });
// List all applications
const apps = await client.applications.list({ limit: 10 });
// Get a specific application
const app = await client.applications.retrieve('app-uuid');
```
```python Python theme={null}
# Create a new application
app = client.applications.create(name="My Chatbot")
# List all applications
apps = client.applications.list(limit=10)
# Get a specific application
app = client.applications.retrieve("app-uuid")
```
| Method | Endpoint | Description |
| --------------------------- | --------------------------- | ----------------------------- |
| `applications.create()` | `POST /v0/applications` | Create a new application |
| `applications.retrieve(id)` | `GET /v0/applications/{id}` | Get an application |
| `applications.list()` | `GET /v0/applications` | List applications (paginated) |
***
### Tasks
Manage test tasks and trigger them programmatically.
```ts Node theme={null}
// Create a task
const task = await client.tasks.create({
name: 'Onboarding email test',
prompt: 'Write a concise onboarding email for new users.',
});
// List tasks
const tasks = await client.tasks.list({ limit: 10 });
// Trigger a task
await client.tasks.trigger({ taskId: 'task-uuid' });
```
```python Python theme={null}
# Create a task
task = client.tasks.create(
name="Onboarding email test",
prompt="Write a concise onboarding email for new users.",
)
# List tasks
tasks = client.tasks.list(limit=10)
# Trigger a task
client.tasks.trigger(task_id="task-uuid")
```
| Method | Endpoint | Description |
| -------------------- | ------------------------ | ---------------------- |
| `tasks.create()` | `POST /v0/tasks` | Create a new task |
| `tasks.retrieve(id)` | `GET /v0/tasks/{id}` | Get a task |
| `tasks.list()` | `GET /v0/tasks` | List tasks (paginated) |
| `tasks.trigger()` | `POST /v0/tasks/trigger` | Trigger a task to run |
***
### Tests
View test definitions and results.
```ts Node theme={null}
const tests = await client.tests.list({ limit: 10 });
const test = await client.tests.retrieve('test-uuid');
```
```python Python theme={null}
tests = client.tests.list(limit=10)
test = client.tests.retrieve("test-uuid")
```
| Method | Endpoint | Description |
| -------------------- | -------------------- | ---------------------- |
| `tests.retrieve(id)` | `GET /v0/tests/{id}` | Get a test |
| `tests.list()` | `GET /v0/tests` | List tests (paginated) |
***
### Annotations
Add annotations to traces for labeling and review.
```ts Node theme={null}
const annotation = await client.annotations.create({
traceId: 'trace-uuid',
label: 'incorrect',
comment: 'The response contained outdated pricing.',
});
const annotations = await client.annotations.list({ limit: 10 });
```
```python Python theme={null}
annotation = client.annotations.create(
trace_id="trace-uuid",
label="incorrect",
comment="The response contained outdated pricing.",
)
annotations = client.annotations.list(limit=10)
```
| Method | Endpoint | Description |
| -------------------------- | -------------------------- | ---------------------------- |
| `annotations.create()` | `POST /v0/annotations` | Create an annotation |
| `annotations.retrieve(id)` | `GET /v0/annotations/{id}` | Get an annotation |
| `annotations.list()` | `GET /v0/annotations` | List annotations (paginated) |
***
### Runs
View test run history and results.
```ts Node theme={null}
const runs = await client.runs.list({ limit: 10 });
const run = await client.runs.retrieve('run-uuid');
```
```python Python theme={null}
runs = client.runs.list(limit=10)
run = client.runs.retrieve("run-uuid")
```
| Method | Endpoint | Description |
| ------------------- | ------------------- | --------------------- |
| `runs.retrieve(id)` | `GET /v0/runs/{id}` | Get a run |
| `runs.list()` | `GET /v0/runs` | List runs (paginated) |
***
### Topics
Organize and group related content.
```ts Node theme={null}
const topic = await client.topics.create({ name: 'Pricing questions' });
const topics = await client.topics.list({ limit: 10 });
```
```python Python theme={null}
topic = client.topics.create(name="Pricing questions")
topics = client.topics.list(limit=10)
```
| Method | Endpoint | Description |
| --------------------- | --------------------- | ----------------------- |
| `topics.create()` | `POST /v0/topics` | Create a topic |
| `topics.retrieve(id)` | `GET /v0/topics/{id}` | Get a topic |
| `topics.list()` | `GET /v0/topics` | List topics (paginated) |
***
### Style Guides
Manage evaluation style guides.
```ts Node theme={null}
const guide = await client.styleGuides.create({
name: 'Formal tone',
content: 'Responses should use professional language...',
});
const guides = await client.styleGuides.list({ limit: 10 });
```
```python Python theme={null}
guide = client.style_guides.create(
name="Formal tone",
content="Responses should use professional language...",
)
guides = client.style_guides.list(limit=10)
```
| Method | Endpoint | Description |
| -------------------------- | --------------------------- | ----------------------------- |
| `styleGuides.create()` | `POST /v0/style-guides` | Create a style guide |
| `styleGuides.retrieve(id)` | `GET /v0/style-guides/{id}` | Get a style guide |
| `styleGuides.list()` | `GET /v0/style-guides` | List style guides (paginated) |
***
### Documents
Manage knowledge base documents for RAG workflows.
```ts Node theme={null}
// Upload a document
const doc = await client.documents.create({
name: 'Product FAQ',
content: 'Frequently asked questions about our product...',
});
// List documents
const docs = await client.documents.list({ limit: 10 });
// List chunked documents (for RAG inspection)
const chunks = await client.documents.listChunks({ limit: 10 });
```
```python Python theme={null}
# Upload a document
doc = client.documents.create(
name="Product FAQ",
content="Frequently asked questions about our product...",
)
# List documents
docs = client.documents.list(limit=10)
# List chunked documents (for RAG inspection)
chunks = client.documents.list_chunks(limit=10)
```
| Method | Endpoint | Description |
| ------------------------ | --------------------------- | -------------------------------- |
| `documents.create()` | `POST /v0/documents` | Upload a document |
| `documents.retrieve(id)` | `GET /v0/documents/{id}` | Get a document |
| `documents.list()` | `GET /v0/documents` | List documents (paginated) |
| `documents.listChunks()` | `GET /v0/documents/chunked` | List document chunks (paginated) |
***
## Error handling
Both SDKs throw typed errors for API failures.
```ts Node theme={null}
import Avido from '@avidoai/sdk-node';
try {
await client.traces.retrieve('nonexistent-id');
} catch (err) {
if (err instanceof Avido.NotFoundError) {
console.log('Trace not found');
} else if (err instanceof Avido.AuthenticationError) {
console.log('Invalid API key');
} else {
throw err;
}
}
```
```python Python theme={null}
from avido import Avido, NotFoundError, AuthenticationError
try:
client.traces.retrieve("nonexistent-id")
except NotFoundError:
print("Trace not found")
except AuthenticationError:
print("Invalid API key")
```
***
## Pagination
List endpoints return paginated results. Use `limit` and `offset` to page through data.
```ts Node theme={null}
// Fetch all traces in pages of 50
let offset = 0;
const limit = 50;
while (true) {
const page = await client.traces.list({ limit, offset });
for (const trace of page.data) {
console.log(trace.id);
}
if (page.data.length < limit) break;
offset += limit;
}
```
```python Python theme={null}
# Fetch all traces in pages of 50
offset = 0
limit = 50
while True:
page = client.traces.list(limit=limit, offset=offset)
for trace in page.data:
print(trace.id)
if len(page.data) < limit:
break
offset += limit
```
***
## TypeScript types
The Node SDK exports all request and response types for full type safety.
```ts theme={null}
import Avido from '@avidoai/sdk-node';
import type {
IngestCreateResponse,
ValidateWebhookValidateResponse,
TraceRetrieveResponse,
TraceListResponse,
} from '@avidoai/sdk-node/resources';
```
***
## Python type imports
The Python SDK exports typed response objects.
```python theme={null}
from avido.types import (
IngestCreateResponse,
ValidateWebhookValidateResponse,
TraceRetrieveResponse,
TraceListResponse,
Task,
TaskResponse,
Annotation,
AnnotationResponse,
)
```
***
## Next steps
* Follow the [Tracing guide](/traces) to instrument your LLM pipeline.
* Set up [Webhooks](/webhooks) for automated test triggering.
* Explore the full HTTP API in the API Reference.
# System Journal
Source: https://docs.avidoai.com/system-journal
Automated monitoring and documentation of AI model changes for compliance and operational excellence

## What is the System Journal?
The System Journal is an intelligent monitoring system that automatically tracks and documents all significant changes in your AI model deployments. It serves as your automated compliance officer and operational guardian, creating a comprehensive audit trail of configuration changes, parameter modifications, and data anomalies across all your AI traces.
Think of it as a "black box recorder" for your AI systems—capturing every meaningful change that could impact model behavior, compliance, or evaluation accuracy.
### Key Capabilities
* **Automatic Change Detection**: Identifies when model parameters (temperature, max tokens, top-k, etc.) change between deployments
* **Missing Parameter Alerts**: Flags when critical parameters required for evaluation or compliance are absent
* **Intelligent Journal Entries**: Generates human-readable descriptions of what changed, when, and by how much
* **Complete Audit Trail**: Maintains a tamper-proof history of all configuration changes for regulatory compliance
* **Zero Manual Overhead**: Operates completely automatically in the background
## Why Use the System Journal?
### For Engineering Teams
**Prevent Configuration Drift**
You'll immediately know when model parameters change unexpectedly. No more debugging mysterious behavior changes or performance degradations caused by unnoticed configuration updates.
**Accelerate Incident Response**
When something goes wrong, the System Journal provides instant visibility into what changed and when. Instead of digging through logs, you can see at a glance: "LLM Temperature Changed: 0.4 → 0.9" with timestamps and context.
**Maintain Evaluation Integrity**
Missing parameters can invalidate your evaluation results. The System Journal ensures you catch these gaps before they impact your metrics or decision-making.
### For Compliance Teams
**Regulatory Readiness**
Financial institutions face strict requirements for AI transparency and explainability. The System Journal automatically maintains the comprehensive audit trails regulators expect, reducing preparation time from weeks to minutes.
**Risk Management**
Track when risk-relevant parameters change (like content filtering thresholds or decision boundaries) and ensure they stay within approved ranges.
**Evidence Collection**
Every journal entry includes timestamps, before/after values, and trace context—everything needed for compliance reporting or incident investigation.
### Real-World Impact
Consider this scenario: A wealth management firm's AI-powered client communication system suddenly starts generating longer, more creative responses. Without the System Journal, this could go unnoticed for weeks. With it, compliance immediately sees: "LLM Temperature Changed: 0.2 → 0.8" and "Max Tokens Changed: 150 → 500"—catching a potentially risky configuration change before it impacts clients.
## How to Use the System Journal
### Accessing the System Journal
1. Navigate to the **System Journal** section in your Avido dashboard
2. You'll see a chronological list of all journal entries across your AI systems
### Understanding Journal Entries
Each System Journal entry includes:
* **Type Indicator**: Visual icon showing the category (change, missing parameter, error)
* **Clear Description**: Plain-language explanation like "Model version changed from gpt-4-turbo to gpt-4o"
* **Timestamp**: Exact time the change was detected
* **Trace Link**: Direct connection to the affected trace for deeper investigation
* **Change Details**: Before and after values for parameter changes
### Viewing Journal Entries in Context
#### On the Dashboard
System Journal entries appear as reference lines on your metric graphs, showing exactly when changes occurred relative to performance shifts.
#### In Trace Details
When viewing individual traces, associated journal entries are displayed inline, providing immediate context for that specific execution.
#### In the System Journal List
The dedicated System Journal page provides:
* Filtering by entry type, date range, or affected system
* Sorting by relevance, time, or severity
* Bulk actions for reviewing multiple entries
### Common Workflows
#### Investigating Performance Changes
1. Notice a metric shift on your dashboard
2. Check for System Journal markers at the same timestamp
3. Click through to see what parameters changed
4. Review the trace details to understand the impact
#### Compliance Review
1. Access the System Journal for your reporting period
2. Filter by the relevant AI system or model
3. Export the journal entries for your compliance report
4. Document any required explanations or approvals
#### Responding to Alerts
When the System Journal detects missing required parameters:
1. The entry clearly identifies what's missing (e.g., "Missing Parameter: topK")
2. Click through to the affected trace
3. Update your configuration to include the missing parameter
4. Verify the fix in subsequent traces
### Best Practices
**Regular Review Schedule**
Set up a weekly review of System Journal entries to catch trends before they become issues.
**Tag Critical Parameters**
Work with your compliance team to identify which parameters are critical for your use case, ensuring the System Journal prioritizes these in its monitoring.
**Integrate with Your Workflow**
* Set up alerts for critical changes
* Include System Journal reviews in your deployment checklist
* Reference journal entries in incident post-mortems
**Use Journal Entries for Documentation**
The System Journal creates a natural documentation trail. Use it to:
* Track experiment results
* Document approved configuration changes
* Build a knowledge base of parameter impacts
### Advanced Features
#### Entry Classification
Different System Journal entry types use distinct visual indicators:
* 🔄 **Configuration Changes**: Parameter modifications
* ⚠️ **Missing Data**: Required fields not present
* 🔍 **Anomalies**: Unusual patterns detected
* ✅ **Resolutions**: Issues that have been addressed
#### Intelligent Grouping
When multiple parameters change simultaneously, the System Journal groups related changes into a single entry for easier understanding.
#### Historical Analysis
Compare current configurations against any point in history to understand evolution and drift over time.
## Getting Started
1. **No Setup Required**: The System Journal begins working automatically as soon as you start sending traces to Avido
2. **First Journal Entries**: You'll see your first entries within minutes of trace ingestion
3. **Customization**: Contact your Avido representative to configure specific parameters to monitor or adjust sensitivity thresholds
The System Journal transforms AI observability from reactive firefighting to proactive governance, ensuring your AI deployments remain compliant, performant, and predictable.
# Tracing
Source: https://docs.avidoai.com/traces
Capture every step of your LLM workflow and send it to Avido for replay, evaluation, and monitoring.
When your chatbot conversation or agent run is in flight, **every action becomes an *event***.\
Bundled together they form a **trace** – a structured replay of what happened, step‑by‑step.
| Event | When to use |
| ----------- | ------------------------------------------------------------------------------- |
| `trace` | The root container for a whole conversation / agent run. |
| `llm` | Start and end of every LLM call. |
| `tool` | Calls to a function / external tool invoked by the model. |
| `retriever` | RAG queries and the chunks they return. |
| `log` | Anything else worth seeing while debugging (system prompts, branches, errors…). |
The full schema lives in API ▸ Ingestion.
***
## Understanding `testId` and `traceId`
Two IDs appear on trace events — here's what each one does:
| Field | Who sets it | When to include |
| --------- | -------------------------------- | --------------------------------------------------------------------------------------------------------------------------------------------------------------------------------------------------- |
| `testId` | Avido (via [webhook](/webhooks)) | **Only** when the trace originates from an Avido test. Pass the `testId` from the webhook payload. Do **not** set it for traces that come from real user interactions. |
| `traceId` | You (optional) | Setting `traceId` client-side is **optional** — the server generates one automatically if you don't. If you do set it, use a random UUID and keep the **same value across all steps** in the trace. |
Do **not** set `traceId` equal to `testId`. They serve different purposes: `testId` links the trace to an Avido test run for evaluation, while `traceId` groups events together into a single trace.
***
## Recommended workflow
1. **Collect events in memory** as they happen.
2. **Flush** once at the end (or on fatal error).
3. **Add a `log` event** describing the error if things blow up.
4. **Keep tracing async** – never block your user.
5. **Evaluation‑only mode?** Only ingest when the run came from an Avido test → check for `testId` from the [Webhook](/webhooks).
6. **LLM events** should contain the *raw* prompt & completion – strip provider JSON wrappers.
***
## SDK installation
```bash Node theme={null}
npm install @avidoai/sdk-node
```
```bash Python theme={null}
pip install avido
```
***
## Ingesting events
You can send events:
* **Directly via HTTP**
* **Via our SDKs** (Node: `@avidoai/sdk-node`, Python: `avido`)
When authenticating with an API key, include both the `x-api-key` and `x-application-id`
headers. The application ID should match the application that owns the key so the
request can be authorized.
```bash cURL (default) theme={null}
curl --request POST \
--url https://api.avidoai.com/v0/ingest \
--header 'Content-Type: application/json' \
--header 'x-application-id: ' \
--header 'x-api-key: ' \
--data '{
"events": [
{
"type": "trace",
"timestamp": "2025-05-15T12:34:56.123455Z",
"referenceId": "123e4567-e89b-12d3-a456-426614174000",
"metadata": {
"source": "chatbot"
}
},
{
"type": "llm",
"event": "start",
"traceId": "123e4567-e89b-12d3-a456-426614174000",
"timestamp": "2025-05-15T12:34:56.123456Z",
"modelId": "gpt-4o-2024-08-06",
"params": {
"temperature": 1.2
},
"input": [
{
"role": "user",
"content": "Tell me a joke."
}
]
}
]
}'
```
```ts Node theme={null}
import Avido from '@avidoai/sdk-node';
const client = new Avido({
applicationId: process.env['AVIDO_APPLICATION_ID'],
apiKey: process.env['AVIDO_API_KEY'],
});
// testId comes from the webhook payload — only include it for
// Avido test runs, not for real user interactions.
const ingest = await client.ingest.create({
events: [
{
timestamp: '2025-05-15T12:34:56.123456Z',
type: 'trace',
testId: webhookBody.testId, // omit for user-originated traces
},
{
timestamp: '2025-05-15T12:34:56.123456Z',
type: 'tool',
toolInput: 'the input to a tool call',
toolOutput: 'the output from the tool call',
}
],
});
console.log(ingest.data);
```
```python Python theme={null}
import os
from avido import Avido
client = Avido(
application_id=os.environ.get("AVIDO_APPLICATION_ID"),
api_key=os.environ.get("AVIDO_API_KEY"),
)
# test_id comes from the webhook payload — only include it for
# Avido test runs, not for real user interactions.
ingest = client.ingest.create(
events=[
{
"timestamp": "2025-05-15T12:34:56.123456Z",
"type": "trace",
"testId": webhook_body.get("testId"), # omit for user-originated traces
},
{
"timestamp": "2025-05-15T12:34:56.123456Z",
"type": "tool",
"toolInput": "the input to a tool call",
"toolOutput": "the output from the tool call",
},
],
)
print(ingest.data)
```
***
## Tip: map your IDs
If you already track a conversation / run in your own DB, pass that same ID as `referenceId`.\
It makes liftover between your system and Avido effortless.
***
## Event types in depth
Every call to `client.ingest.create()` accepts an array of events.
The first event is usually a `trace` (the root container), followed by one or more step events.
### `trace` — root container
Every ingestion batch should start with a `trace` event. It groups all subsequent steps together.
```ts Node theme={null}
await client.ingest.create({
events: [
{
type: 'trace',
timestamp: new Date().toISOString(),
referenceId: 'your-internal-conversation-id', // links to your system
testId: webhookBody.testId, // links to an Avido test run
metadata: { source: 'chatbot', userId: '42' },
},
],
});
```
```python Python theme={null}
client.ingest.create(
events=[
{
"type": "trace",
"timestamp": datetime.now(timezone.utc).isoformat(),
"referenceId": "your-internal-conversation-id",
"testId": webhook_body.get("testId"),
"metadata": {"source": "chatbot", "userId": "42"},
},
],
)
```
| Field | Required | Description |
| ------------- | -------- | -------------------------------------------------------------------------------------------------------------------------------------------------------------------------- |
| `type` | Yes | Always `"trace"` |
| `timestamp` | Yes | ISO 8601 timestamp |
| `referenceId` | No | Your own ID for this conversation / run |
| `traceId` | No | Client-provided UUID to identify this trace. Optional — the server generates one if omitted. If set, use the **same** random UUID for all steps in the trace. |
| `testId` | No | The `testId` from a [webhook payload](/webhooks) — links the trace to an Avido test run. **Only set this for test-originated traces; omit it for real user interactions.** |
| `metadata` | No | Arbitrary key-value pairs for filtering and search |
### `llm` — LLM calls
Track every call to a language model. Use `event: "start"` when the call begins and `event: "end"` when it completes, or send a single event with both input and output after the call finishes.
```ts Node theme={null}
await client.ingest.create({
events: [
{
type: 'trace',
timestamp: new Date().toISOString(),
},
{
type: 'llm',
event: 'start',
timestamp: startTime.toISOString(),
modelId: 'gpt-4o-2024-08-06',
params: { temperature: 0.7, maxTokens: 1024 },
input: [
{ role: 'system', content: 'You are a helpful assistant.' },
{ role: 'user', content: 'Summarize this document.' },
],
},
{
type: 'llm',
event: 'end',
timestamp: endTime.toISOString(),
output: [
{ role: 'assistant', content: 'Here is the summary...' },
],
tokenUsage: { prompt: 120, completion: 85 },
},
],
});
```
```python Python theme={null}
client.ingest.create(
events=[
{
"type": "trace",
"timestamp": datetime.now(timezone.utc).isoformat(),
},
{
"type": "llm",
"event": "start",
"timestamp": start_time.isoformat(),
"modelId": "gpt-4o-2024-08-06",
"params": {"temperature": 0.7, "maxTokens": 1024},
"input": [
{"role": "system", "content": "You are a helpful assistant."},
{"role": "user", "content": "Summarize this document."},
],
},
{
"type": "llm",
"event": "end",
"timestamp": end_time.isoformat(),
"output": [
{"role": "assistant", "content": "Here is the summary..."},
],
"tokenUsage": {"prompt": 120, "completion": 85},
},
],
)
```
Send the **raw** prompt and completion values. Strip any provider-specific JSON wrappers so Avido can display and evaluate them consistently.
### `tool` — function / tool calls
Log every tool or function call your model makes.
```ts Node theme={null}
{
type: 'tool',
timestamp: new Date().toISOString(),
toolInput: JSON.stringify({ query: 'AAPL stock price' }),
toolOutput: JSON.stringify({ price: 187.42, currency: 'USD' }),
}
```
```python Python theme={null}
{
"type": "tool",
"timestamp": datetime.now(timezone.utc).isoformat(),
"toolInput": json.dumps({"query": "AAPL stock price"}),
"toolOutput": json.dumps({"price": 187.42, "currency": "USD"}),
}
```
### `retriever` — RAG queries
Track retrieval-augmented generation lookups and the chunks they return.
```ts Node theme={null}
{
type: 'retriever',
timestamp: new Date().toISOString(),
query: 'What is the refund policy?',
result: JSON.stringify([
{ chunk: 'Refunds are available within 30 days...', score: 0.92 },
{ chunk: 'For premium plans, contact support...', score: 0.87 },
]),
}
```
```python Python theme={null}
{
"type": "retriever",
"timestamp": datetime.now(timezone.utc).isoformat(),
"query": "What is the refund policy?",
"result": json.dumps([
{"chunk": "Refunds are available within 30 days...", "score": 0.92},
{"chunk": "For premium plans, contact support...", "score": 0.87},
]),
}
```
### `log` — everything else
Use `log` events for system prompts, branching decisions, error details, or anything else worth seeing during debugging.
```ts Node theme={null}
{
type: 'log',
timestamp: new Date().toISOString(),
body: 'User triggered fallback branch — no documents matched above threshold',
}
```
```python Python theme={null}
{
"type": "log",
"timestamp": datetime.now(timezone.utc).isoformat(),
"body": "User triggered fallback branch — no documents matched above threshold",
}
```
***
## Full end-to-end example
A complete example capturing a realistic agent run with multiple event types:
```ts Node theme={null}
import Avido from '@avidoai/sdk-node';
const client = new Avido({
applicationId: process.env['AVIDO_APPLICATION_ID'],
apiKey: process.env['AVIDO_API_KEY'],
});
async function handleRequest(prompt: string, testId?: string) {
const events: Record[] = [];
const traceStart = new Date();
// 1. Root trace
events.push({
type: 'trace',
timestamp: traceStart.toISOString(),
testId,
metadata: { source: 'api' },
});
// 2. Retriever step
const docs = await vectorSearch(prompt);
events.push({
type: 'retriever',
timestamp: new Date().toISOString(),
query: prompt,
result: JSON.stringify(docs),
});
// 3. LLM call
const llmStart = new Date();
const completion = await callLLM(prompt, docs);
events.push(
{
type: 'llm',
event: 'start',
timestamp: llmStart.toISOString(),
modelId: 'gpt-4o-2024-08-06',
input: [
{ role: 'system', content: 'Answer using the provided context.' },
{ role: 'user', content: prompt },
],
},
{
type: 'llm',
event: 'end',
timestamp: new Date().toISOString(),
output: [{ role: 'assistant', content: completion.text }],
tokenUsage: {
prompt: completion.usage.promptTokens,
completion: completion.usage.completionTokens,
},
},
);
// 4. Flush everything in one call
await client.ingest.create({ events });
return completion.text;
}
```
```python Python theme={null}
import json
import os
from datetime import datetime, timezone
from avido import Avido
client = Avido(
application_id=os.environ.get("AVIDO_APPLICATION_ID"),
api_key=os.environ.get("AVIDO_API_KEY"),
)
def handle_request(prompt: str, test_id: str | None = None) -> str:
events: list[dict] = []
trace_start = datetime.now(timezone.utc)
# 1. Root trace
events.append({
"type": "trace",
"timestamp": trace_start.isoformat(),
"testId": test_id,
"metadata": {"source": "api"},
})
# 2. Retriever step
docs = vector_search(prompt)
events.append({
"type": "retriever",
"timestamp": datetime.now(timezone.utc).isoformat(),
"query": prompt,
"result": json.dumps(docs),
})
# 3. LLM call
llm_start = datetime.now(timezone.utc)
completion = call_llm(prompt, docs)
events.extend([
{
"type": "llm",
"event": "start",
"timestamp": llm_start.isoformat(),
"modelId": "gpt-4o-2024-08-06",
"input": [
{"role": "system", "content": "Answer using the provided context."},
{"role": "user", "content": prompt},
],
},
{
"type": "llm",
"event": "end",
"timestamp": datetime.now(timezone.utc).isoformat(),
"output": [
{"role": "assistant", "content": completion.text},
],
"tokenUsage": {
"prompt": completion.usage.prompt_tokens,
"completion": completion.usage.completion_tokens,
},
},
])
# 4. Flush everything in one call
client.ingest.create(events=events)
return completion.text
```
***
## Fetching traces
Use the SDK to list or retrieve traces for debugging and analysis.
```ts Node theme={null}
// List recent traces
const traces = await client.traces.list({ limit: 10 });
for (const trace of traces.data) {
console.log(trace.id, trace.referenceId);
}
// Retrieve a specific trace by ID
const trace = await client.traces.retrieve('trace-uuid-here');
console.log(trace.data);
```
```python Python theme={null}
# List recent traces
traces = client.traces.list(limit=10)
for trace in traces.data:
print(trace.id, trace.reference_id)
# Retrieve a specific trace by ID
trace = client.traces.retrieve("trace-uuid-here")
print(trace.data)
```
***
## Error handling
Wrap your ingestion calls so a tracing failure never crashes your application.
```ts Node theme={null}
try {
await client.ingest.create({ events });
} catch (err) {
// Log but don't crash — tracing is secondary to your user's request
console.error('Avido ingestion failed:', err);
}
```
```python Python theme={null}
try:
client.ingest.create(events=events)
except Exception as e:
# Log but don't crash — tracing is secondary to your user's request
logger.error("Avido ingestion failed: %s", e)
```
***
## Next steps
* Inspect traces in **Traces** inside the dashboard.
* Already using OpenTelemetry? See the [OpenTelemetry Integration](/opentelemetry) guide.
* Set up [Webhooks](/webhooks) to trigger tests automatically.
* Explore the full schema in the API Reference.
# Webhooks
Source: https://docs.avidoai.com/webhooks
Trigger automated Avido tests from outside your code and validate payloads securely.
## Why webhook‑triggered tests?
**Part of Avido's secret sauce is that you can kick off a test *without touching your code*.**\
Instead of waiting for CI or redeploys, Avido sends an HTTP `POST` to an endpoint that **you** control.
| Benefit | What it unlocks |
| ----------------------- | ------------------------------------------------------------- |
| **Continuous coverage** | Run tests on prod/staging as often as you like and automated. |
| **SME‑friendly** | Non‑developers trigger & tweak tasks from the Avido UI. |
***
## How it works
1. **A test is triggered** in the dashboard or automatically.
2. **Avido POSTs** to your configured endpoint.
3. **Validate** the `signature` + `timestamp` with our API/SDK.
4. **Run your LLM flow** using `prompt` from the payload.
5. **Emit a trace** that includes `testId` to connect results in Avido.\
*Using OpenTelemetry?* Set the `avido.test.id` span attribute instead — see the [OpenTelemetry guide](/opentelemetry#common-attributes).
6. **Return `200 OK`** – any other status tells Avido the test failed.
Validating a webhook with the API requires both `x-api-key` and `x-application-id`
headers. Use the application ID that issued the API key.
### Payload example
When Avido triggers your webhook endpoint, it sends:
```json Webhook payload theme={null}
{
"prompt": "Write a concise onboarding email for new users.",
"testId": "123e4567-e89b-12d3-a456-426614174000",
"metadata": {
"customerId": "1",
"priority": "high"
}
}
```
Headers:
| Header | Purpose |
| ------------------- | ---------------------------------------------------------- |
| `x-avido-signature` | HMAC signature of the payload |
| `x-avido-timestamp` | Unix ms timestamp (in milliseconds) the request was signed |
**Notes:**
* `testId` is **always** included in webhook payloads and is unique per test run. Pass it to your `ingest.create()` call so the trace is linked to the Avido test.
* `metadata` is optional and only included when available from the originating task.
* The webhook body **may contain additional fields** beyond those shown above. For example, experiment-related data is included when tests are part of an experiment. Do not assume a fixed schema — always handle unknown fields gracefully.
You do **not** need to set `traceId` when responding to a webhook. The server generates one automatically. If you do set it, use a random UUID — do not reuse the `testId` as the `traceId`. See the [Tracing guide](/traces#understanding-testid-and-traceid) for details.
**Always validate the raw body.** The HMAC signature is computed over the exact JSON payload sent by Avido. You must forward the **raw, unmodified request body** to the `/v0/validate-webhook` endpoint (or use it directly when verifying the signature). If you parse and re-serialize the body, differences in key ordering or whitespace can cause signature verification to fail.
***
## Verification flow
```mermaid theme={null}
sequenceDiagram
Avido->>Your Endpoint: POST payload + headers
Your Endpoint->>Avido API: /v0/validate-webhook
Avido API-->>Your Endpoint: { valid: true }
Your Endpoint->>LLM: run(prompt)
Your Endpoint->>Avido Ingest API: POST /v0/ingest (testId)
```
If validation fails, respond **401** (or other 4xx/5xx). Avido marks the test as **failed**.
***
## Body validation best practices
The webhook body **is not a fixed schema**. While the most common fields are `prompt`, `testId`, and `metadata`, the payload may include additional fields at any time (for example, `experiment` data when a test is part of an experiment). Your endpoint should:
1. **Accept any valid JSON body** — do not reject requests that contain unknown fields.
2. **Forward the entire raw body for signature validation** — the HMAC signature covers every field in the payload. If you strip, rename, or re-order fields before calling `/v0/validate-webhook`, the signature check will fail.
3. **Read only the fields you need** after validation succeeds — safely ignore fields you don't recognize.
When using a framework that automatically parses JSON (e.g., Express, Flask, FastAPI), pass the **parsed object** directly to the validation endpoint or SDK method. Avoid manually re-serializing it, as subtle differences (key order, whitespace) can break signature verification.
***
## Code examples
```bash cURL (default) theme={null}
curl --request POST \
--url https://api.avidoai.com/v0/validate-webhook \
--header 'Content-Type: application/json' \
--header 'x-application-id: ' \
--header 'x-api-key: ' \
--data '{
"signature": "abc123signature",
"timestamp": 1687802842609,
"body": {
"prompt": "Write a concise onboarding email for new users.",
"testId": "123e4567-e89b-12d3-a456-426614174000",
"metadata": {
"customerId": "1",
"priority": "high"
}
}
}'
```
```ts Node theme={null}
import express from 'express';
import Avido from '@avidoai/sdk-node';
const app = express();
// Use express.json() to parse the body — the SDK handles
// sending the parsed object for validation.
app.use(express.json());
const client = new Avido({
applicationId: process.env.AVIDO_APPLICATION_ID!,
apiKey: process.env.AVIDO_API_KEY!,
});
app.post('/avido/webhook', async (req, res) => {
const signature = req.get('x-avido-signature');
const timestamp = req.get('x-avido-timestamp');
// Pass the full body as-is — do not pick specific fields before
// validation. The body may contain additional fields such as
// experiment data, and all fields are covered by the signature.
const body = req.body;
try {
const { valid } = await client.validateWebhook.validate({
signature,
timestamp,
body
});
if (!valid) return res.status(401).send('Invalid webhook');
const result = await runAgent(body.prompt); // your LLM call
// Send the trace linked to the test — pass testId from the webhook payload.
// You do NOT need to set traceId; the server generates one automatically.
await client.ingest.create({
events: [
{
type: 'trace',
timestamp: new Date().toISOString(),
testId: body.testId,
input: body.prompt,
output: result,
},
],
});
return res.status(200).send('OK');
} catch (err) {
console.error(err);
return res.status(500).send('Internal error');
}
});
```
```python Python theme={null}
import os
from datetime import datetime, timezone
from flask import Flask, request, jsonify
from avido import Avido
app = Flask(__name__)
client = Avido(
application_id=os.environ["AVIDO_APPLICATION_ID"],
api_key=os.environ["AVIDO_API_KEY"],
)
@app.route("/avido/webhook", methods=["POST"])
def handle_webhook():
# Parse the full JSON body as-is. Do not discard or reshape
# fields before validation — the signature covers the entire
# payload, which may include additional fields like experiment data.
body = request.get_json(force=True) or {}
signature = request.headers.get("x-avido-signature")
timestamp = request.headers.get("x-avido-timestamp")
if not signature or not timestamp:
return jsonify({"error": "Missing signature or timestamp"}), 400
try:
resp = client.validate_webhook.validate(
signature=signature,
timestamp=timestamp,
body=body
)
if not resp.valid:
return jsonify({"error": "Invalid webhook signature"}), 401
except Exception as e:
return jsonify({"error": str(e)}), 401
result = run_agent(body.get("prompt")) # your LLM pipeline
# Send the trace linked to the test — pass testId from the webhook payload.
# You do NOT need to set traceId; the server generates one automatically.
client.ingest.create(
events=[
{
"type": "trace",
"timestamp": datetime.now(timezone.utc).isoformat(),
"testId": body.get("testId"),
"input": body.get("prompt"),
"output": result,
},
],
)
return jsonify({"status": "ok"}), 200
```
***
## SDK method reference
### `validateWebhook.validate()`
Verifies that an incoming webhook request was signed by Avido.
```ts Node theme={null}
const { valid } = await client.validateWebhook.validate({
signature, // from x-avido-signature header
timestamp, // from x-avido-timestamp header
body, // the full parsed request body
});
```
```python Python theme={null}
resp = client.validate_webhook.validate(
signature=signature, # from x-avido-signature header
timestamp=timestamp, # from x-avido-timestamp header
body=body, # the full parsed request body
)
# resp.valid -> bool
```
| Parameter | Type | Description |
| ----------- | ------ | ------------------------------------------- |
| `signature` | string | The `x-avido-signature` header value |
| `timestamp` | string | The `x-avido-timestamp` header value |
| `body` | object | The full webhook request body (parsed JSON) |
Returns an object with a `valid` boolean field.
***
## Experiments
When a test is triggered as part of an **experiment**, the webhook payload includes an additional `experiment` field. Experiments let you compare different configurations (variants) of your LLM pipeline against a baseline, and the `experiment` field tells your application which overrides to apply.
### Experiment payload
```json Webhook payload with experiment theme={null}
{
"prompt": "Write a concise onboarding email for new users.",
"testId": "123e4567-e89b-12d3-a456-426614174000",
"metadata": {
"customerId": "1",
"priority": "high"
},
"experiment": {
"experimentId": "aaa11111-bbbb-cccc-dddd-eeeeeeeeeeee",
"experimentVariantId": "fff22222-3333-4444-5555-666666666666",
"overrides": {
"response_generator": {
"model": "reasoning",
"system": "You are a concise assistant."
}
}
}
}
```
| Field | Type | Description |
| -------------------------------- | ----------------------------------------- | ------------------------------------------------------------------------------------------------------------------------------------------------------------------------------------------------------- |
| `experiment.experimentId` | `string (uuid)` | Unique identifier for the experiment |
| `experiment.experimentVariantId` | `string (uuid)` | Unique identifier for the variant being tested |
| `experiment.overrides` | `Record>` | Configuration overrides keyed by **inference step name** (e.g. `response_generator`, `classifier`). Each step's value is an object of parameter overrides (e.g. `model`, `system`, `max_output_tokens`) |
**How overrides work:**
Your application already has its own configuration (prompts, models, parameters, etc.) for each step in your LLM pipeline. The `overrides` object tells you **what to change**: each key is a step name, and each value contains the specific settings to overwrite for that step.
For example, if `overrides` contains `{ "response_generator": { "model": "reasoning" } }`, you should use the `reasoning` model for your `response_generator` step instead of whatever your default is — and keep all other settings as-is.
### Using experiments in your application
When your webhook handler receives a payload with `experiment`, apply the overrides to the corresponding steps in your LLM pipeline:
```ts Node theme={null}
app.post('/avido/webhook', async (req, res) => {
// ... validation omitted for brevity ...
const body = req.body;
// Check if this test is part of an experiment
if (body.experiment) {
const { overrides } = body.experiment;
// Apply overrides to each inference step in your pipeline.
// The keys in `overrides` match the step names you defined in Avido.
for (const [stepName, params] of Object.entries(overrides)) {
// Example: override the model and system prompt
// for your "response_generator" step
applyStepConfig(stepName, params);
}
}
const result = await runAgent(body.prompt); // your LLM call
await client.ingest.create({
events: [
{
type: 'trace',
timestamp: new Date().toISOString(),
testId: body.testId,
input: body.prompt,
output: result,
},
],
});
return res.status(200).send('OK');
});
// Example helper — adapt to your framework / LLM client
function applyStepConfig(stepName: string, params: Record) {
// Look up the step in your pipeline config and merge overrides
pipelineConfig[stepName] = {
...pipelineConfig[stepName],
...params,
};
}
```
```python Python theme={null}
@app.route("/avido/webhook", methods=["POST"])
def handle_webhook():
# ... validation omitted for brevity ...
body = request.get_json(force=True) or {}
# Check if this test is part of an experiment
experiment = body.get("experiment")
if experiment:
overrides = experiment.get("overrides", {})
# Apply overrides to each inference step in your pipeline.
# The keys in `overrides` match the step names you defined in Avido.
for step_name, params in overrides.items():
# Example: override the model and system prompt
# for your "response_generator" step
apply_step_config(step_name, params)
result = run_agent(body.get("prompt")) # your LLM pipeline
client.ingest.create(
events=[
{
"type": "trace",
"timestamp": datetime.now(timezone.utc).isoformat(),
"testId": body.get("testId"),
"input": body.get("prompt"),
"output": result,
},
],
)
return jsonify({"status": "ok"}), 200
# Example helper — adapt to your framework / LLM client
def apply_step_config(step_name: str, params: dict):
# Look up the step in your pipeline config and merge overrides
pipeline_config[step_name] = {**pipeline_config.get(step_name, {}), **params}
```
**You don't need to change your trace ingestion code.** The `testId` already links the trace back to the correct experiment variant in Avido. Just pass `body.testId` as usual.
If your application doesn't run experiments yet, you can safely ignore the `experiment` field — its presence is optional and your existing webhook handler will continue to work without changes.
***
## Troubleshooting
| Problem | Cause | Fix |
| -------------------------------- | ---------------------------------------- | ----------------------------------------------------------------------------------------------------- |
| Signature always invalid | Body was re-serialized before validation | Pass the parsed JSON object directly; don't `JSON.stringify` it first |
| Missing signature header | Framework strips custom headers | Check your reverse proxy / load balancer isn't dropping `x-avido-*` headers |
| Test shows as failed | Endpoint returned non-200 status | Ensure you return `200 OK` after successful processing |
| Trace not linked to test | Missing `testId` in ingestion | Pass `body.testId` in your `ingest.create()` call |
| Experiment overrides not applied | `experiment` field ignored in handler | Check for `body.experiment` and apply `overrides` to your pipeline config before running the LLM call |
***
## Next steps
* Send us [Trace events](/traces) to capture your full LLM workflow.
* Using OpenTelemetry? See the [OpenTelemetry Integration](/opentelemetry) guide.
* Schedule or trigger tasks from **Tasks** in the dashboard.
* Invite teammates so they can craft evals and review results directly in Avido.
***